What You Need to Know
Medical companies and their metallurgical partners are continually developing new and innovative materials and proprietary alloys.
Cutting-tool manufacturers keep pace by developing bold, new insert geometries, tough carbide grades and super-lubricious coatings.
Sharp, PVD-coated tools work best across the entire range of medical-grade superalloys.
Light depths of cut at higher feed rates are typically more effective than traditional “hogging” approaches to metal removal.
Find out the preferred techniques for working with medical-grade titanium, cobalt chrome and nickel-based stainless-steel alloys.
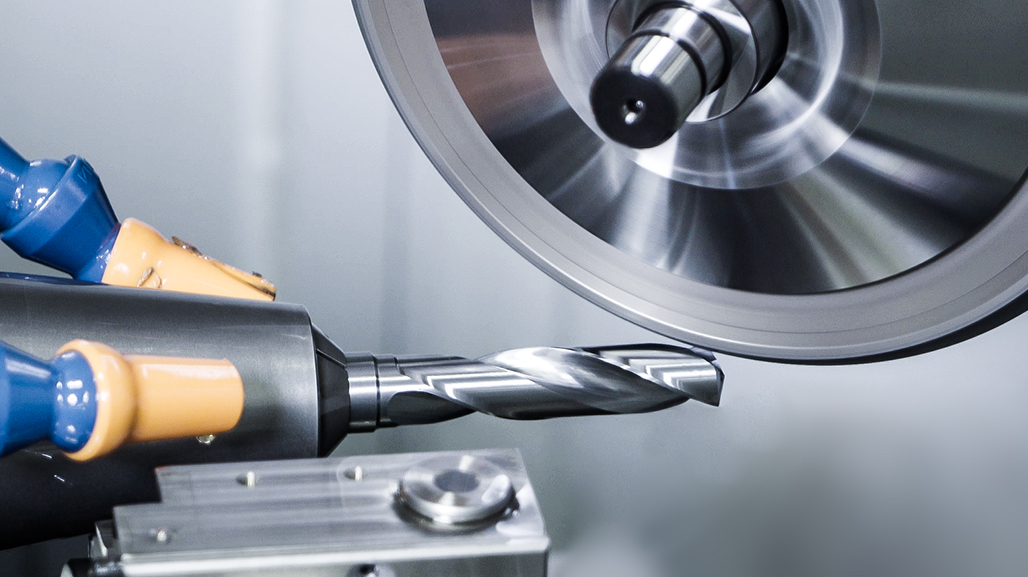
Bone screws, fixation plates, hip and knee implants—these are just a few of the difficult medical parts some machinists face every day. Not only are the geometries complex and tolerances tight, but the metals in these components also can make even the most ambitious machinist regret signing on for overtime.
Unfortunately, things aren’t getting any easier. Medical companies and their metallurgical partners are continually developing new and innovative materials, including Ti-6Al-4V ELI (extra-low interstitials), Phynox and MP35N, along with a whole host of proprietary alloys.
Most of these materials fall into the heat-resistant superalloy (HRSA) category. Translation: These metals are equally at home in a spine as in a red-hot gas turbine exhaust.
Cutting tools wear quickly, and notching at the depth of cut line is common. Built-up edge (BUE)—a glob of metal that sticks to the top of the tool, and usually chips the cutting edge when it breaks away—is also a frequent issue.
Cutting-Tool Makers Meet the Medical Challenge
The good news is that cutting-tool manufacturers are keeping pace with these grueling demands. By developing bold new insert geometries, tough carbide grades and super-lubricious coatings, machinists should be able to tame even the most combative of metals. Of course, there’s more to successful HRSA machining than good carbide.
Machinists must also apply sound machining practices and properly programmed toolpaths. Here are the most important techniques for effective metal removal when working with medical-grade alloys:
1. Stay sharp and use PVD coating for your tools.
As a rule, sharp, PVD-coated tools work best across the entire range of medical-grade superalloys. Don’t settle for general-purpose, carbide-grades or coatings. Cutting-tool providers have developed specific grades for each medical-grade material, and you should take advantage of them, especially on long-running or repeat jobs.
Set aside time for some test cuts on any new material. Bring your suppliers on-site to give a hand with this, and follow their advice. Above all, develop a predictable process: It is far better to schedule premature tool replacements than to wait until they break, hurting the workpiece, damaging the machine tool or injuring its operator.
2. Be aggressive with cutting speed and feed rate to reduce built-up edge.
When inserts don’t last as long as we’d like, many of us tend to ease off on the cutting speed or throttle back the feed rate. This might be the exact opposite of what’s needed.
As a rule, cutting-tool providers recommend an aggressive approach when machining operations aren’t going well. That’s because pushing the tool harder often improves chip formation, and higher spindle speeds get more heat into the cut, reducing BUE.
3. Avoid cutting deep with tactics like trochoidal milling.
Light depths of cut at higher feed rates are typically more effective than traditional “hogging” approaches to metal removal.
Trochoidal toolpaths with full-length (Z-axis) engagement are preferred. Arc in and out of the cut whenever possible. Avoid burying the tool in the corner. You’ll know there’s a problem because the machine will groan in distress.
Program a radius slightly larger than that of the tool, and come back with a smaller tool to pick out the corners. Be sure to get the chips out of the way. If you hear the crunchy noise that comes with re-cutting, it’s time to check for a chipped or broken tool.
4. Stay true (and rigid) with the setup for medical applications.
Rigid setups are always a no-brainer but are doubly important with difficult materials. Avoid tool runout by ditching collet-style and side-lock tool holders in favor of heat-shrink or hydraulic ones.
Keep tools as short as possible, and look at replacing mechanical vises and chucks with their hydraulic cousins. Back-taper chuck jaws slightly, and use knife-edge vise jaws to increase grip. (Even the slightest amount of movement when hogging a block of cobalt chrome or titanium can make for a bad cut.)
Remember that tool holders should be replaced every few years, and more often with heavy use.
These metals are equally at home in a spine as in a red-hot gas turbine exhaust.
5. Be positive with your lead angle.
Most PVD-coated and precision ground tools have “up sharp” cutting edges. Great, but a positive lead-angle on the tool is also advantageous—such as the unused side of an 80-degree diamond or a round insert if feasible. This will reduce depth-of-cut notching, but it often forces you to circle back with a tool able to machine the corner square. Still, it might be well worth it, particularly when turning some super-tough nickel alloy or “triple 5” titanium.
6. Stay cool and maintain those cutting coolants.
It’s a sad fact, but some shops neglect their cutting fluids. You might get away with it when cutting aluminum or mild steel (although even then it’s ill-advised). With metals high in chrome, nickel or cobalt, tired cutting fluid leads to poor tool life and unpredictable results.
Every CNC machine tool should be equipped with a skimmer to remove tramp oils. Cutting coolants should be regularly checked for proper concentration and pH levels.
If your shop doesn’t own a sump sucker, it’s time to look at one. It will not only reduce downtime associated with sump cleaning but will cut recycling costs, too. Also, consider an additional investment: high-pressure cutting fluid and filtration. Everything works better with high-pressure coolant.
7. Look at alternatives to using coated-carbide inserts.
If you’re struggling with coated carbide, it might be time to “go naked.” Uncoated inserts often produce better results with superalloys, especially in finishing cuts.
Also give ceramics a try. Many of these inserts have reinforced “whiskers” of silicon carbide, and offer cutting speeds 10 times greater than carbide. Always run them dry, and never use ceramic with titanium, as the two react chemically.
8. Share your superalloy best practices.
Keep good records of what works and what does not—and share what you know with your peers. Precision medical machining is important work, and shops that succeed at it can easily tackle equally challenging aerospace work.
Key Takeaways
Plan ahead with new PVD-coated tools as you’ll need to test your cuts. Lean on your suppliers to come on-site and show you the ropes.
Despite instincts to the contrary, you can be aggressive with your cutting speed and feed rates, but you should be wary of making deep cuts.
Machining superalloys cause cutting tools to wear quickly, but with the right techniques, you can get the most life out of them.
Create predictable processes for programming toolpaths and replacing tools before they break or cause injuries.
Fess up: Do you ease up on pushing your tools when an insert doesn’t last as long as you’d like? Share your experience.