Whether it’s on the job, at a vocational-technical school or in the garage at home, the first type of welding that most people learn is metal inert gas (MIG). Some refer to it by the American Welding Society’s technically accurate term, gas metal arc welding (GMAW), while others just call it wire feed; either way, it’s the most common and easiest of all welding technologies to master, one that helps beginners build confidence as they learn to weld.
In MIG welding, the machine automatically feeds a spool of solid wire—the electrode—through a welding gun. As the gun nears the weld joint, an electrical arc forms between the wire and workpiece. The resulting heat melts the wire and the area immediately around it, creating a pool that fills the joint with molten metal. The welder then moves the gun lengthwise along the joint to form a weld bead, thus creating a permanent bond between the two pieces of metal.
As with most welding processes, a shield gas such as argon or carbon dioxide is needed to protect the area from oxidation and contamination; the welding machine automatically delivers the shielding gas, too. In fact, with MIG welding, or GMAW, the operator needs to do little more than pull the trigger and manipulate the gun to complete the weld.
“Material thickness, base metal, filler metal, thermal conditions, joint design and operating parameters all play key roles in making a sound weld.”
Charlie Cross,Lincoln Electric
MIG welding is suitable for carbon, stainless steel, aluminum and nickel-based alloys in various thicknesses depending on the size of the welding machine and other factors.
Here, two experts—Charlie Cross, welding technical specialist at Lincoln Electric, and Mike Sammons, global product manager of light industrial products multiprocess at ESAB—weigh in with recommendations on how to generate the best weld bead possible. Their advice applies just as well to beginners as those with years of welding experience.
Ask the Basic Welding Questions
Cross starts by ticking off a host of questions any welder should be able to answer after receiving proper training and gaining sufficient experience: What’s the correct shielding gas and flow rate for the material? Do you have the right diameter and type of electrode? Is the wire tensioned properly, and how fast is it feeding? Are the voltage, amperage and polarity set? Are the travel and work angles good?
Miss the mark on any of these, he says, and you can end up with bead discontinuities and defects such as undercut (a troughlike groove in the base metal), porosity (holes in the weld bead), incomplete fill (insufficient filler metal) or inadequate metal fusion (a weak weld).
“You can find most parameters under the door of a typical welding machine,” Cross says. “In addition, Lincoln Electric and other welding equipment suppliers offer a range of welding guides that will help determine the correct starting conditions. One question I often ask folks who are troubleshooting is, have you reviewed the equipment’s operator manual? You would be surprised how helpful it can be.”
Sammons agrees. “If you don’t have access to either a formal institution or an experienced welding person to lean on, then educate yourself via whatever means possible. Read the trade magazines. Pick up a few books. Check out the videos on YouTube or the equipment manufacturer’s website. There’s plenty of good material out there.”
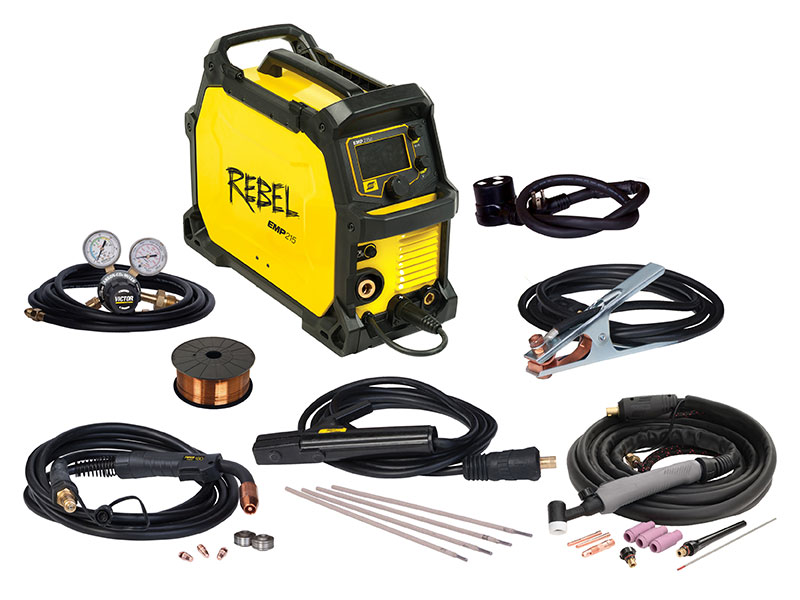
The Rebel EMP 215ic from ESAB supports 120/230-volt power and is capable of MIG, TIG and stick welding. (Photo courtesy of ESAB)
Buy the Right Equipment
Choosing the right type of equipment is similarly important, and here again, education is key. “Assuming you or your employer don’t already own a welding machine, you should take some time to learn about all that’s available,” Sammons says. “Is Brand X better than Brand Y? What’s my budget? What materials and thicknesses do I want to weld? There are many options out there, and it’s easy to buy the wrong machine or invest in one you’ll soon outgrow.”
Cross seconds this statement. “Which machine to buy often comes down to how much you expect to use it and what kinds of projects you’re planning on,” he says. “Material thickness, base metal, filler metal, thermal conditions, joint design and operating parameters all play key roles in making a sound weld.
“The capabilities and features of a machine are also important considerations,” Cross continues. “For example, the welding machine in my garage is connected to the internet. This gives me real-time feedback on my welding parameters while keeping a cloud-based record of my different projects. I can also use this capability to update the machine software, conduct preventive maintenance and troubleshoot issues that may arise. Much of that is probably overkill for a lot of people, but I find it very useful.”
Protect Yourself and Prepare
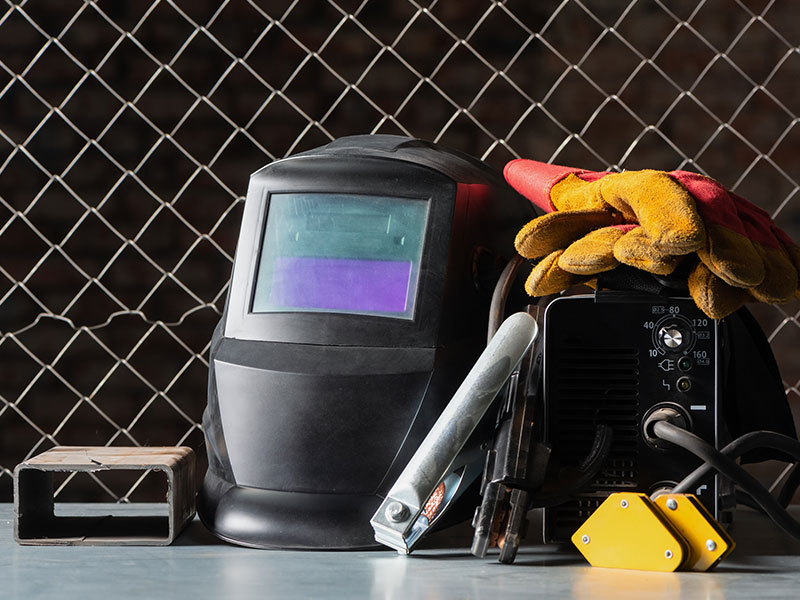
All welding projects require personal protective equipment (PPE), including helmet, face shield, leather jacket and gloves, and a sturdy pair of steel-toe boots. In addition, there’s often a need for a band saw and grinder, and possibly a solid workbench, preferably one that can be grounded. Then there are the basic hand tools, such as clamps, pliers, chisels and hammers.
“Do I have everything needed to complete the job, and is it well-organized and handy?” Sammons says. “There’s nothing more frustrating than getting ready to lay a bead and discovering that you don’t have the right tools to complete it.”
Now that you have a headful of theoretical knowledge, an appropriate welding machine plugged in and ready to go, and a well-prepared work area, it’s time to get practicing.
“Even for those who’ve welded before, it’s a good idea to get some material of similar type and thickness and practice a bit before starting on the actual project,” Sammons says. “And if the job requires working overhead or lying on the ground under a piece of equipment, try to lay some beads in the same position. Whatever the situation, you should be as stable and comfortable as possible. If not, it makes the job much more difficult.”
Sammons and Cross suggest that much of practicing is about building the muscle memory needed to be a good welder. Setting the correct machine parameters, in most cases, is relatively easy: ESAB offers a series of settings known as sMIG (short for Smart MIG) machine assistance, while Lincoln has a Ready.Set.Weld function with preprogrammed parameters. “We’ve developed a user-friendly interface screen that helps the operator fine-tune their parameters very effectively,” Cross says. “It encourages new users and makes the welding process much less intimidating.”
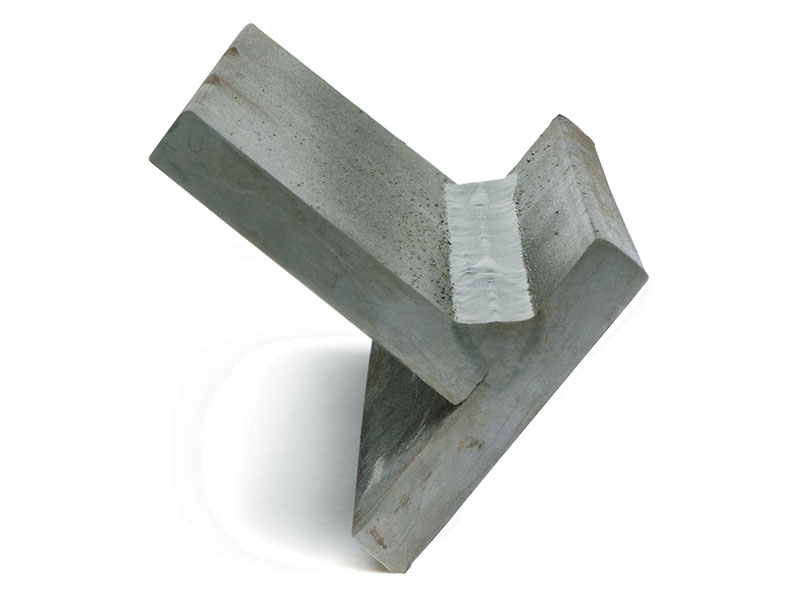
This sectioned weldment shows the characteristics of a quality weld bead: flat face, proper placement in the joint, uniformity and good wash-in (smooth transition) to the base metal. (Photo courtesy of Lincoln Electric Co., Cleveland. All rights reserved)
Inspect Your Work
Once you’ve completed the weld bead, you should visually inspect it. Cross says to look for a flat weld face, proper placement and uniformity throughout the bead. These indicate the welding procedure is sound and your technique is dialed in.
Taking it a step further, cutting and etching the weld shows what’s going on inside. “You can weld a test specimen with the desired procedure and technique, cross-section it, polish one end, and etch it with a suitable grade such as Nital [an acid used for nondestructive testing],” Cross says. “This will help determine whether you have suitable fusion into the base metal and if there are any discontinuities in the weldment.”
Sammons acknowledges that getting a good weld may take time. “Even if you have all the settings just right, you still have to hold the gun at the proper angle and move it at the correct speed,” he says. “A lot of people tend to go too fast when they’re first starting out and end up with this long, gangly-looking bead that doesn’t really do much. But there’s also the preparation. This includes making sure the metals are free of oil, paint, rust and other contaminants that can mess up a weld. Do your homework upfront, practice and don’t be afraid to ask for help.”
Kip Hanson is a freelance writer and manufacturing consultant. Hanson, who is the proprietor of KAHMCO LLC, has more than 40 years experience in manufacturing, machine tools, fabrication and ERP systems. In addition, Hanson is a contributing editor at Manufacturing Engineering, Shop Metalworking Technology and others. He has been writing about manufacturing technology since 1998.
To request a quote, please login to your existing account or register a new one. This helps us provide you with a personalized experience and keep track of your requests.