With manufacturers looking to do more with less in order to stay profitable, remote measuring is vital. Here’s what you need to know about the tools that collect critical measurement points from practically anywhere.
Metrology is the science of measuring. It’s a deeply technical topic, but to automakers, aerospace facilities, medical manufacturers—and anyone else involved in producing discrete components—metrology is mostly about assuring that part feature depths, diameters, positions, lengths and angles all meet dimensional tolerances.
Yet there’s much more to metrology than micrometers and height gages, starting with dimensional data collection, followed by its statistical analysis.
Automated and Cost-Effective
The use of statistics in quality management is nothing new. In fact, it’s nearly 100 years old. First proposed by physicist and engineer Walter Shewhart, his efforts to reduce part variation led to the development of SQC (statistical quality control) and its subset SPC (statistical process control). Today, SPC and SQC are central components of any quality control system.
The terms are often used interchangeably, although metrology purists will argue that there’s a significant difference. Where SPC is used during the manufacturing process to prevent defects and improve part quality, SQC is performed after the fact. However, both rely on data collection and analysis, and both help to identify trends in the manufacturing process.
The question then becomes: What’s the best way to collect and record manufacturing data?
Read more: Basic Metrology: What You Need to Know About Precision Measurements
Many workplaces still rely on manual measurements, then writing down values with pen and paper or typing them into a spreadsheet. And while there’s nothing wrong with the first part—taking manual measurements—there are certainly far more automated and cost-effective methods to gather dimensional data for use in statistical process control or a quality management software system.
Data Collection Hardware: Metrology Over the Airwaves
One of these comes from the L.S. Starrett Company, where Director of Research and Development Jeffrey Wilkinson describes several options for efficient industrial data collection.
“We have wired multiplexers that can take data from a range of measurement tools and send those values to a computer,” he says. “Beyond that, we have our DataSure product line, which is essentially a virtual or wireless version of a multiplexer.”
With DataSure, the measurement device—a micrometer or caliper, for example—must be equipped with a radio, Wilkinson explains. As the operator takes each measurement, he or she pushes a button on the device, sending the data to a gateway connected to the computer. The data is either tabulated in a log form or sent through a COM port to an SPC program or Microsoft Excel. A multiplexer accomplishes the same thing but uses a cable rather than a radio to transmit data.
For remote or field-based applications, data can be sent from the hand tool to a mobile app on the user’s smartphone. From there, it can be emailed, saved for upload upon the user’s return to the home office, or sent to a secure gateway that shares the information with the factory or corporate mothership. This last scenario also applies to organizations with multiple facilities, even those located in different states, countries and continents.
Read more: Managing Downtime: A Guide to Improving Shop Productivity During Manufacturing Slowdowns
Says Wilkinson: “We have many applications where there's nothing more than a benchtop computer that's talking to tools on the shop floor, and everything is local to that facility. On the other extreme, we have one customer in Asia that actually sends their data over the web to a location in Europe, where it’s processed and sent back to the original site for display on a user interface. There are so many manufacturers today who are collecting, consuming and storing quality data that we’ve had to develop a very flexible system, one able to handle a range of different requirements.”
Data Collection Software: The Critical Link
Hany Abdel-Motaleb, MeasurLink and data management specialist at Mitutoyo America Corp., sees similar requirements. Like Starrett and others, the company offers traditional multiplexers and all the necessary hardware for wired data collection. For facilities that wish to skip the cables, however, Mitutoyo also offers U-WAVE, a hardware system that allows you to wirelessly transmit measurement information to a computer.
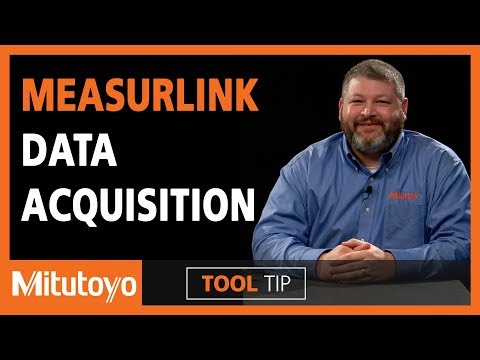
U-WAVE consists of two components, Abdel-Motaleb explains—a receiver connected to the computer via USB, and individual transmitters for each measurement tool, which can be located up to 60 feet from the receiver. There’s also a software portion that manages communication between the different devices.
Regardless of how the data is collected or whatever system is used to collect it, it’s of limited value without some form of quality data management software. In Mitutoyo’s case, this software is MeasurLink, a modular system that supports statistical analysis, gage tracking and calibration, process analysis, SPC and more. “Once the data is in the MeasurLink database, it can be accessed remotely through the cloud or directly from an SQL database on the customer’s network,” Abdel-Motaleb says.
Start Collecting Shop Floor Data Now
For facilities nervous about the cost and hassle of implementing wired or wireless data collection hardware, never mind a quality data management software system, it’s not as big a task as one might think. Abdel-Motaleb suggests that the elephant can be eaten one bite at a time, and you might already have at least some of the necessary hardware.
Read more: When to Upgrade Your Drills: Solid Carbide Has Come a Long Way
“Many micrometers, indicators and calipers are already equipped with the necessary port,” he says. “If so, all that’s needed is a single cable and a computer to begin collecting data.” This eliminates the chance of mistyping information, he adds, as well as the chance that an expensive machine tool will inadvertently sit idle while the operator is writing down or typing dimensional data. Beyond that, the effort behind a full implementation comes down to two things—where do you want to collect data, and what do you want to do with it?
“Depending on how big your implementation is and how much room for improvement you have, the return on investment for these systems is usually quite fast,” he says. “As proof, I recently worked with a customer that cut their scrap costs by $180,000 the first year. The investment in MeasurLink, U-WAVE and new hand tools was just a fraction of that cost. That said, achieving complete ROI in a year or less is pretty common.”
Has your facility started to collect data? What tips can you share?
Securing Your Assets
Say the words “wireless network” and most of us grow at least a little worried over the specter of hacking and denial-of-service attacks.
These are certainly valid concerns, which is why providers of wireless data collection have gone to great lengths to secure their systems against bad actors, putting customers at ease and helping to secure their piece of the puzzle for more robust network security.
“Large organizations often store valuable corporate assets such as banking information, people’s names and Social Security numbers,” says Starrett’s Jeffrey Wilkinson.
“Starrett went to great development pains to implement our security scheme, not because hackers care about quality data, but because any radio could be an attack vector into the larger corporate target,” Wilkinson says.
“To this end, we have designed a more secure system than run-of-the-mill Bluetooth or Zigbee, using secure data packets with a limited attack surface, which minimizes or negates the possibility of bad actors gaining access to a corporate network through our system.”
Related Articles
Sanding Made Simple: Disc Speed Comparison
Increase Shop Efficiency and ROI with Acu-Rite Solutions Technology

The Ultimate Coolant Maintenance Checklist for Fluid Systems
Engineered Shaped Grain Abrasives Take Grinding Productivity to New Heights
Let’s Talk About Tool Wear in Machining
To request a quote, please login to your existing account or register a new one. This helps us provide you with a personalized experience and keep track of your requests.

