VIDEO: QUICK TIPS #13 – How to Check Caliper Jaws Quickly
In this episode of MSC's QUICK TIPS, we hear from Mitutoyo about how to check the accuracy of the measuring jaws on your Mitutoyo calipers.
In this episode of MSC's QUICK TIPS, we hear from Mitutoyo about how to check the accuracy of the measuring jaws on your Mitutoyo calipers.
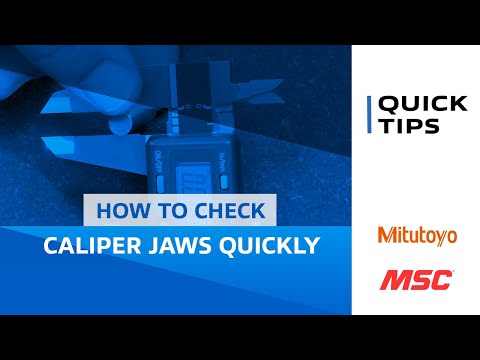
In this episode of MSC's QUICK TIPS, we hear from Mitutoyo about how to check the accuracy of the measuring jaws on your Mitutoyo calipers. In a field like metrology where accuracy and precision is key, this simple quick tip can save you the headache of dealing with inaccurate data.
QUICK TIPS is a video series by MSC Industrial Supply Company where we invite industry pros to share their expertise with us. Through QUICK TIPS, you’ll pick up bite-sized bits of information from our in-house specialists and experts from our most-trusted partners and suppliers in a way that fits your busy schedule.
For more QUICK TIPS, check out our MSC QUICK TIPS playlist. And subscribe to our channel so you won't miss new episodes.
ANDREA HOWARD: Hello and welcome to QUICK TIPS from MSC Industrial Supply, where we invite manufacturers to share best practices with the community. Today's tip comes from Mitutoyo. They're offering some advice on how you can check the condition of your measuring jaws on your calipers. Let's take a look.
NARRATOR: On calipers, the conditions of the measuring jaws over time is always a concern. For the external measuring faces, before you begin measuring anything, you bring the measuring faces close together, but not touching. And then look at the gap between them in front of a light. This may look silly, but it actually works. The use of the light gap is an efficient way to see any wear or bending of the jaws.
If you see something, you can then do a more thorough and quantitative test by using a gauge pin. This is done by simply moving the gauge pin from near the beam to the tips of the jaws while observing the readings. Here, all the values are zero, so we know that the flatness and parallelism of the jaws are in good shape.
The use of a light gap is also good for checking the condition of the internal measuring faces. In particular, when you have the crossed knife edge type like we have on this caliper. To check these internal measuring jaws, you don't create a gap, but instead you close the calipers and then slightly rotate it and look at that gap at an angle to check the condition of the measuring faces.
ANDREA HOWARD: To find out more about the precision of Mitutoyo calipers, go to www.mscdirect.com/mitutoyocalipers. Thank you Mitutoyo. In an industry where being precise can help an average company become an exceptional company, I can't imagine a better example of the perfect quick tip. See you next time.
Established in 1963, Mitutoyo offers a full product line of precision measuring tools including calipers, micrometers and indicators, as well as instruments and equipment. Mitutoyo is the leading metrology company in the world and is committed to developing breakthrough technologies for its comprehensive range of dimensional measuring tools, instruments and systems. Mitutoyo continues to develop the most advanced and sophisticated metrology equipment available.


To request a quote, please login to your existing account or register a new one. This helps us provide you with a personalized experience and keep track of your requests.