
Guide to Using Cost Allocation
How does this work?
MSC has the ability to individually code each item within an order for reporting purposes. With Cost Allocation, you can allocate specific items to departments, cost centers, general ledger accounts, etc. The selections made will be carried through to your packing slip and invoice documents.
Setting up Cost Allocation
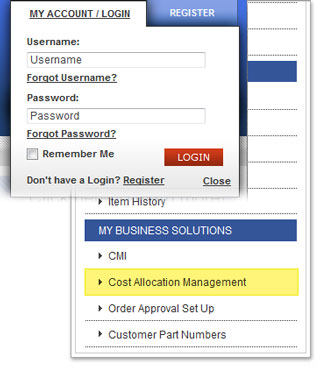
To access the Cost Allocation section, please log in with an administrator's account and click "My Account" in the header.
Note: Administrator access is required to set up this functionality. Please contact our eCommerce customer support team at 800-753-7970 if you need to have administrator access established for your account.
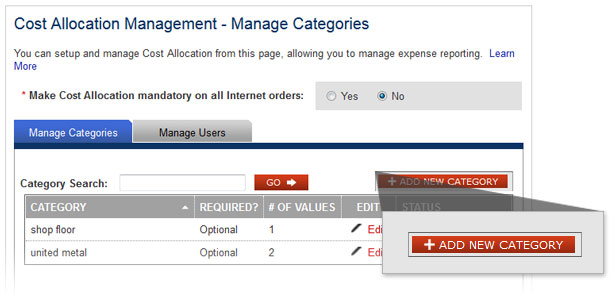
Select "Cost Allocation Management" in the left navigation bar. From this link, you can set up the categories to use for Cost Allocation.
Setting Up Categories and Values
To set up categories and values, select "Add New Category." A category is defined as a type of distribution. Categories help to organize where the items will be distributed. For example, you can create the category titled "Department" by clicking on the "Add new Category" link. Next you will need to create a category value, which is a specific descriptor within the category. For example, under the category department a descriptor might be "Manufacturing."
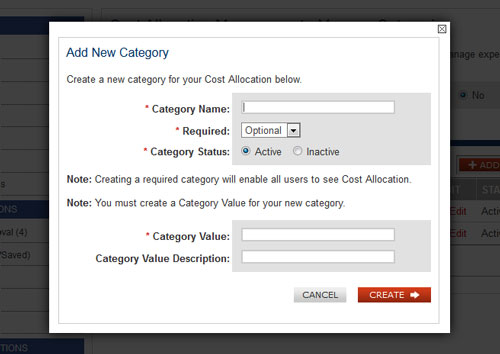
Follow the steps below to create a category and value
- Enter the required information
- Category Name - The Type of distribution such as "Department."
- Required drop down box - Select mandatory if the category MUST be filled in before order can be processed.
- Category Status - Automatically defaults to active (select inactive, if you would like to activate for later use.)
- Category Value - Input the first value, for example "Manufacturing."
- Category Value Description - Description of value for clarification.
- Select "Create" to save the category and value.
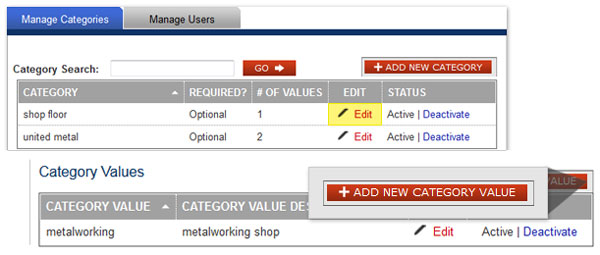
Setting Up Additional Values
To add values to your established categories select "Edit"
Once selected, click on "Add New Category Value"
Then add the new category value and description, if necessary. Click "Create" to save.
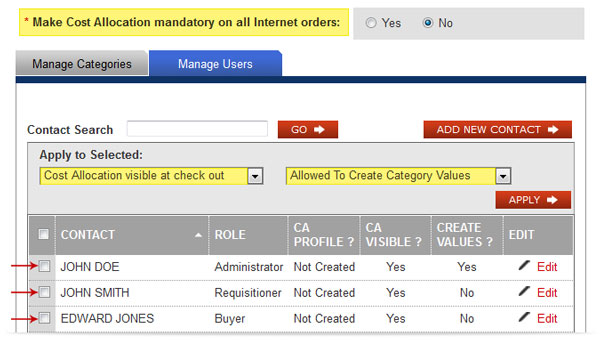
Setting Up and Managing Users
As new members join your team, you can manage your user list. You can automatically require all users to use cost allocation by selecting "Make Cost Allocation mandatory on all Internet orders:" If you do not want to require Cost Allocation for all users, simply select no.
How to use Cost Allocation
While in the shopping cart, you will be able select category and value designations for the appropriate Cost Allocation.
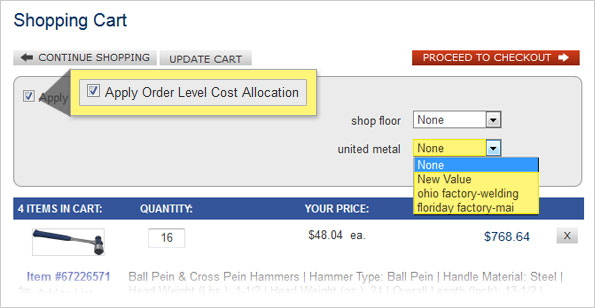
Applying Order Level Cost Allocation
To designate categories and values for all of your shopping cart items, select the "Apply Order Level Cost Allocation," then choose the appropriate categories and values.
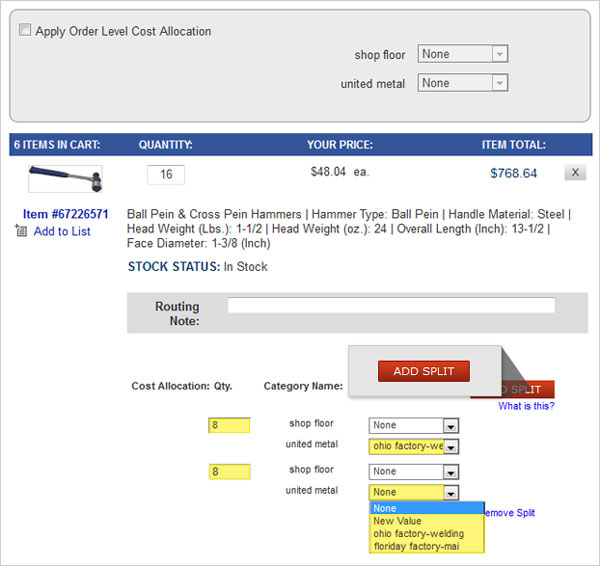
Applying Split Level Cost Allocation
To designate multiple categories and values to a specific item click the "Add Split" button. Then indicate the quantities for each category name and value. You can also override the allocation order level by clicking the override order level button. By doing so, the default Cost Allocation for the item will be applied.
To request a quote, please login to your existing account or register a new one. This helps us provide you with a personalized experience and keep track of your requests.