



Cost Allocation
Section 1: Setting up Cost Allocation
This will guide users through the Cost Allocation Management section, explaining how to access and configure key settings related to cost allocation for orders and categories. Providing step-by-step instructions for creating and managing cost allocation categories, including setting requirements and activating or deactivating category values.
Adjustable Settings in Cost Allocation Management and Their Functions:
Make cost allocation mandatory on all Internet orders: Requires users to assign a cost allocation for every Internet order.
Default all carts to order level cost allocation: Sets all items in the cart to use a single, order-level cost allocation by default.
Allow line item override in cart: Lets users override the order-level cost allocation and assign cost allocations at the individual item level.
Detailed Step by Step Guide:
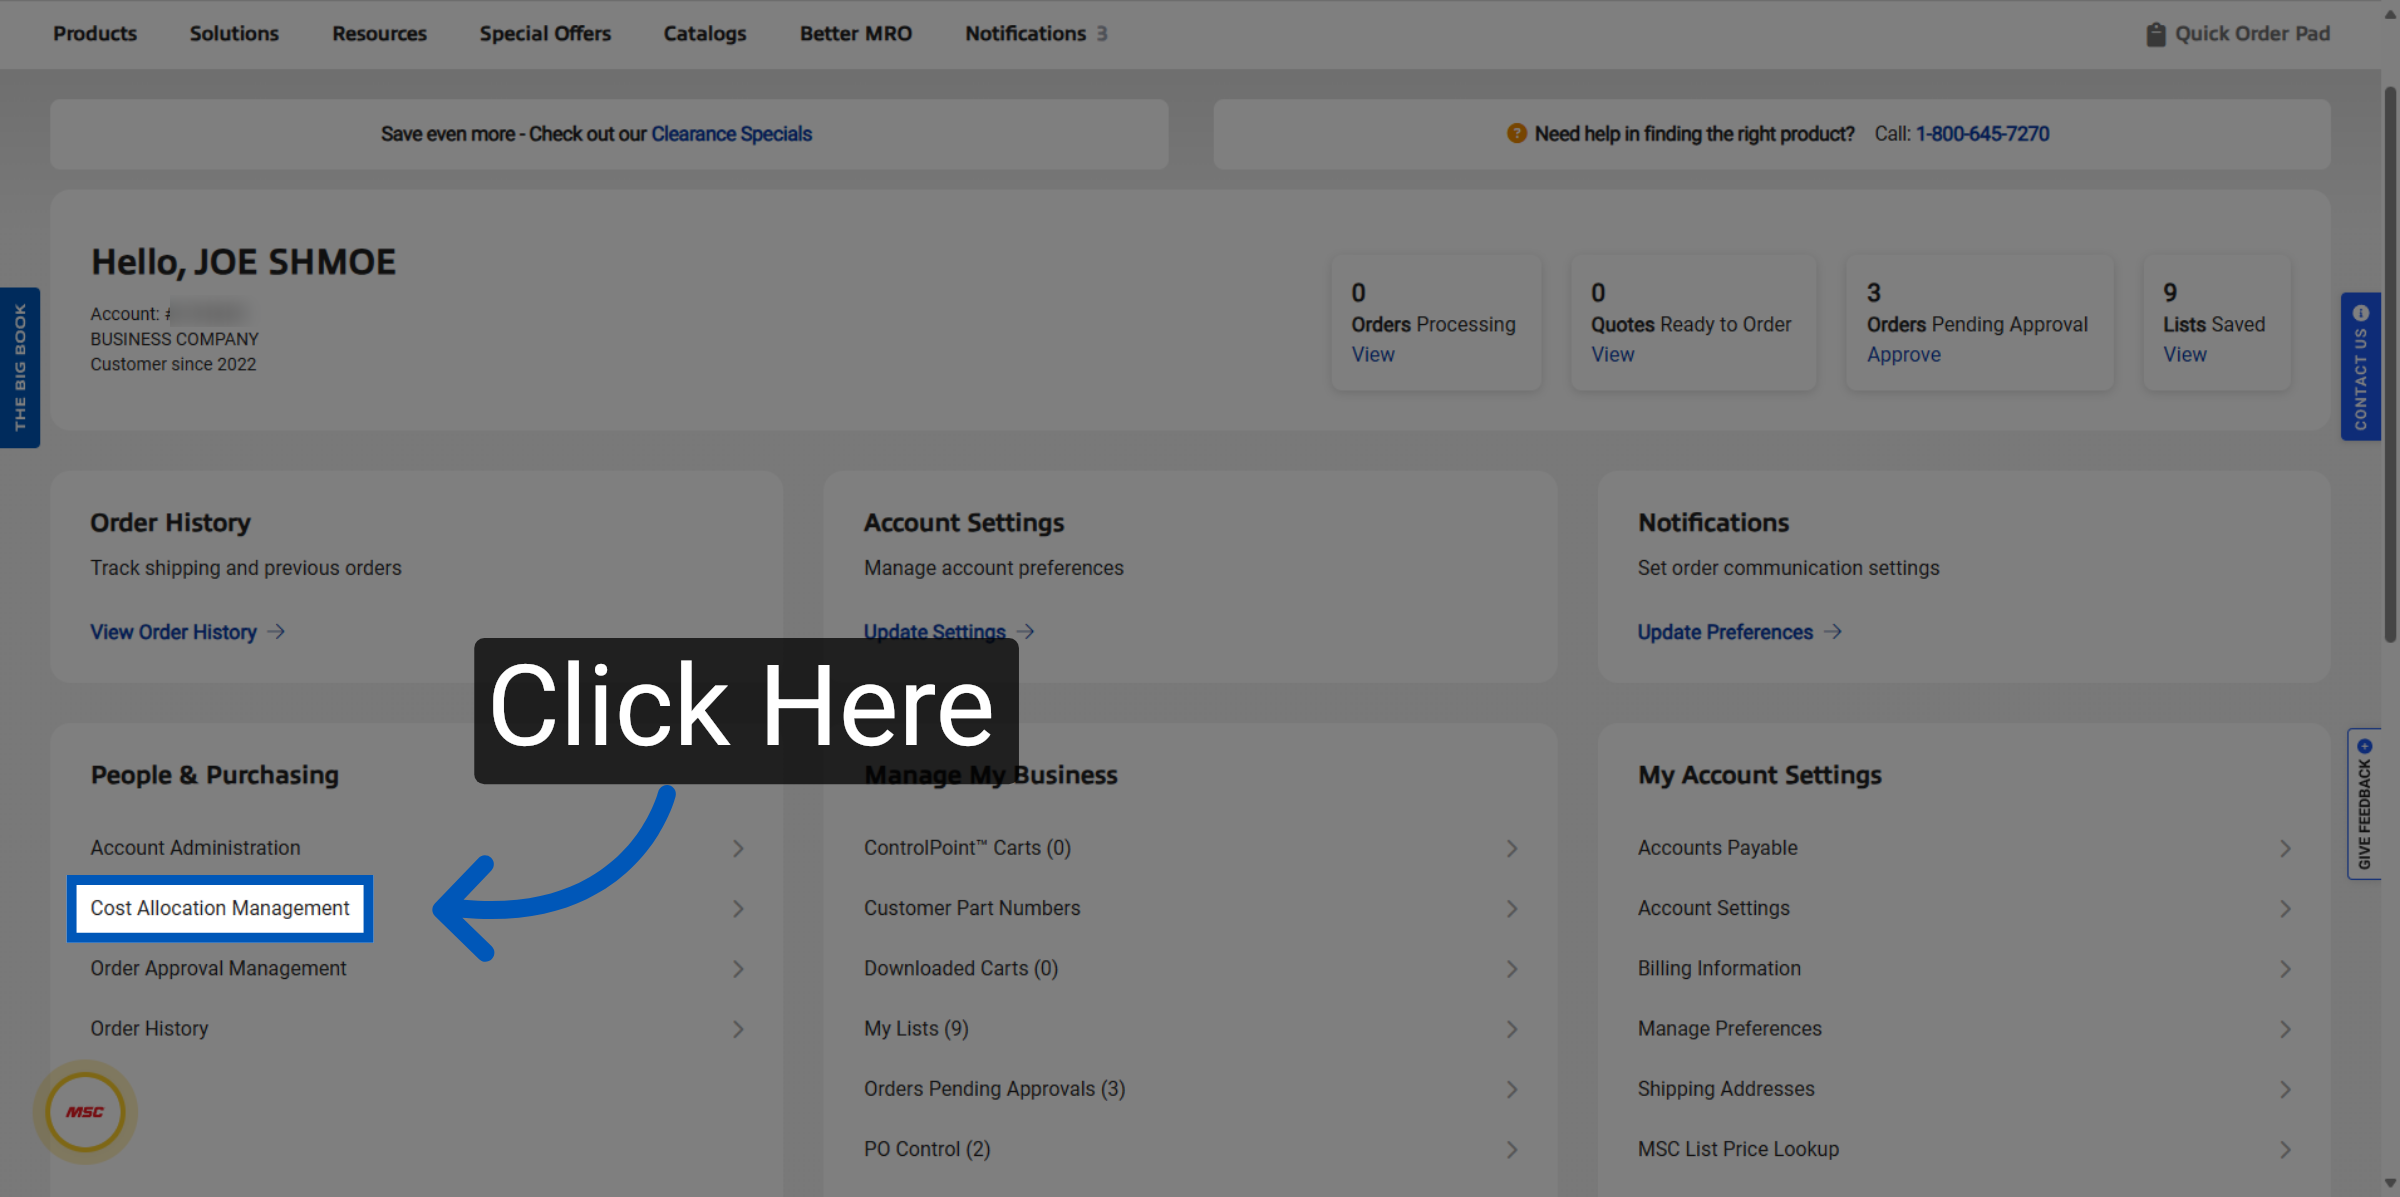
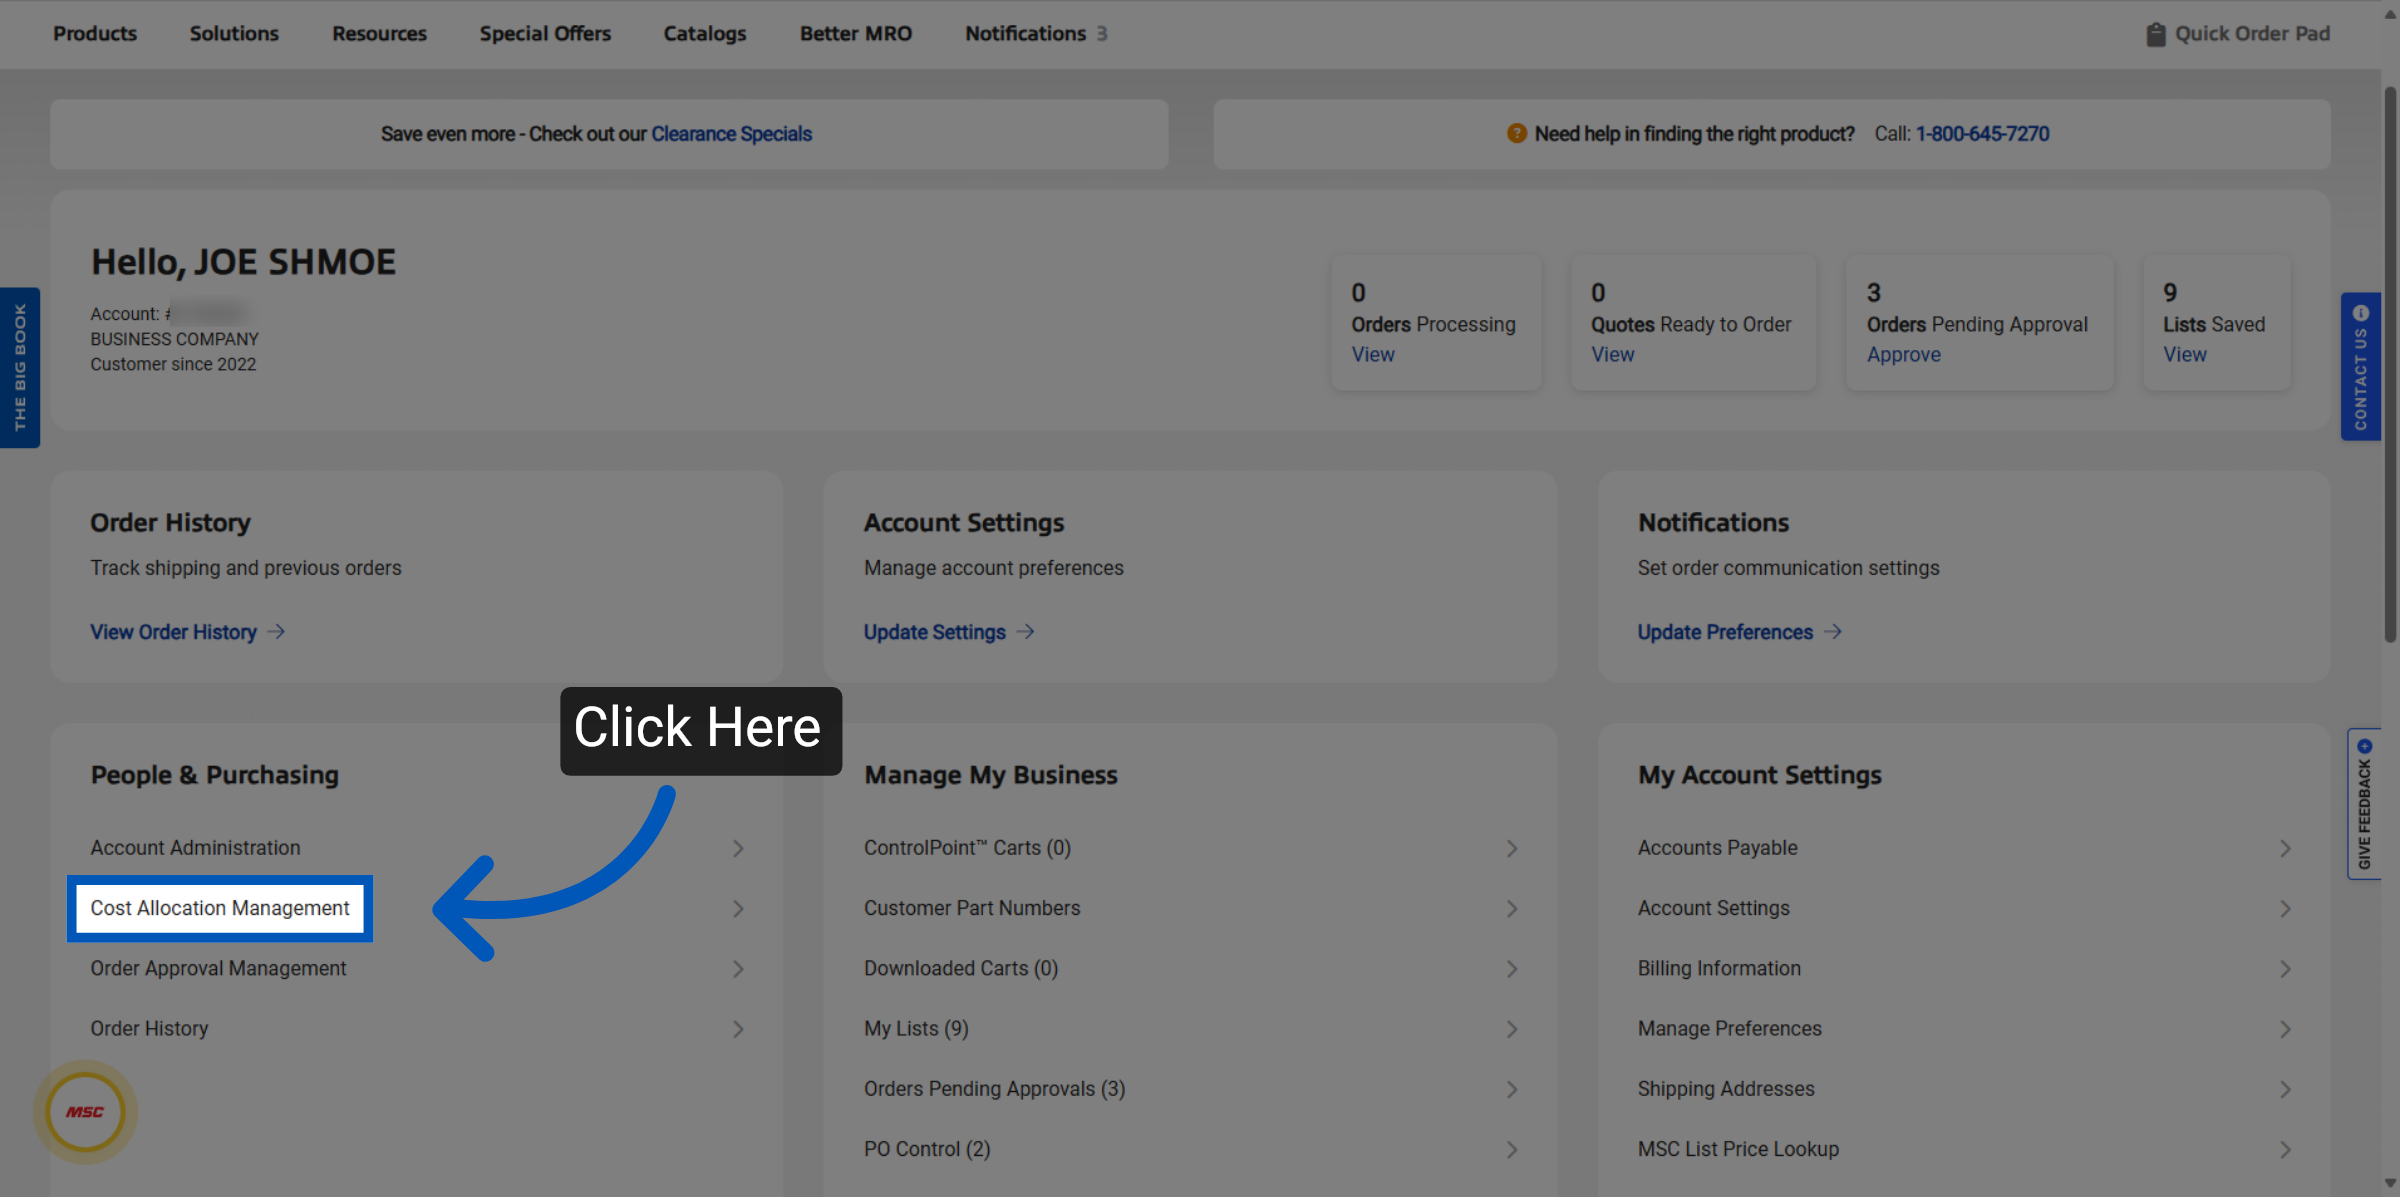
From the "Your Account" page , navigate to Cost Allocation Management under the People and Purchasing section.
Note this is only accessible to admins on the account.
Once in the Cost Allocation Management section you will be able to adjust the various settings of the feature here.
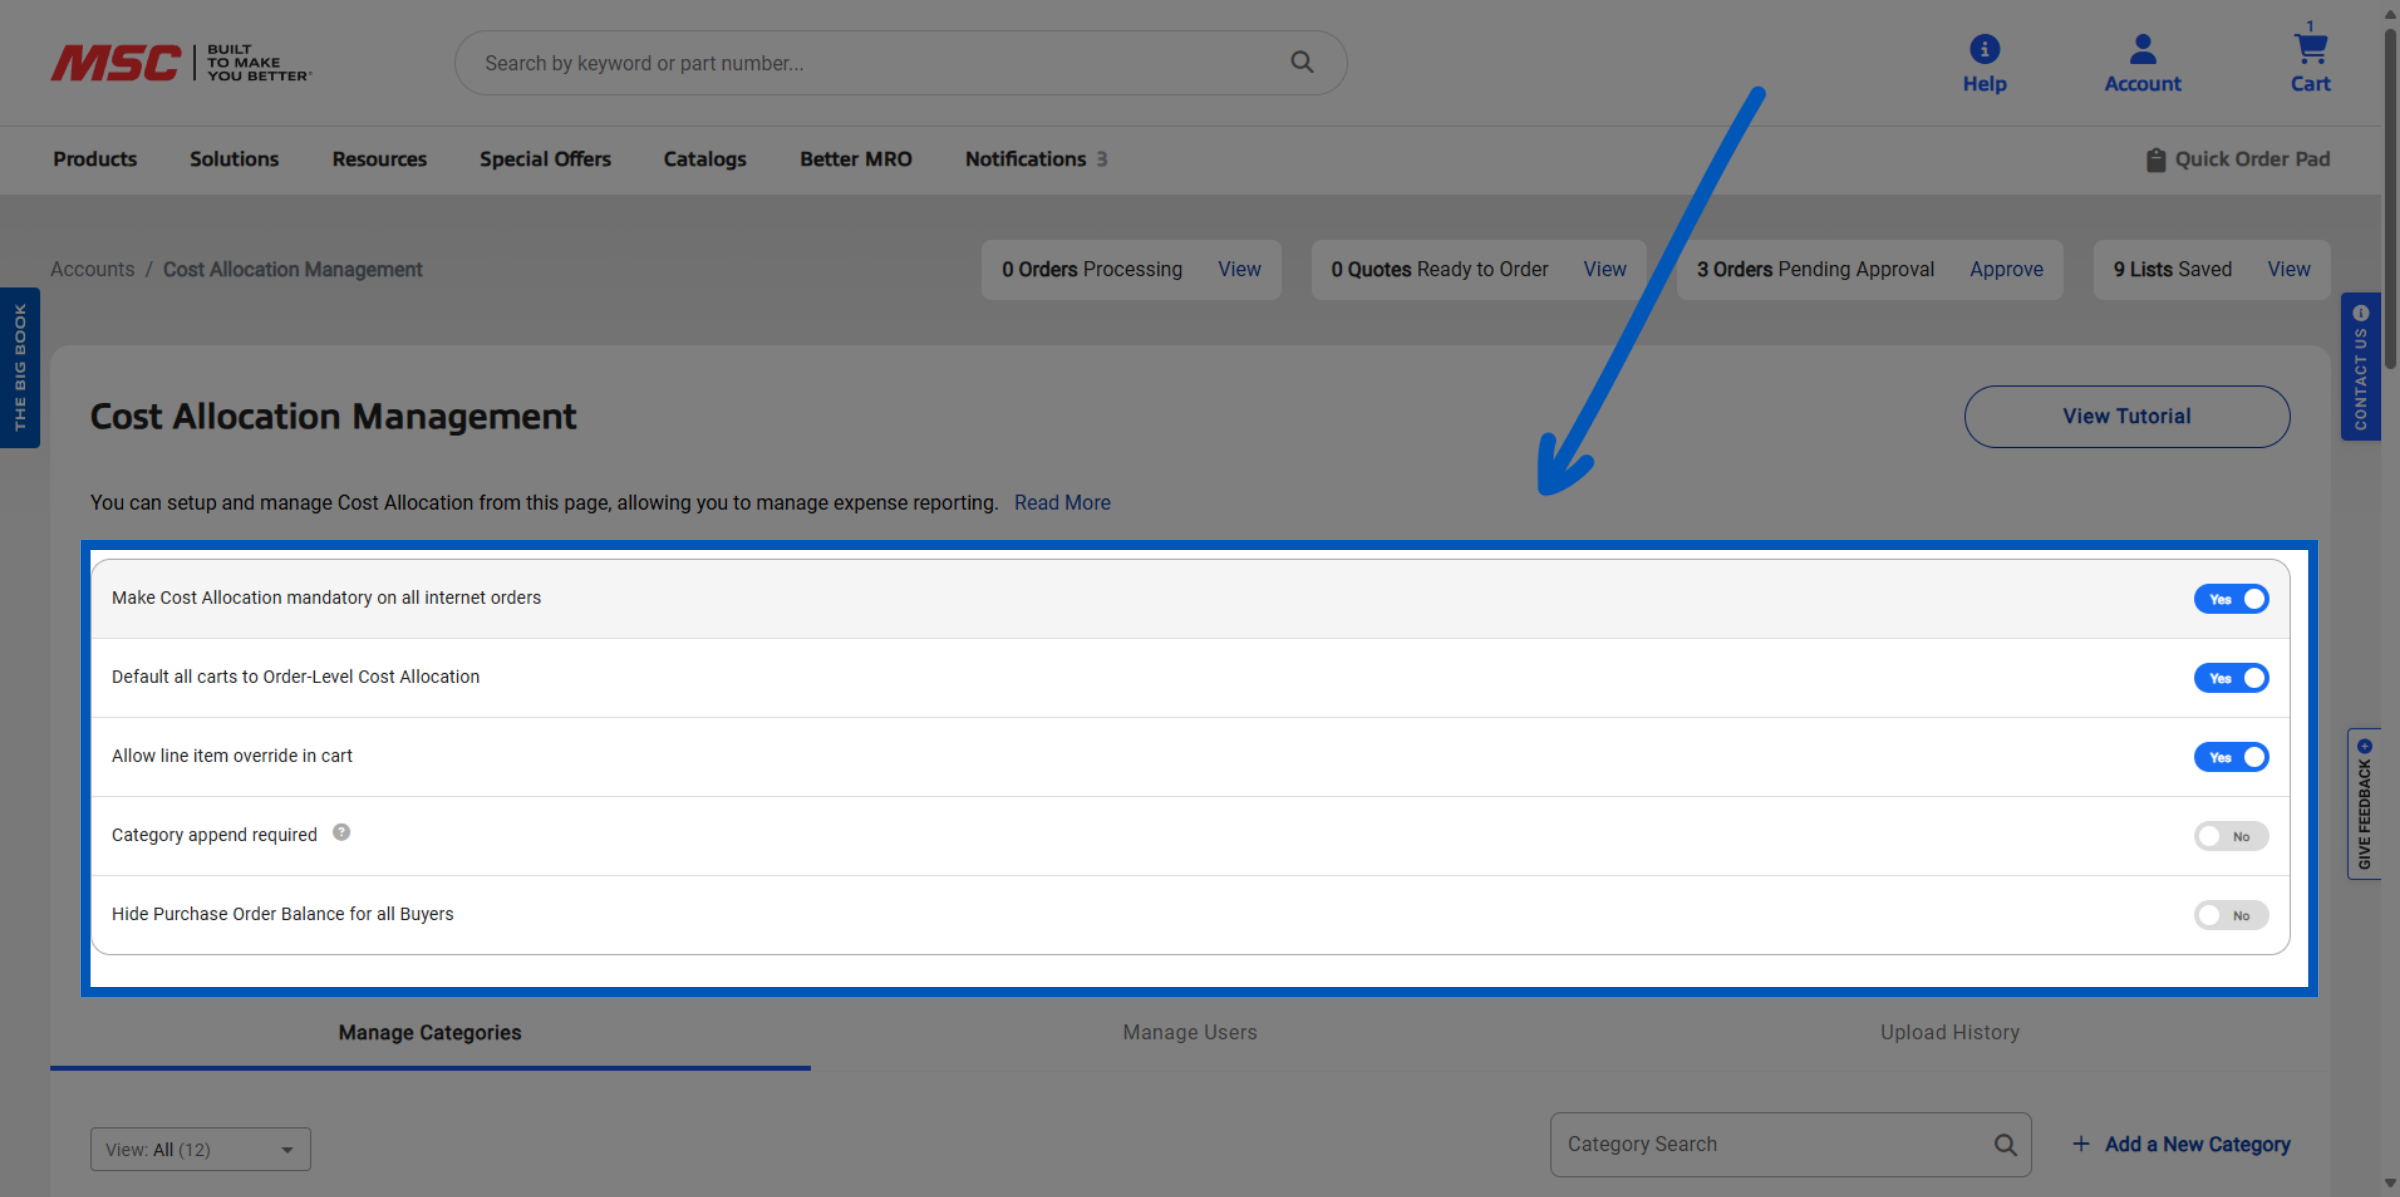
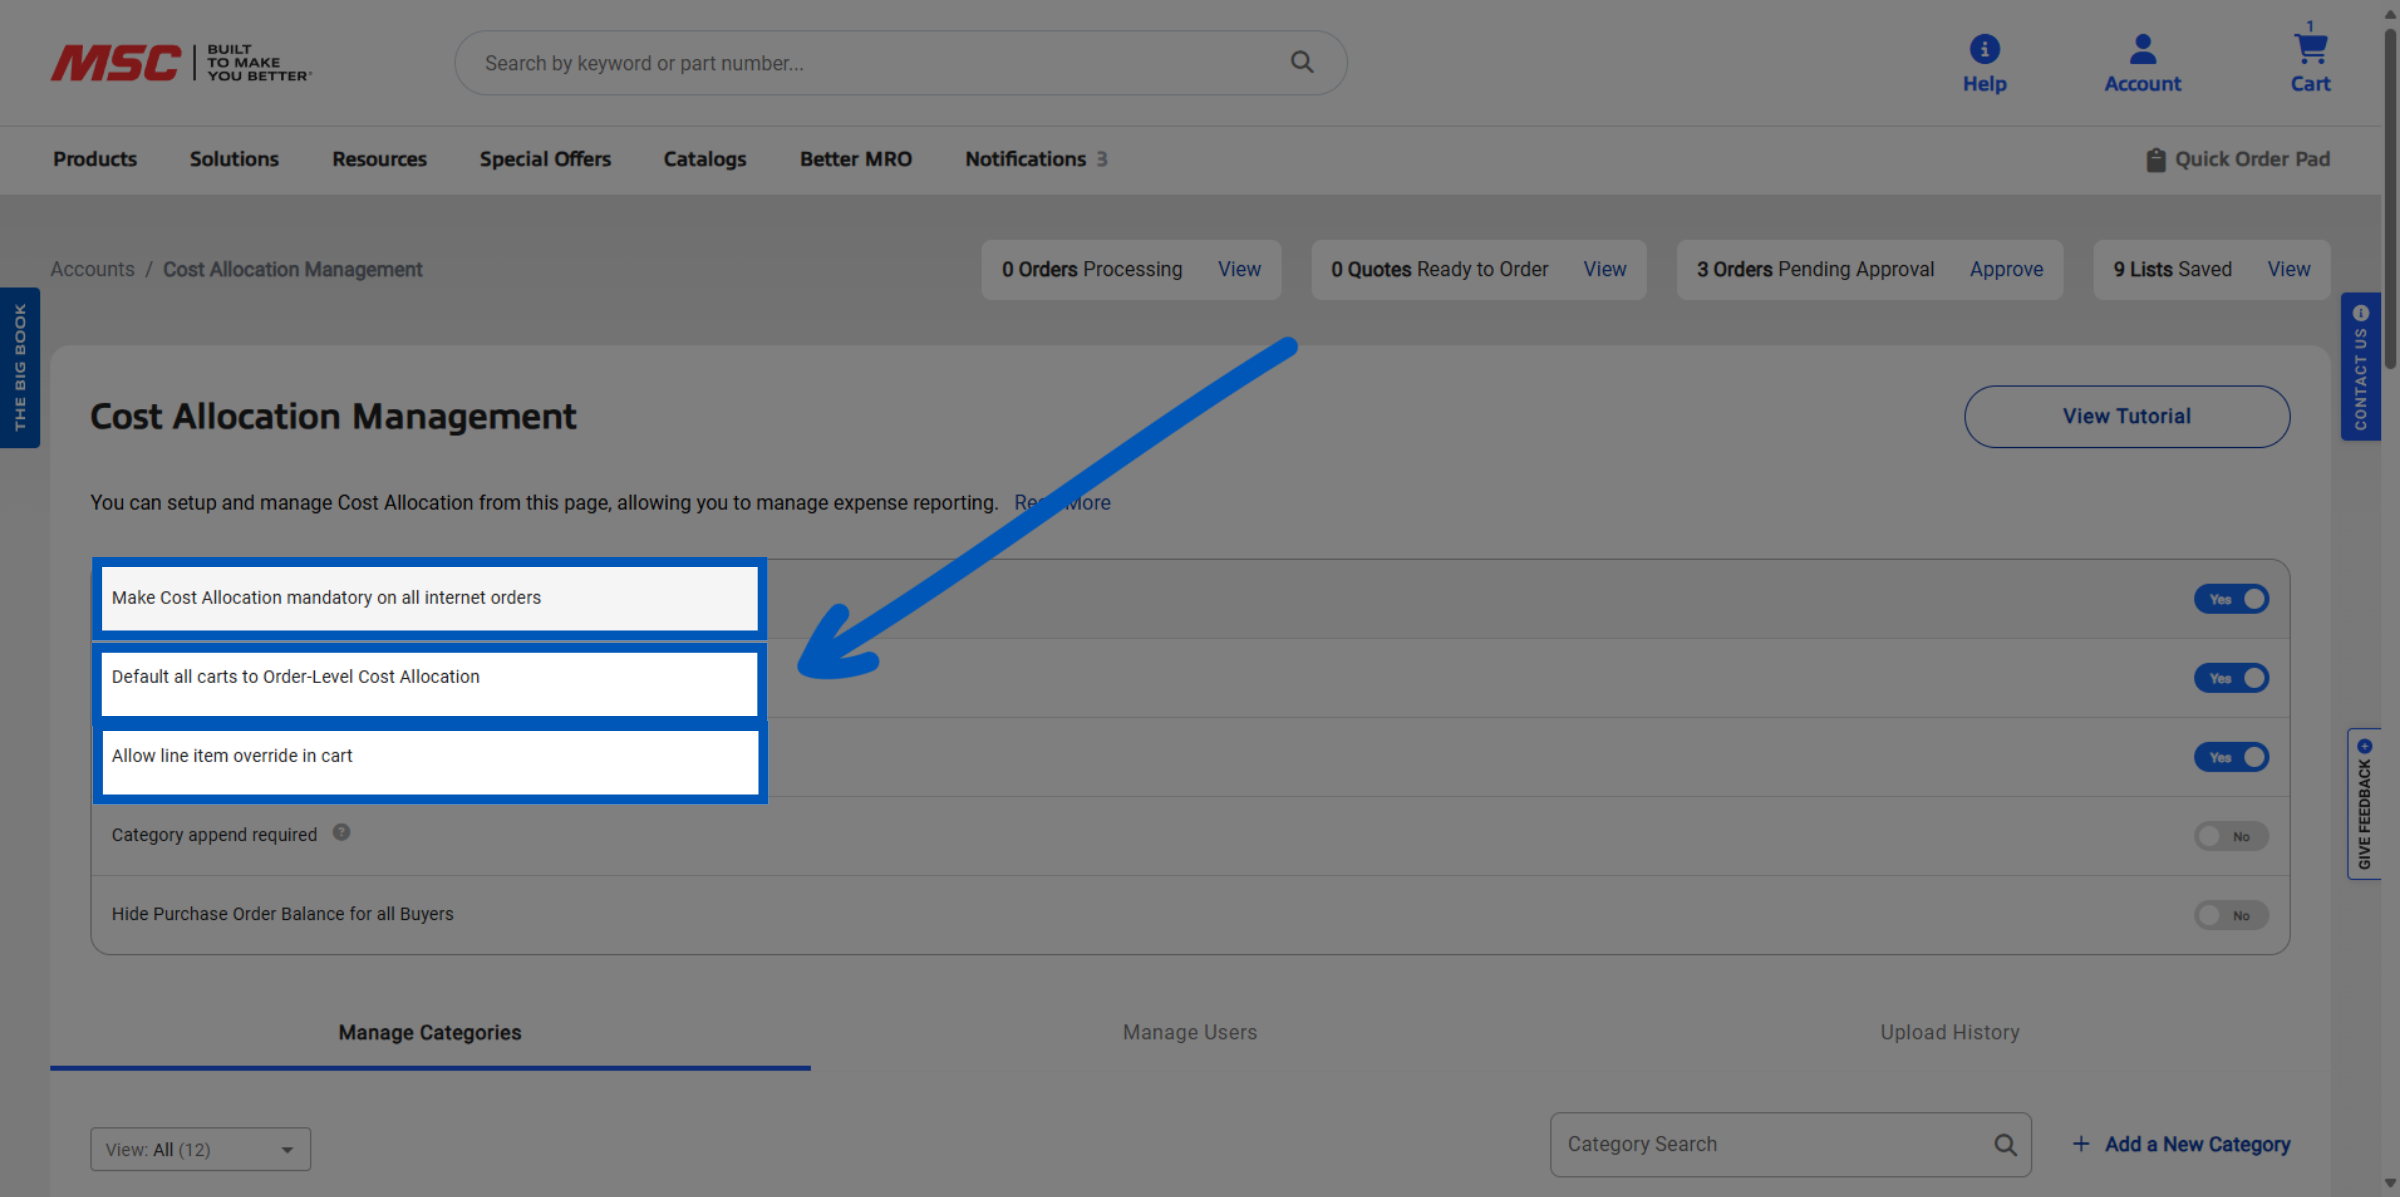
The basic functions you should familiarize yourself with are:
Make cost allocation mandatory on all Internet orders: This requires users to assign a cost allocation for every Internet order.
Default all carts to order level cost allocation: This sets all items in the cart to use a single, order-level cost allocation by default.
Allow line item override in cart: The lets users override the order-level cost allocation and assign cost allocations at the individual item level.
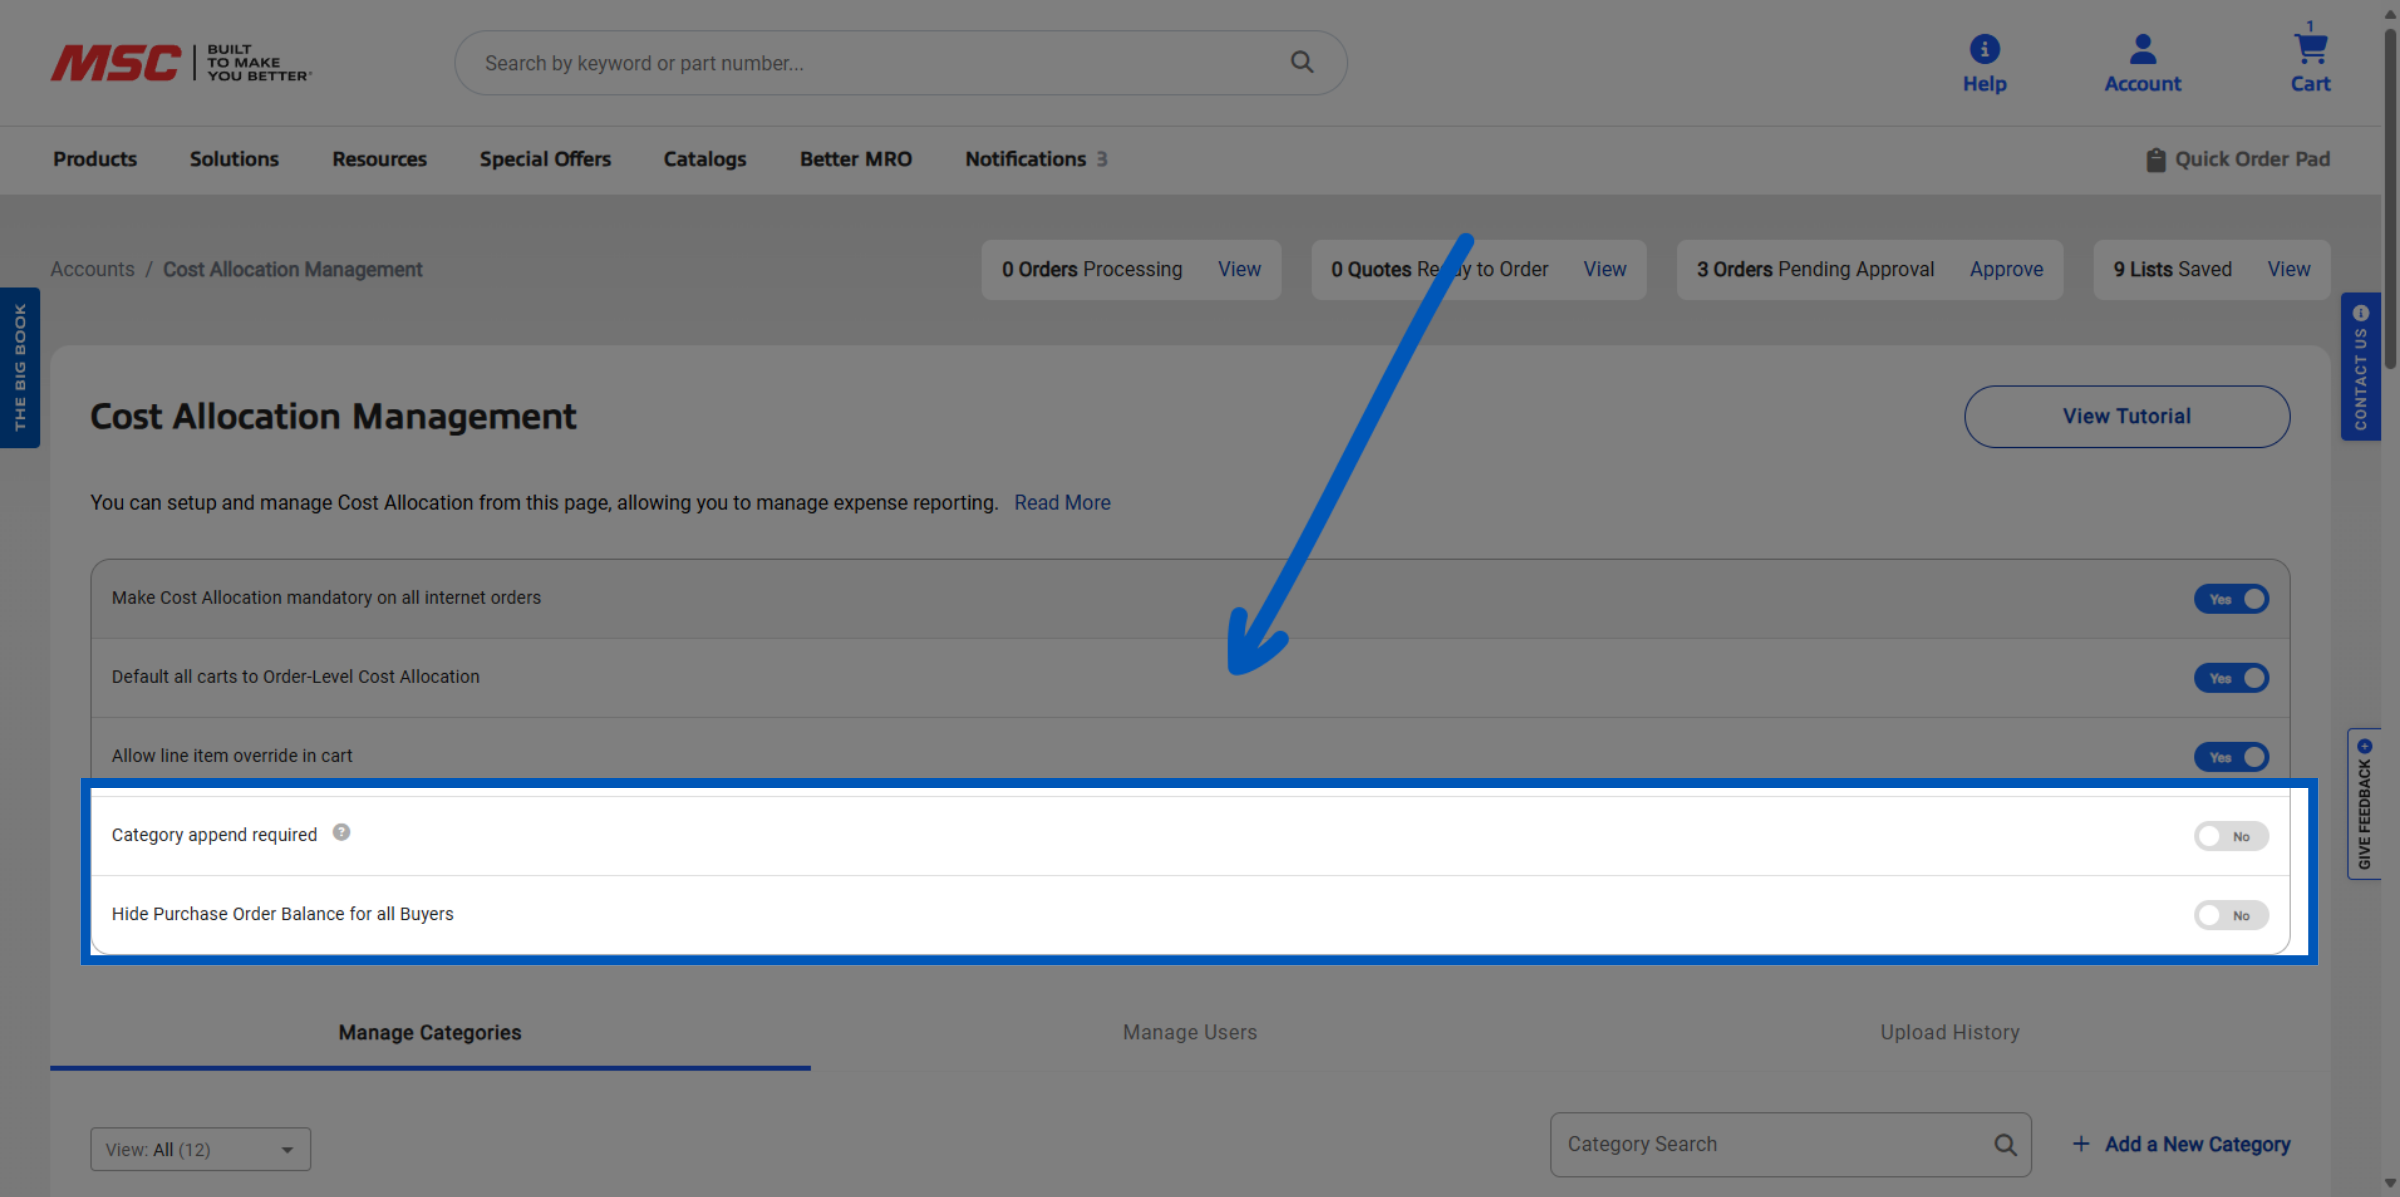
Other advanced functions are detailed in Section 2 below.
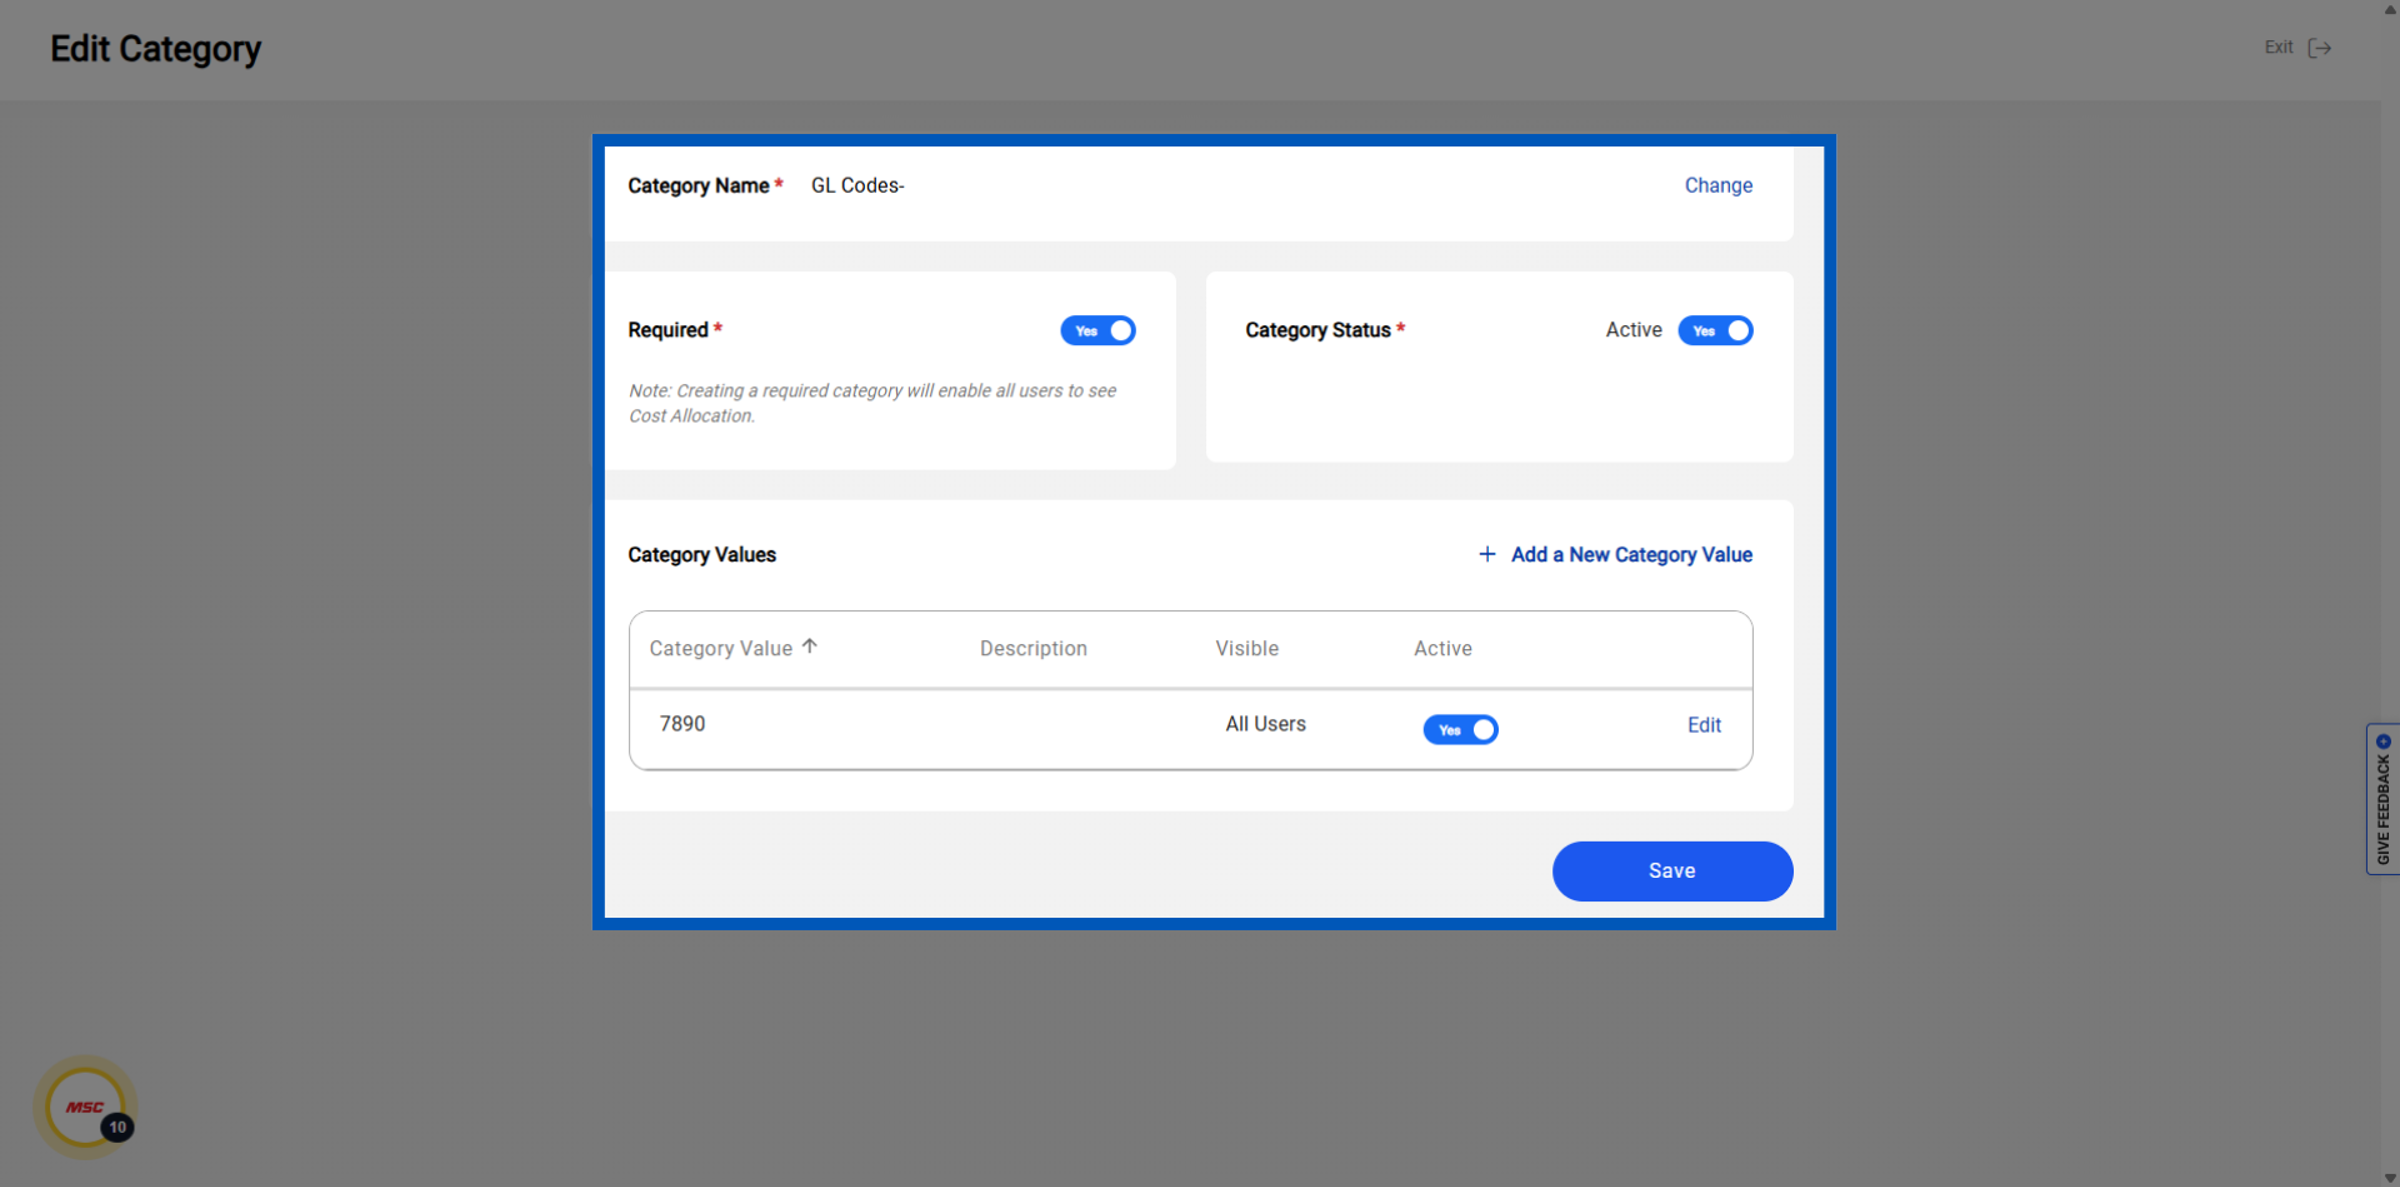
From this section you will be able to manage your various categories, and users Click "Add a new category" to create a new cost allocation category.
Notes: Maximum of 5 categories can be active. After reaching 5 active categories, an existing category will have to be deactivated to make any other category active.
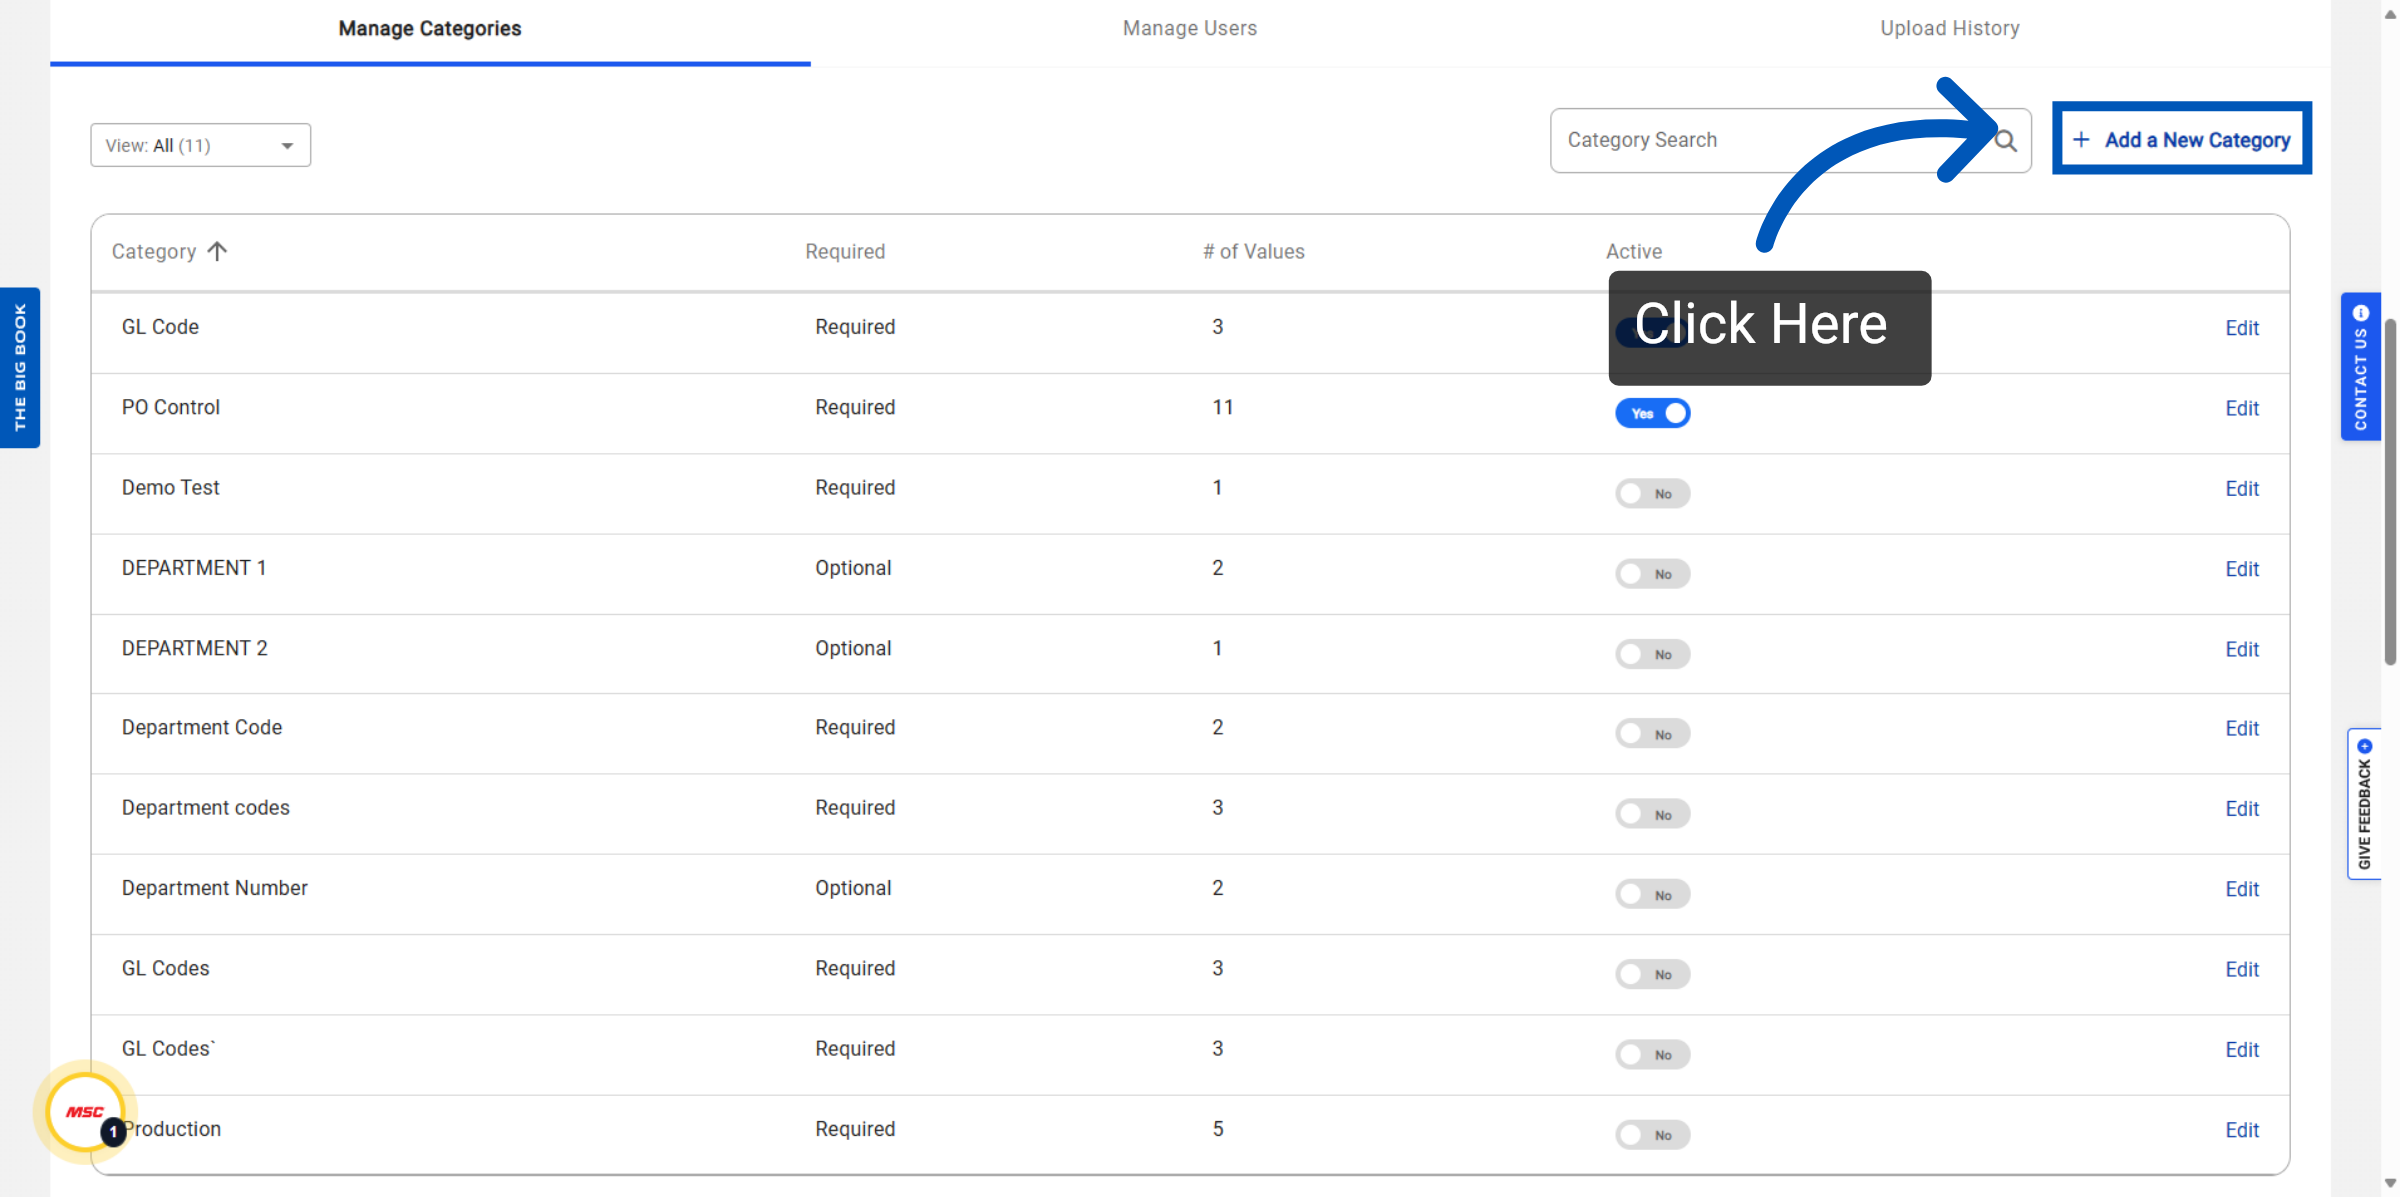
You will also be able to set the Category as a whole as inactive/Active, as well as set the individual values.
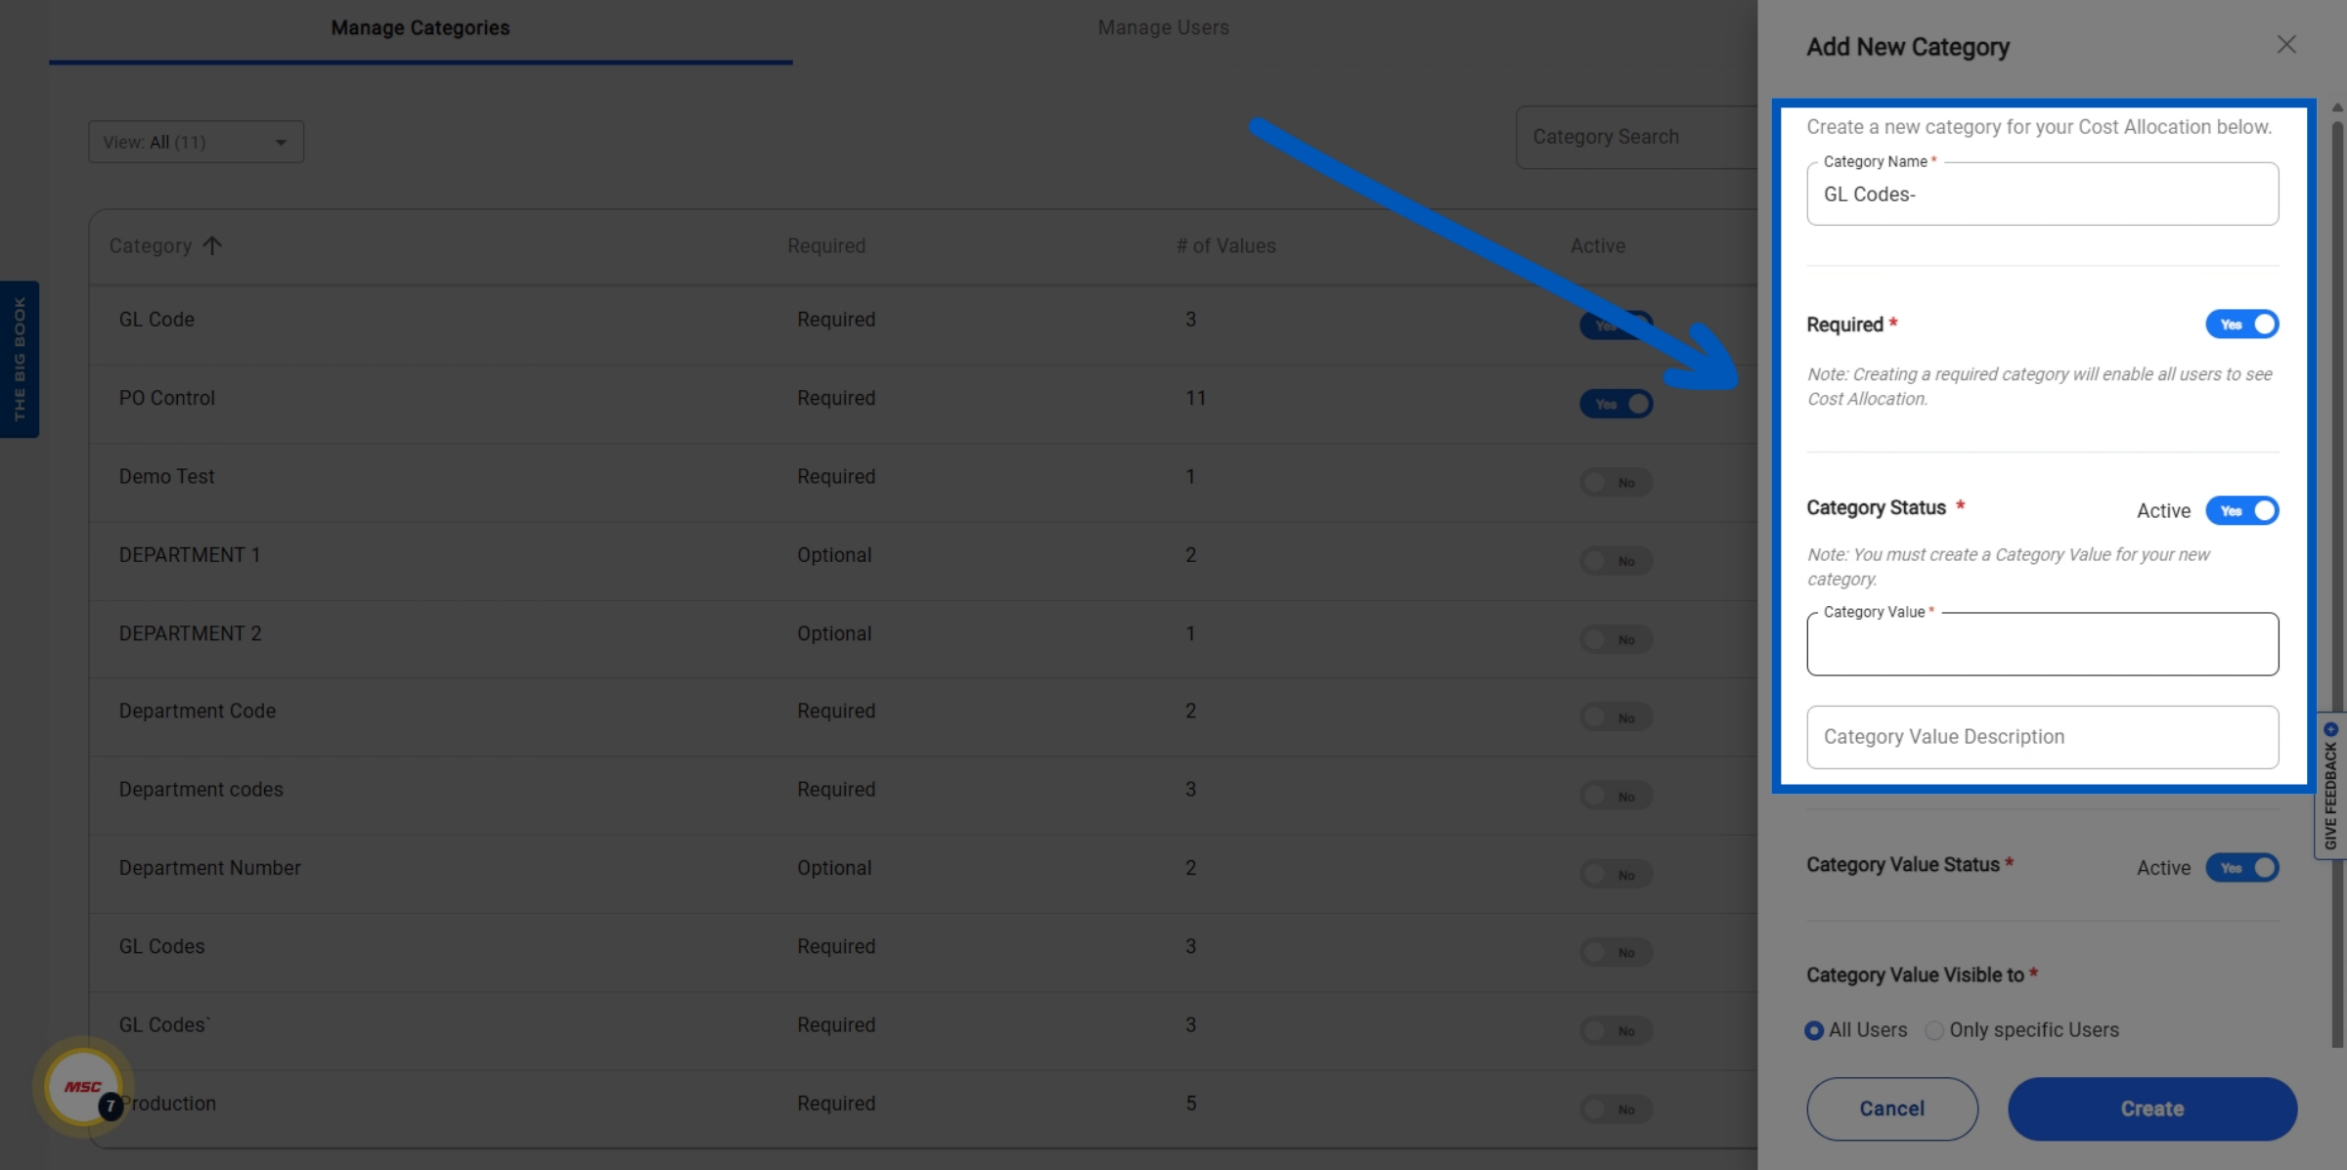
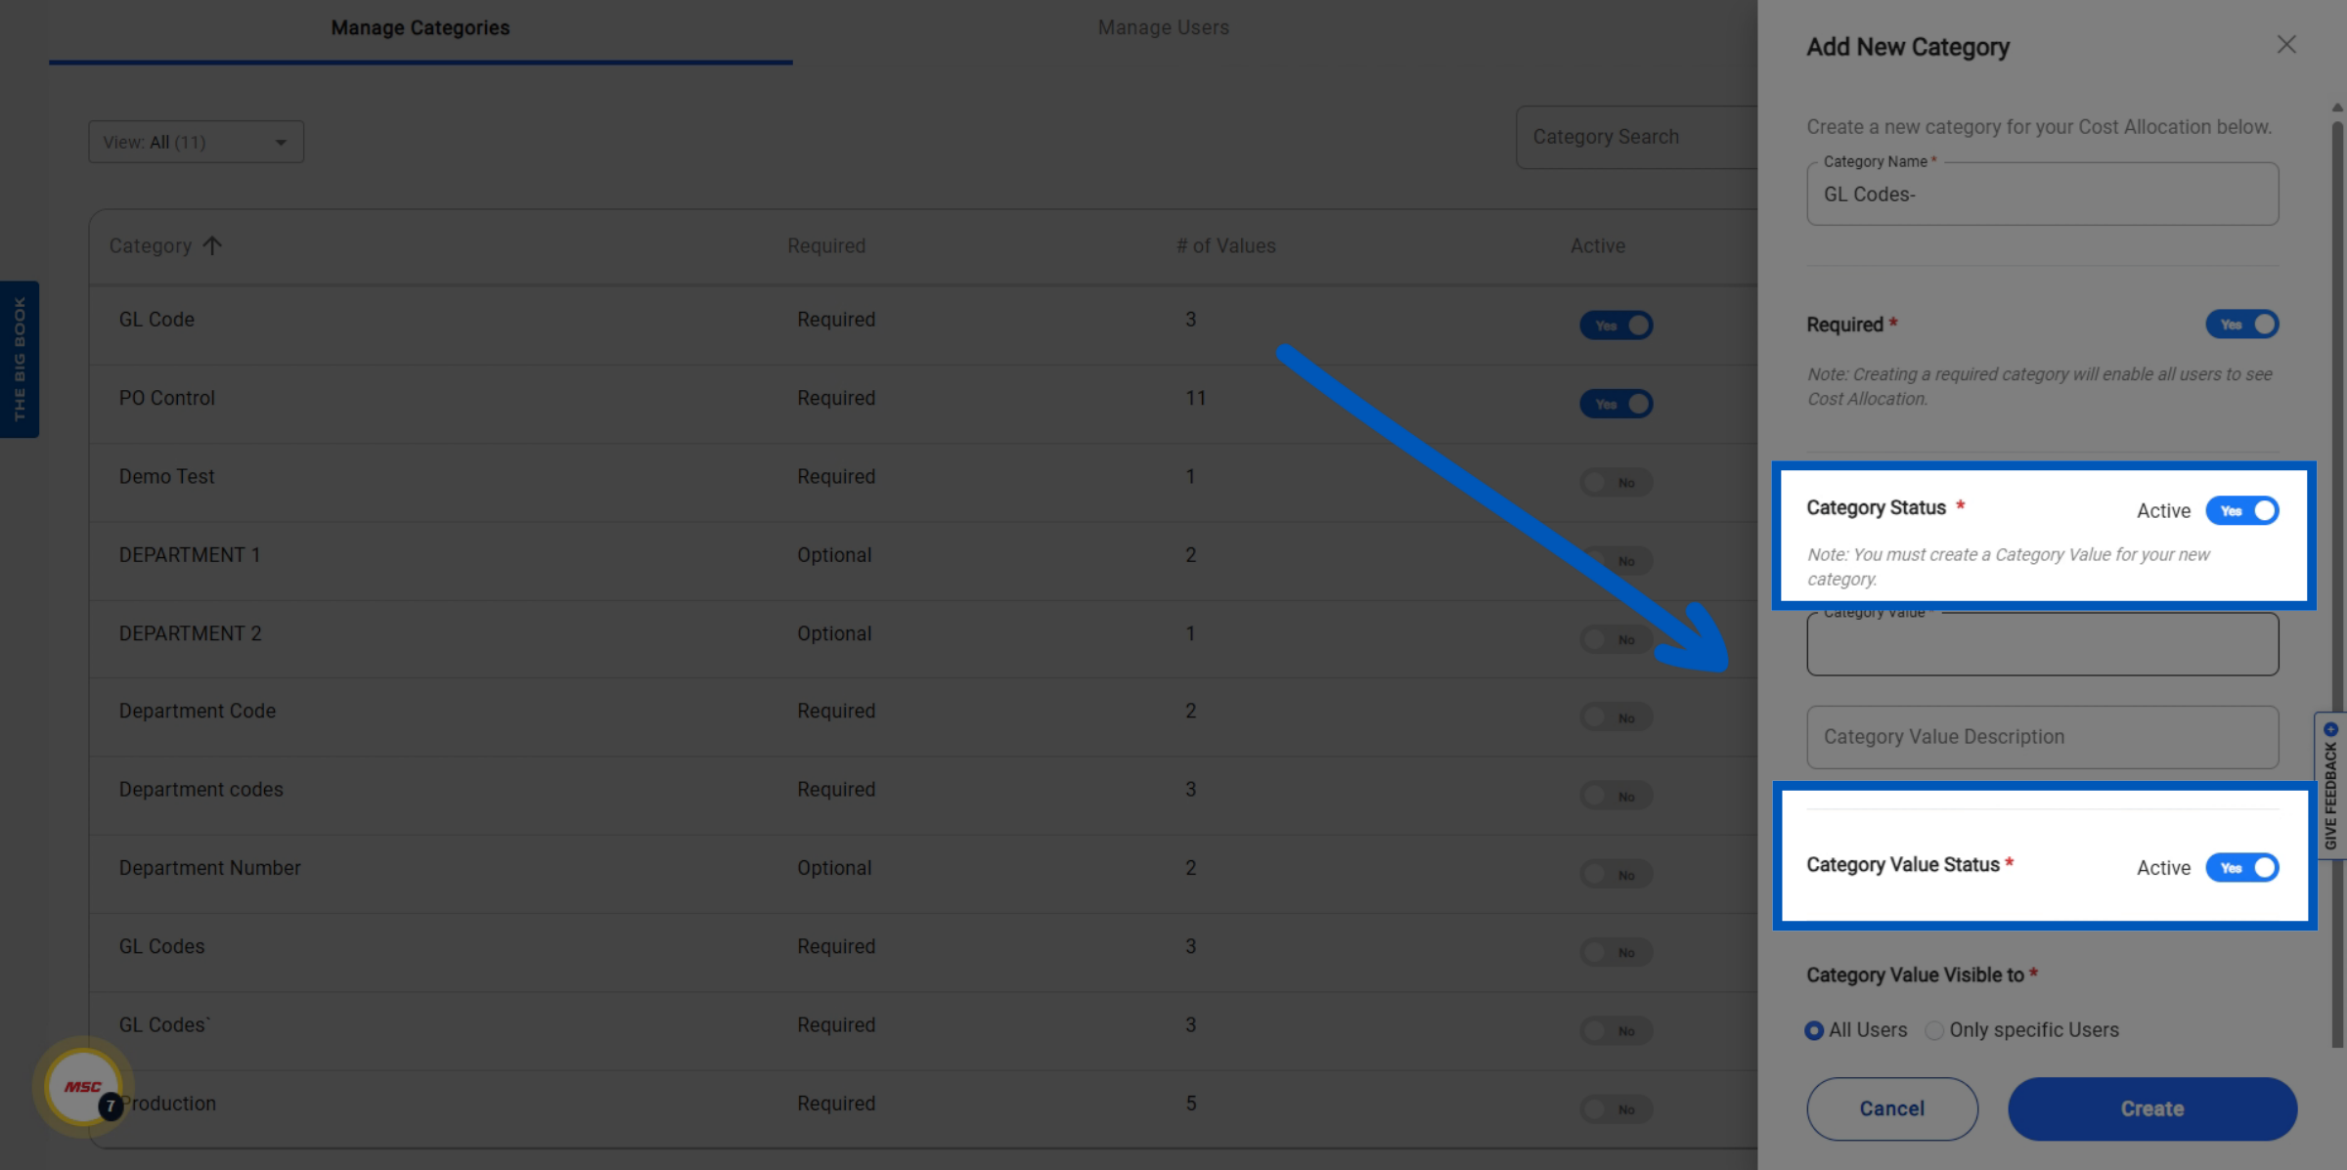
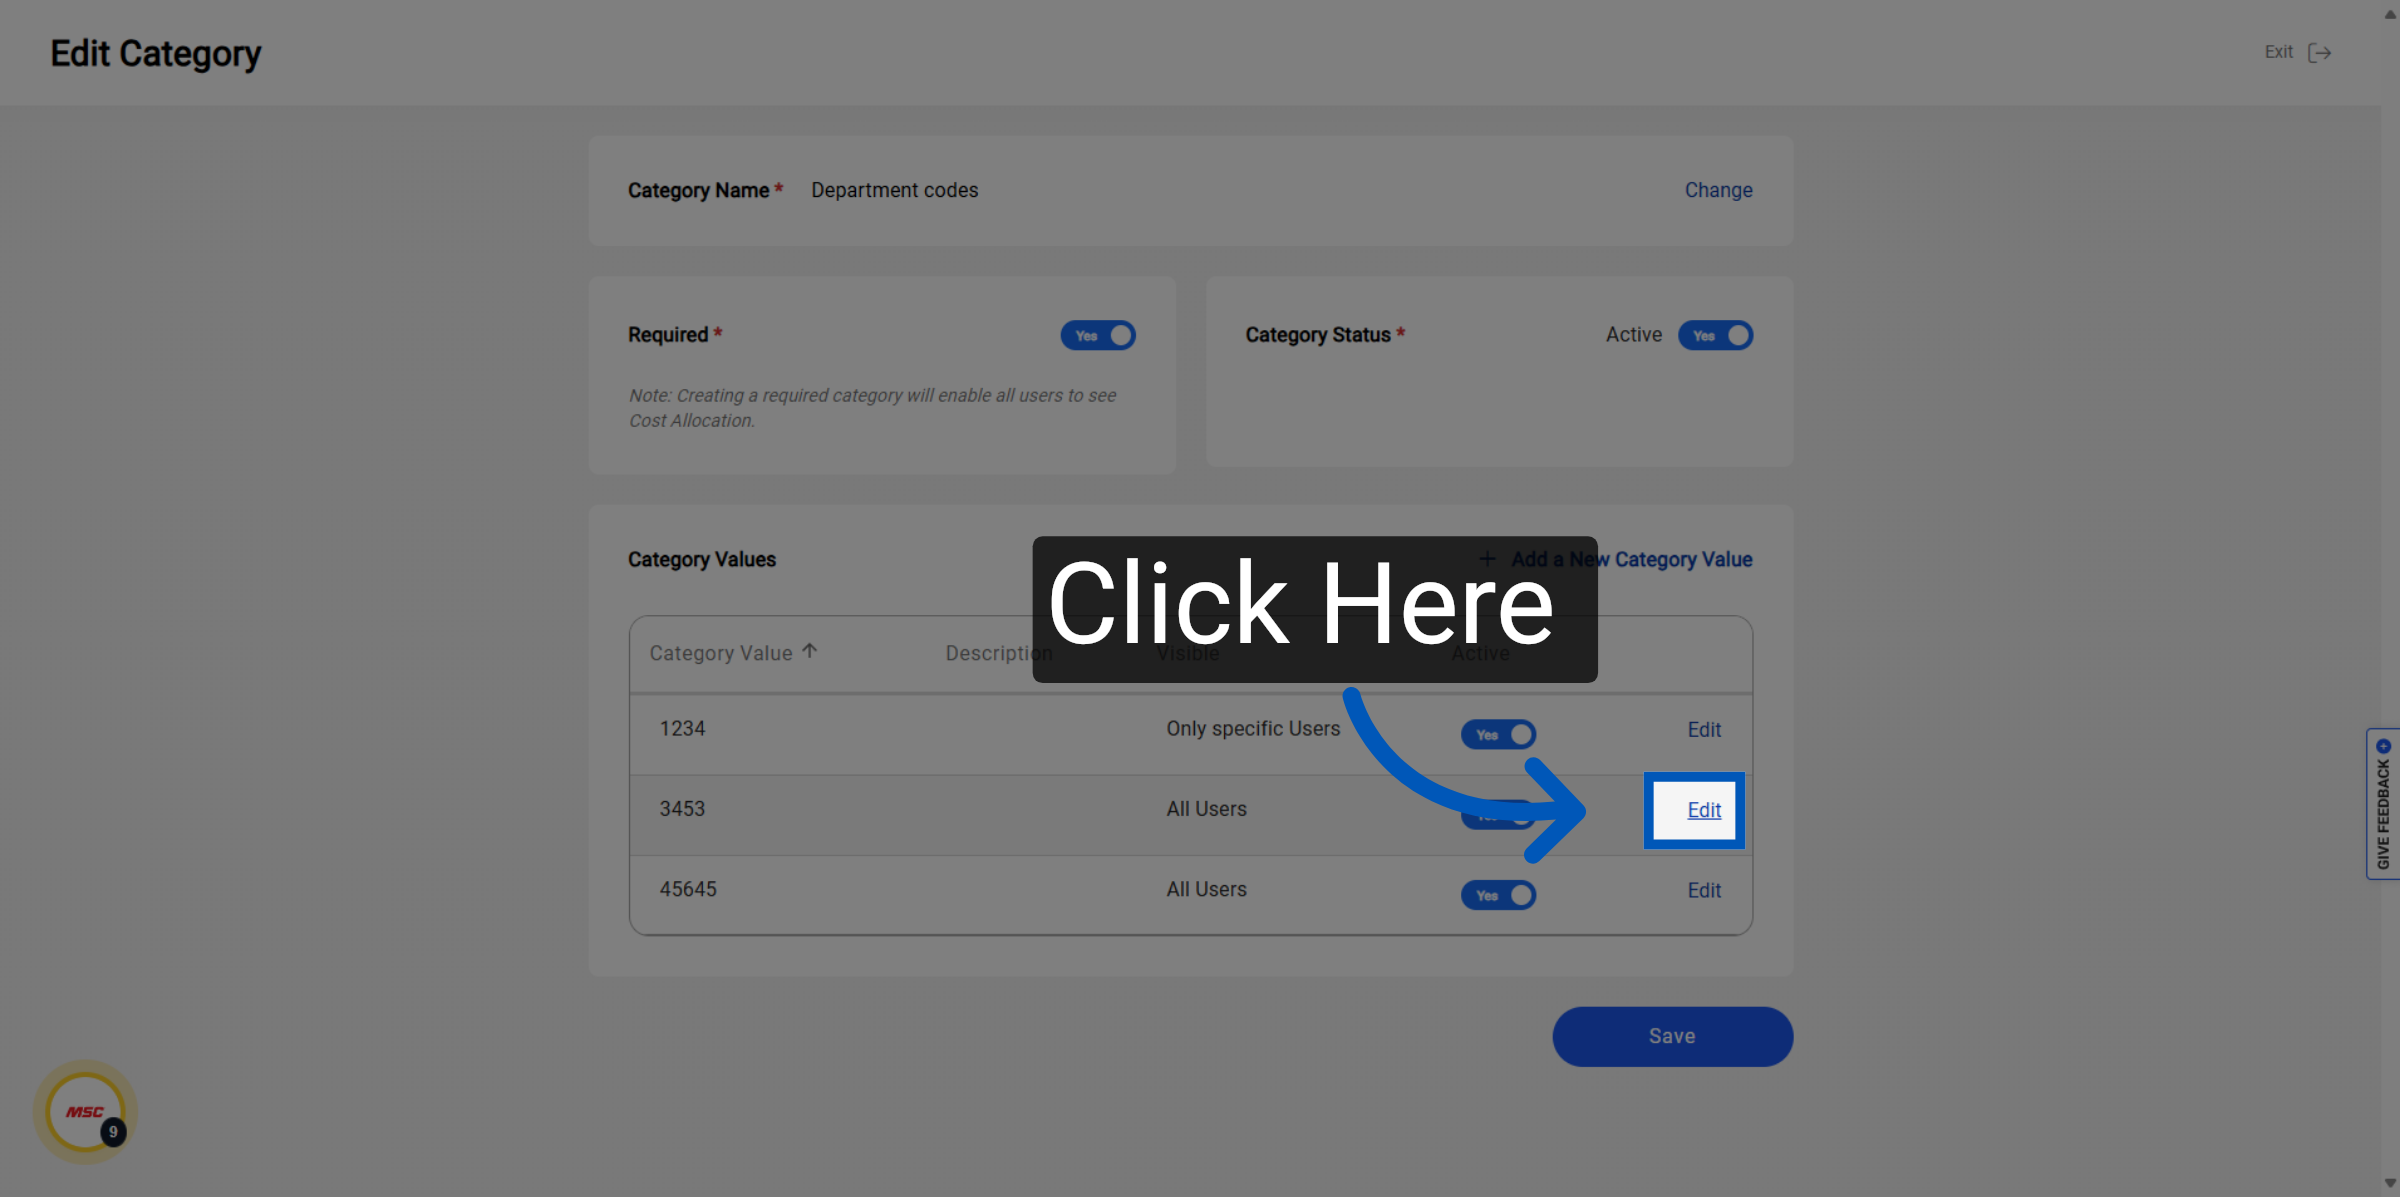
Click the Edit button to modify an existing category.
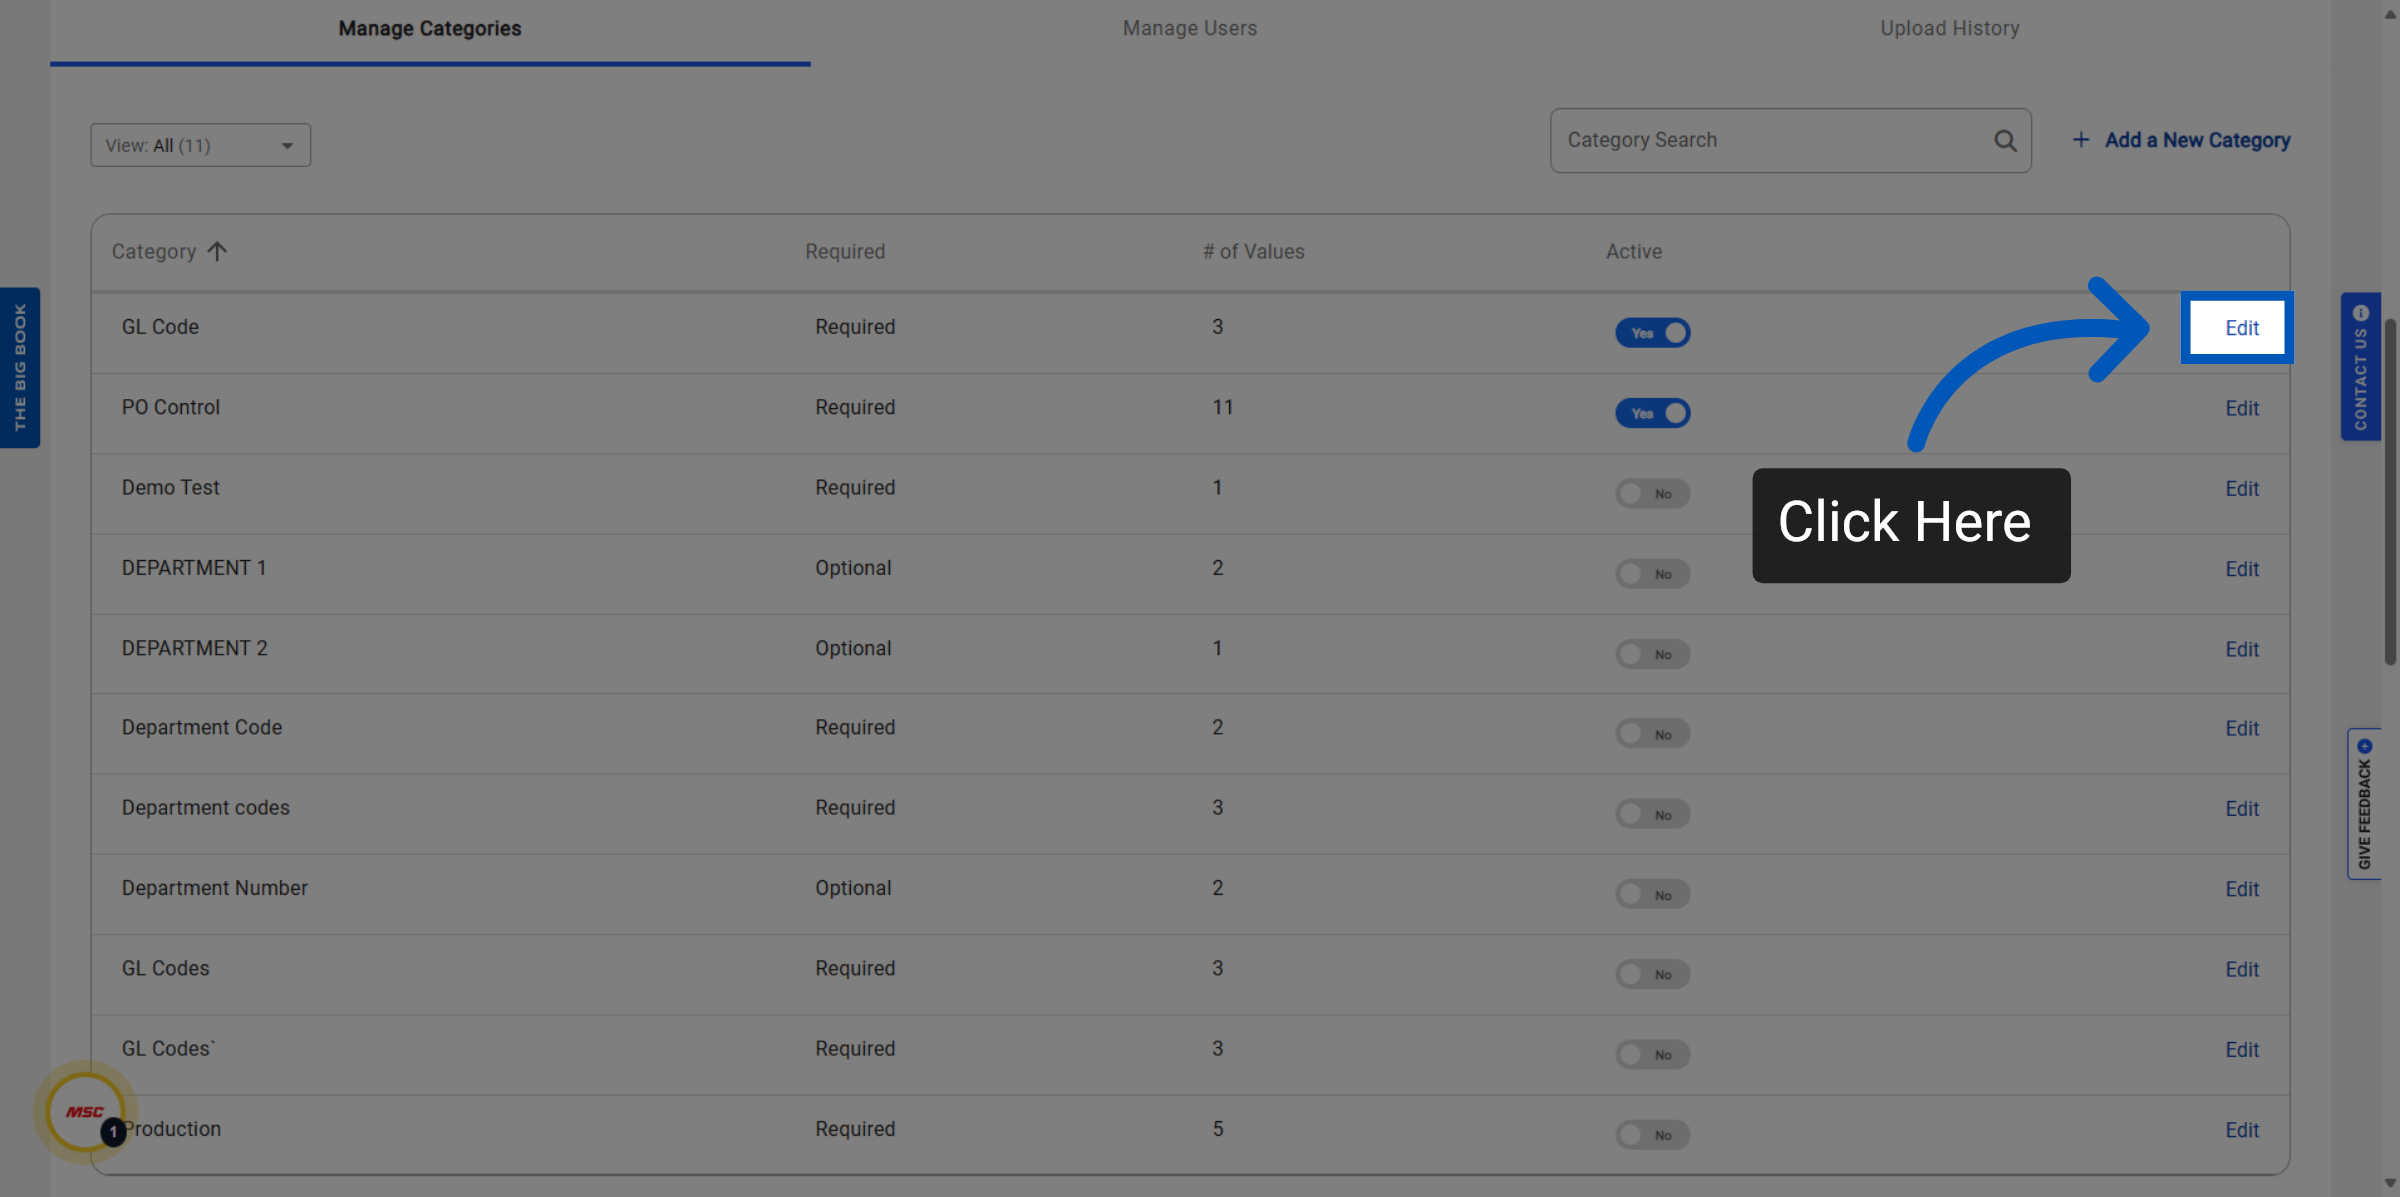
From here you will be able to toggle various settings, assign specific values to certain users, and add new values.
Section 2: Advanced Features
In this guide, we will explore advanced features within Cost Allocation Management. This will cover category visibility, user management, and the Category Append Required function, detailing how these features can be configured and used to control cost allocation processes for departments and users.
From the "Your Account" page, navigate to Cost Allocation Management under the People and Purchasing section.
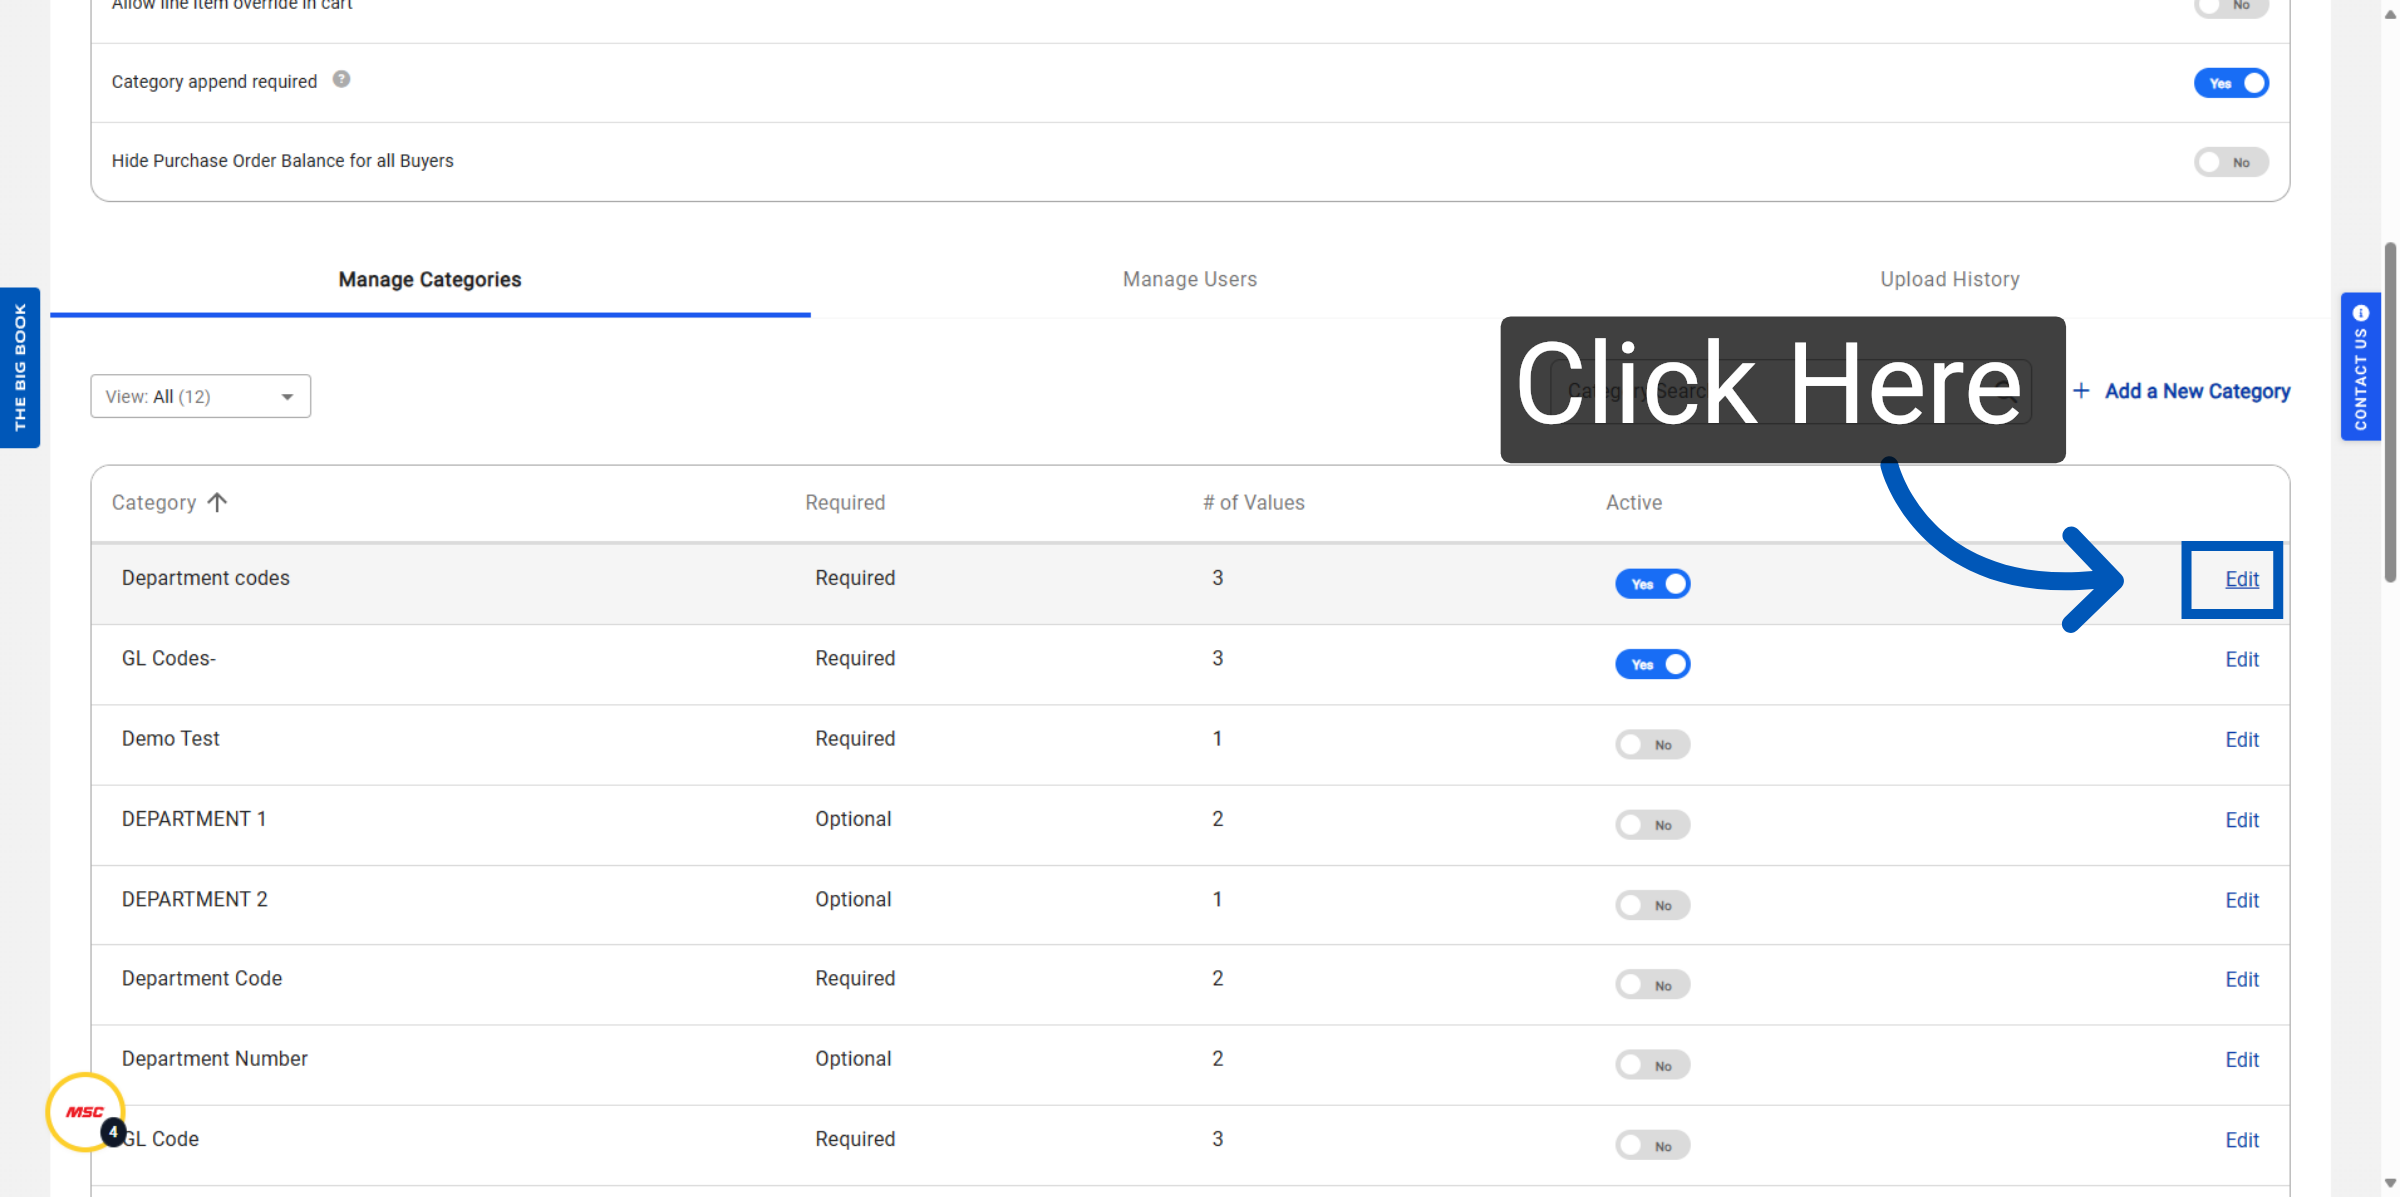
The first feature we are going to cover is how to view and edit the visibility of category values. Categories can be set to be visible to all users or restricted to specific users by editing the category value and saving the changes. While in the Manage Categories tab, click the 'Edit' button to modify settings for a specific category value.
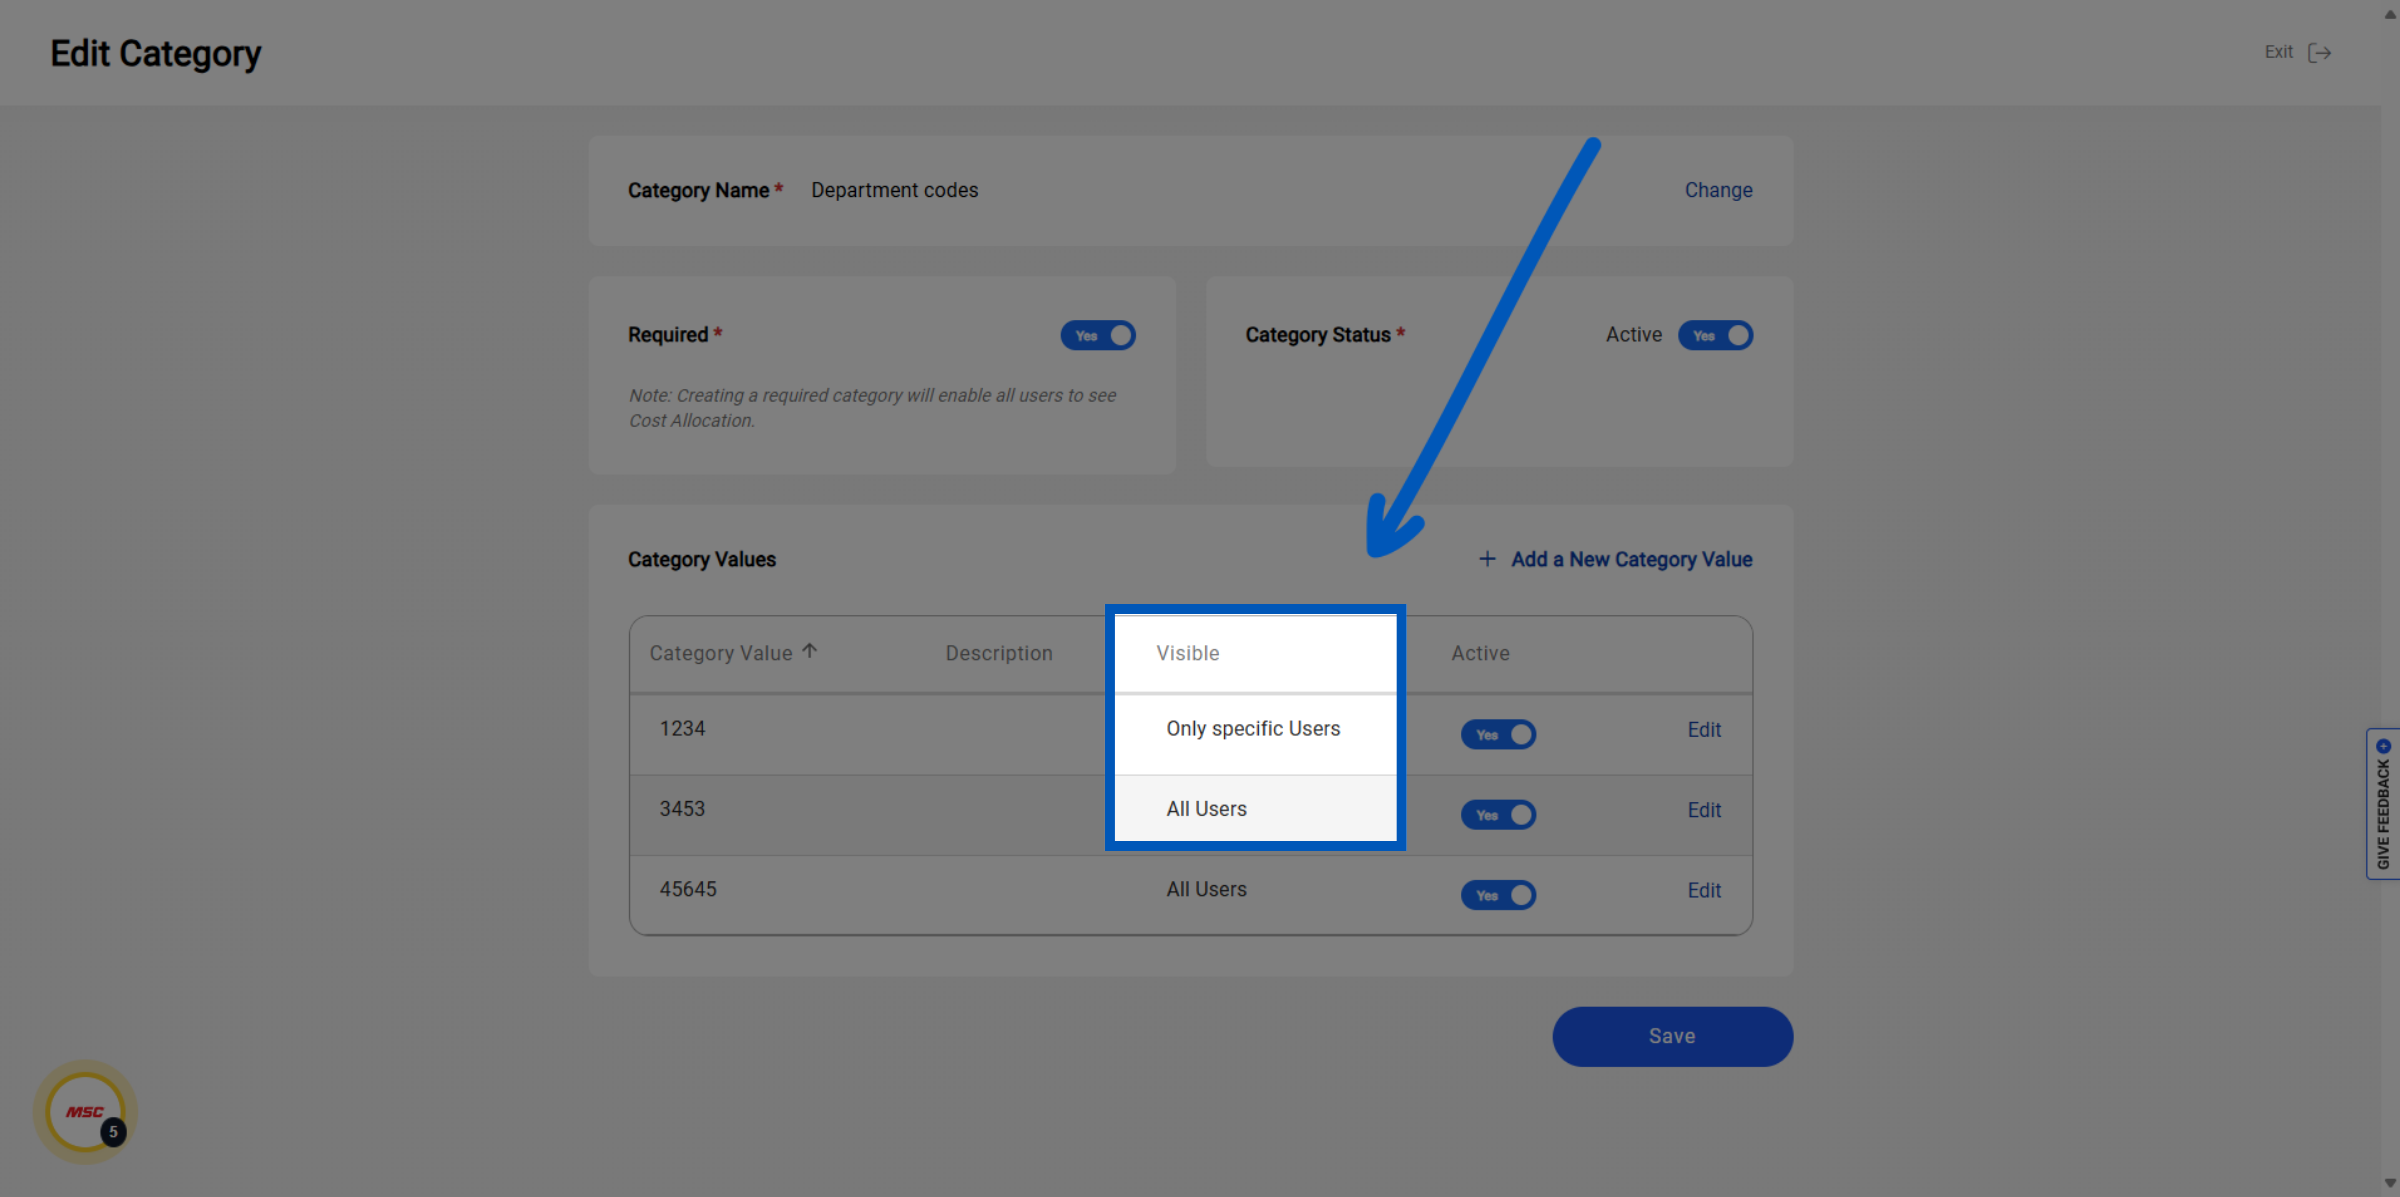
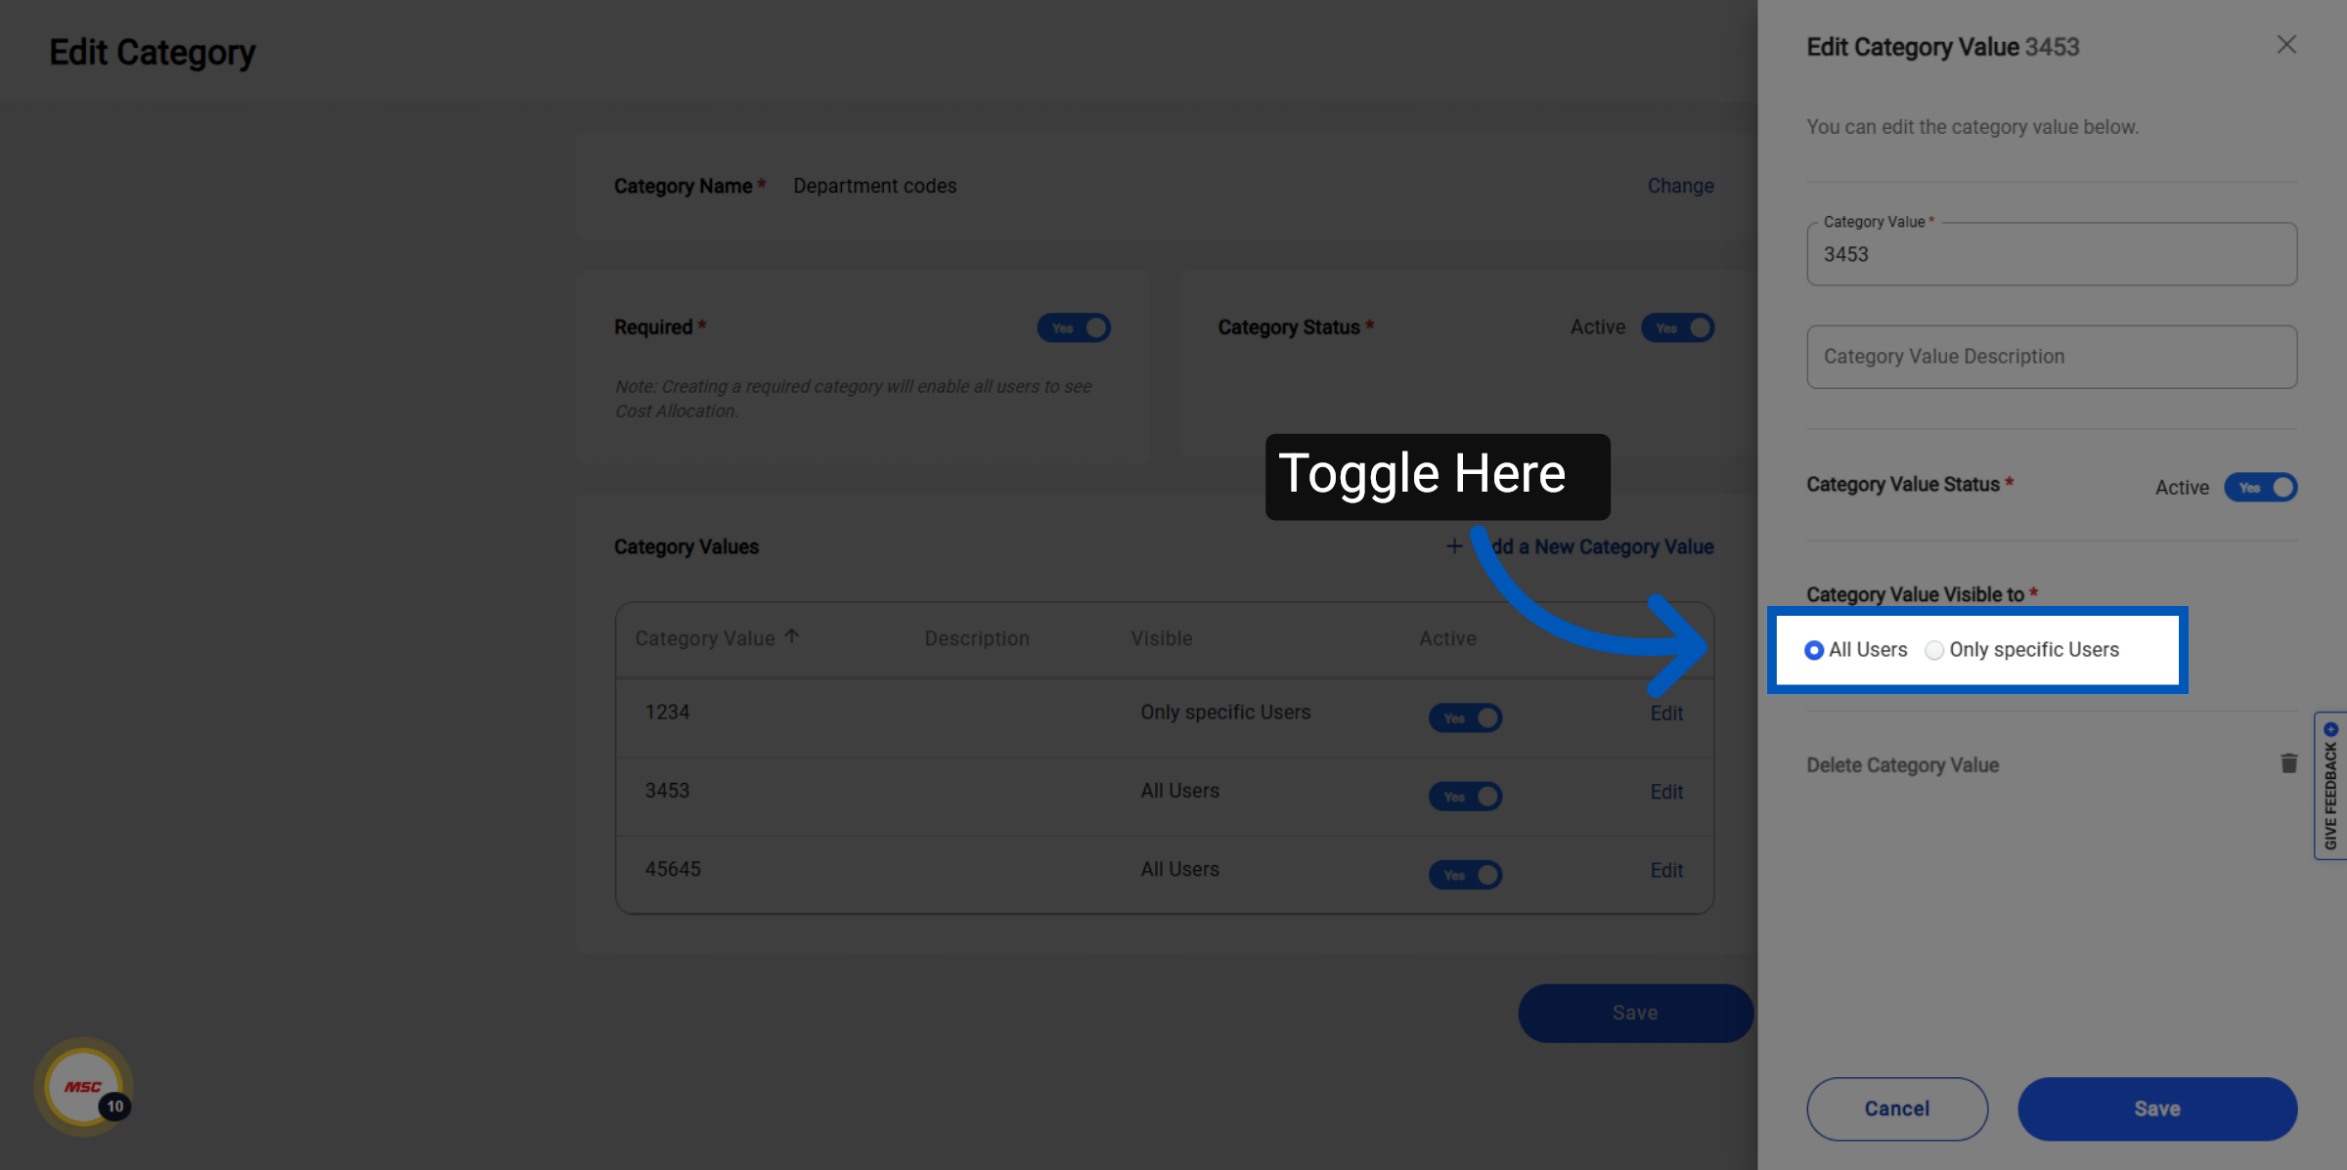
There are two options for visibility:
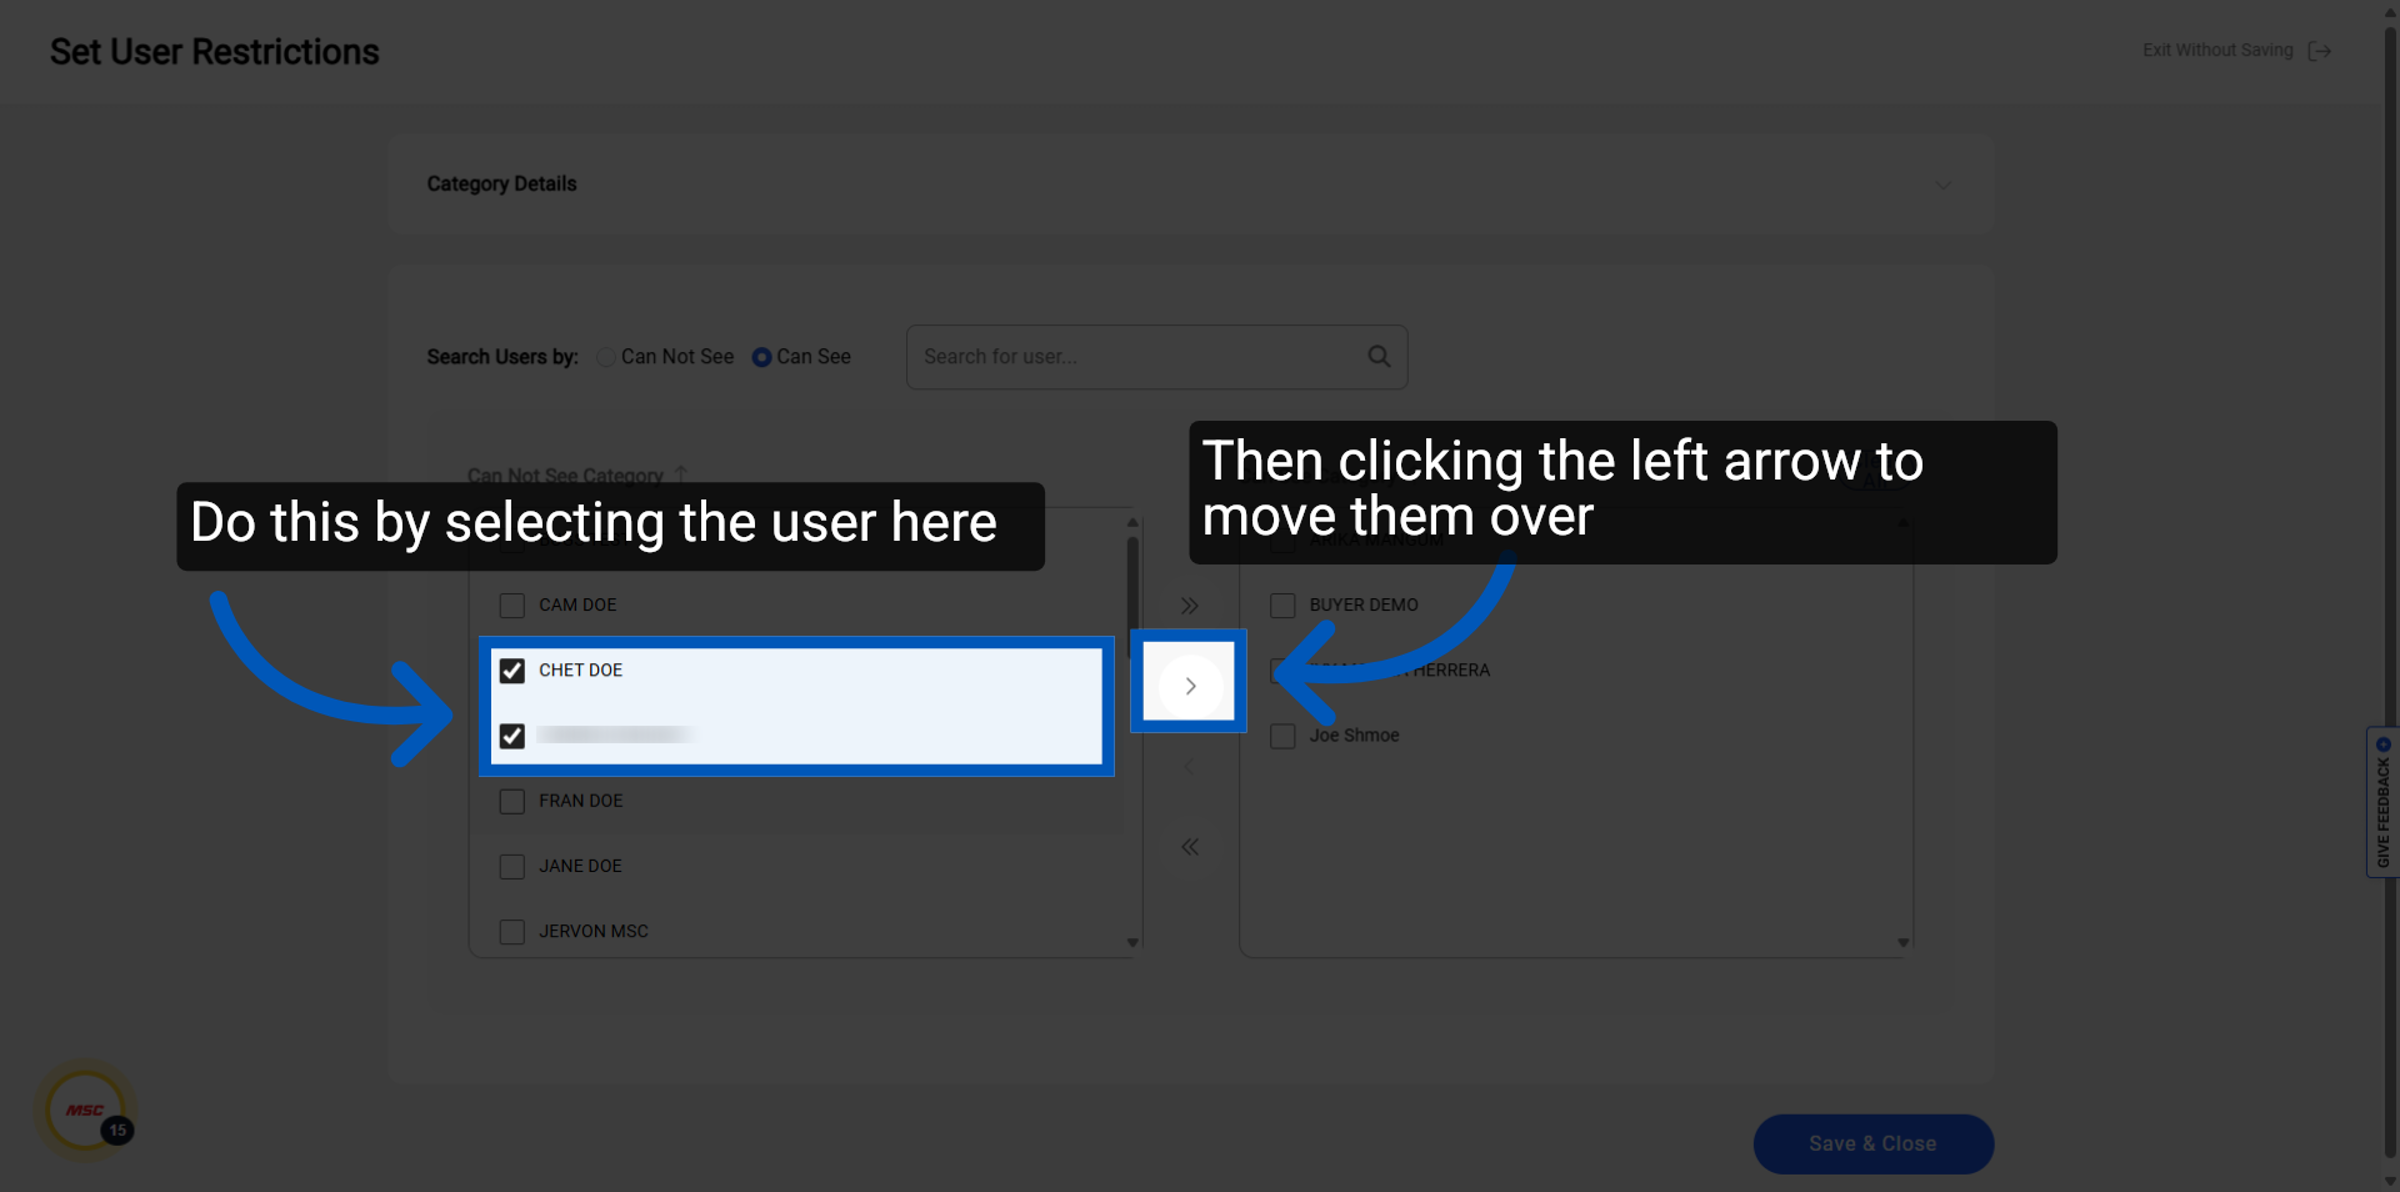
Only Specific users - which will allow you to pick and choose who can see the value.
All Users - Which will not restrict the user at all.
Click 'Edit' to change the visibility settings on the value you would you like to change.
From here you will need to select which visibility setting you want.
If you select "Only specific users" you will need to move contacts from "cannot see" to "can see".
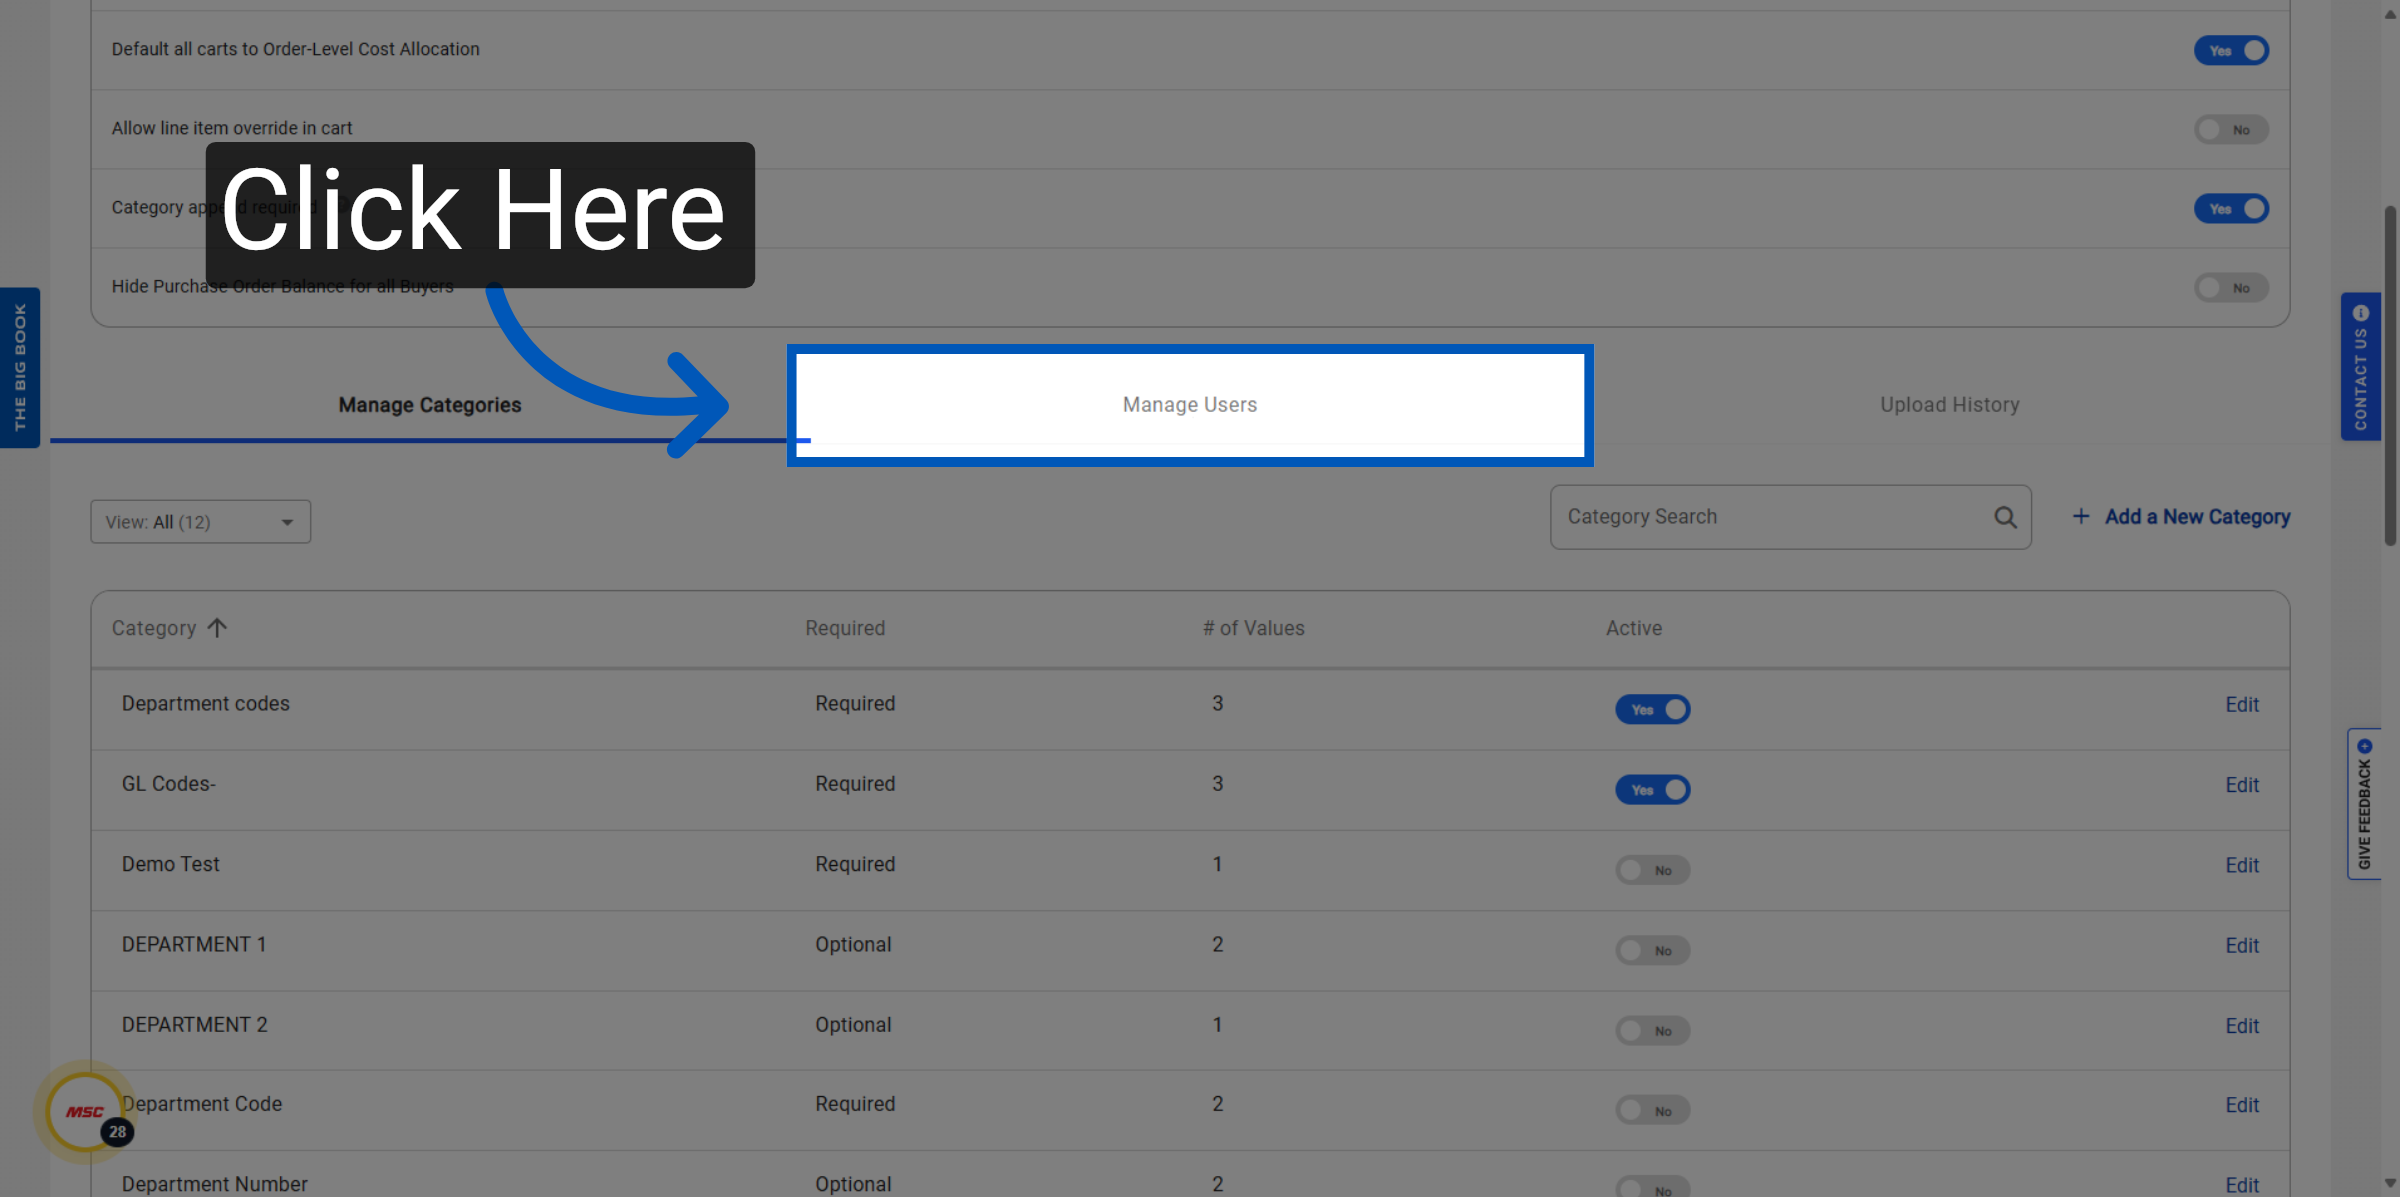
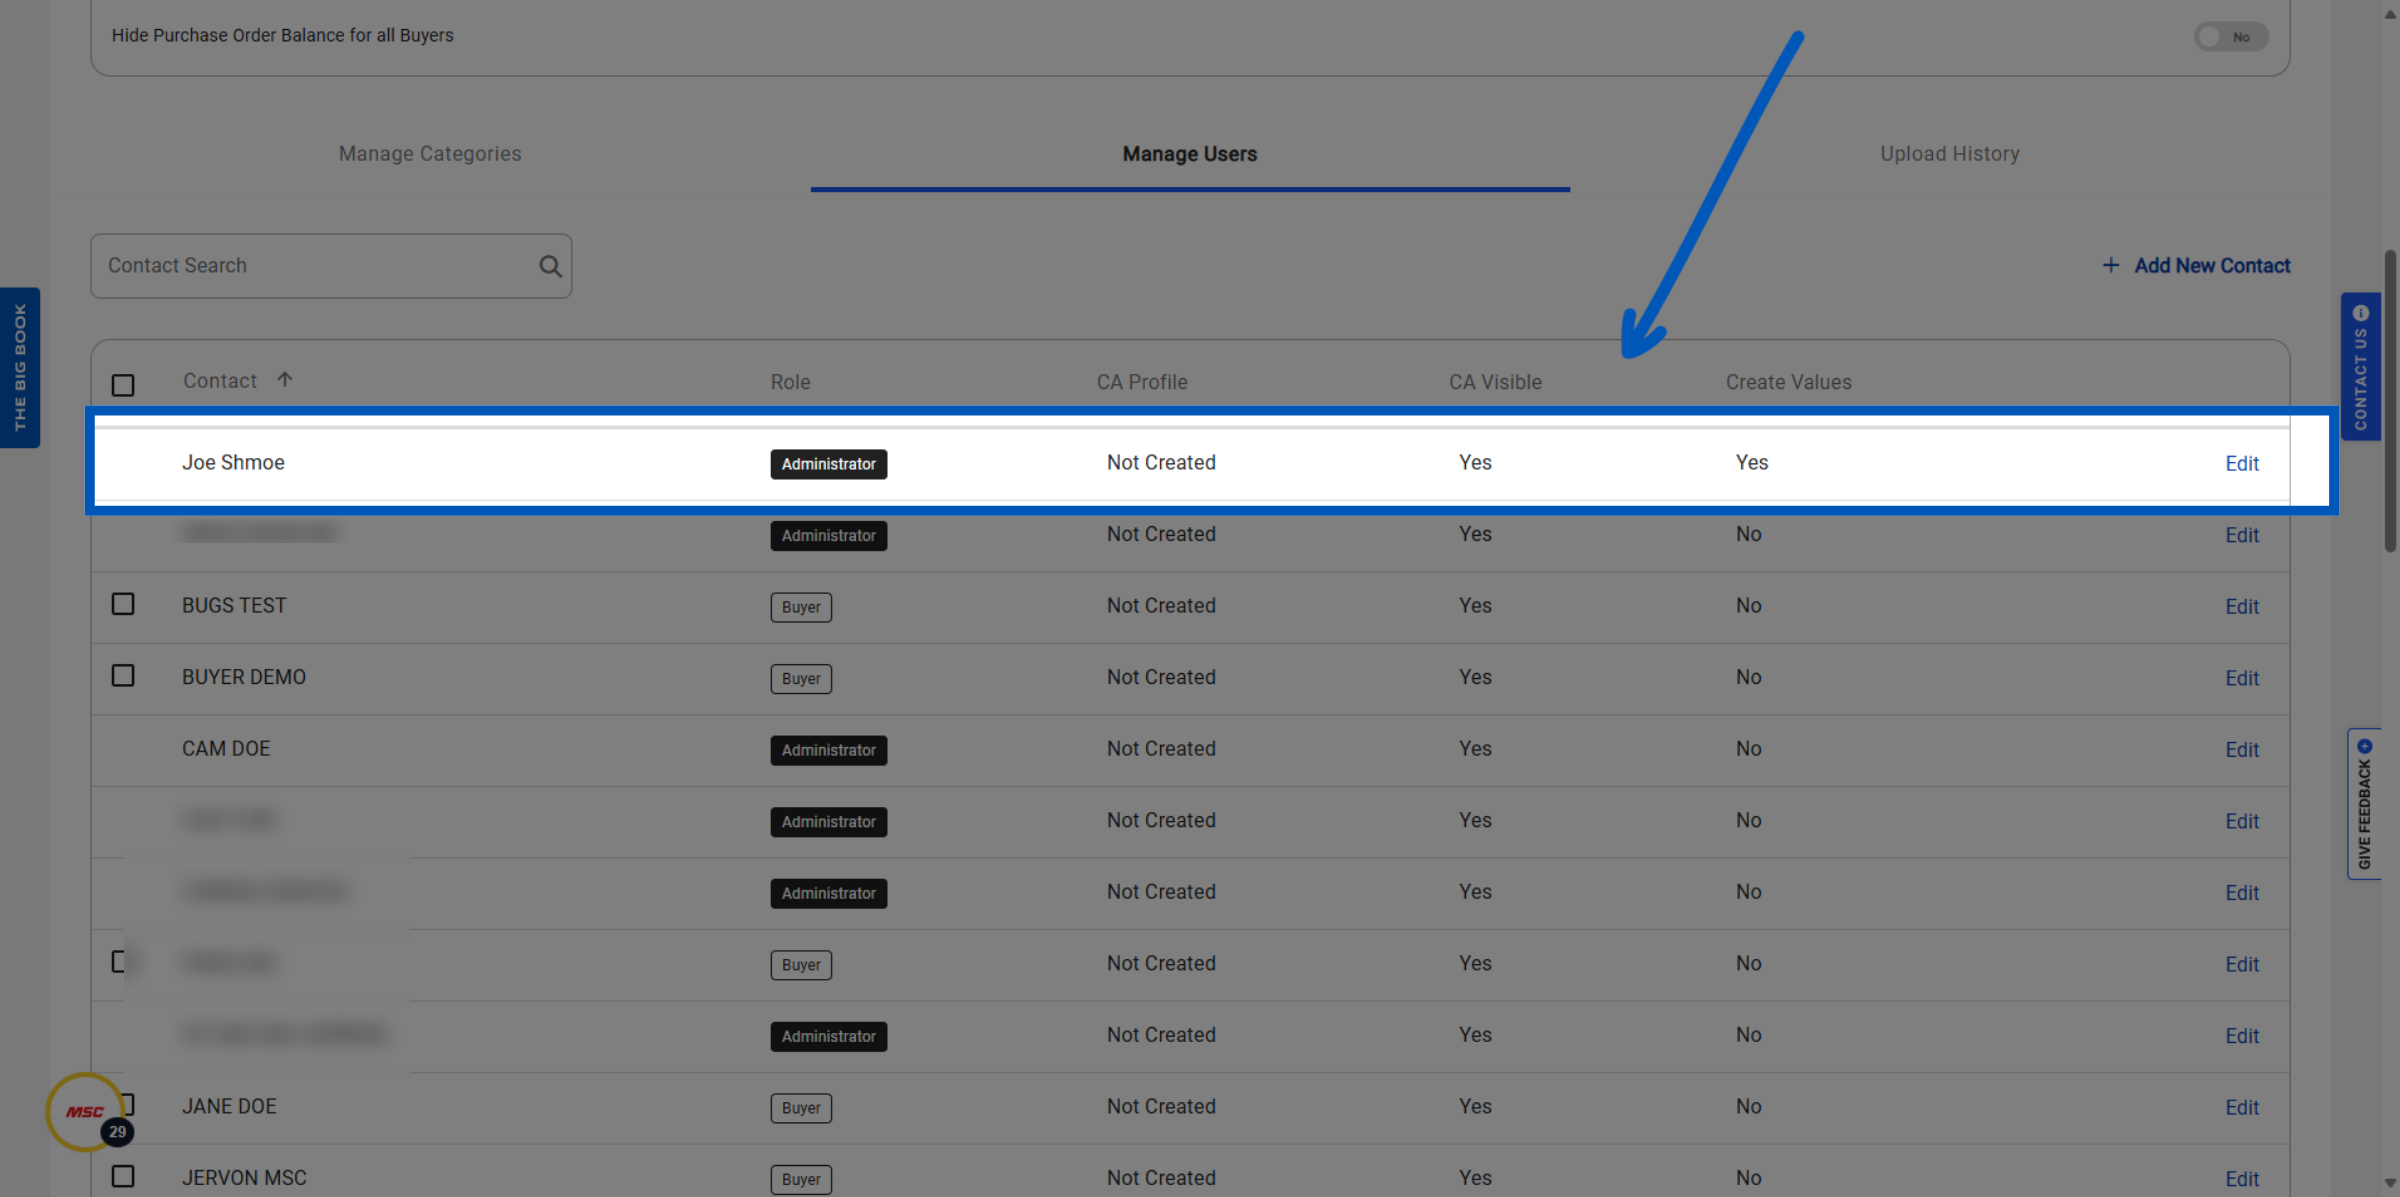
The next feature we will discuss is user management. Here, you can view and manage contacts, their roles, cost allocation profiles, and permissions for creating new values. We will also explain how to edit a contact's visibility settings and assign cost allocations that automatically apply to all orders placed by that user. Click 'Manage Users' to access user management settings.
This is where you will be able to view the contact name, role, cost allocation profile, visibility at checkout, and ability to create new values for each user. Click "Edit" next to a contact to change their settings.
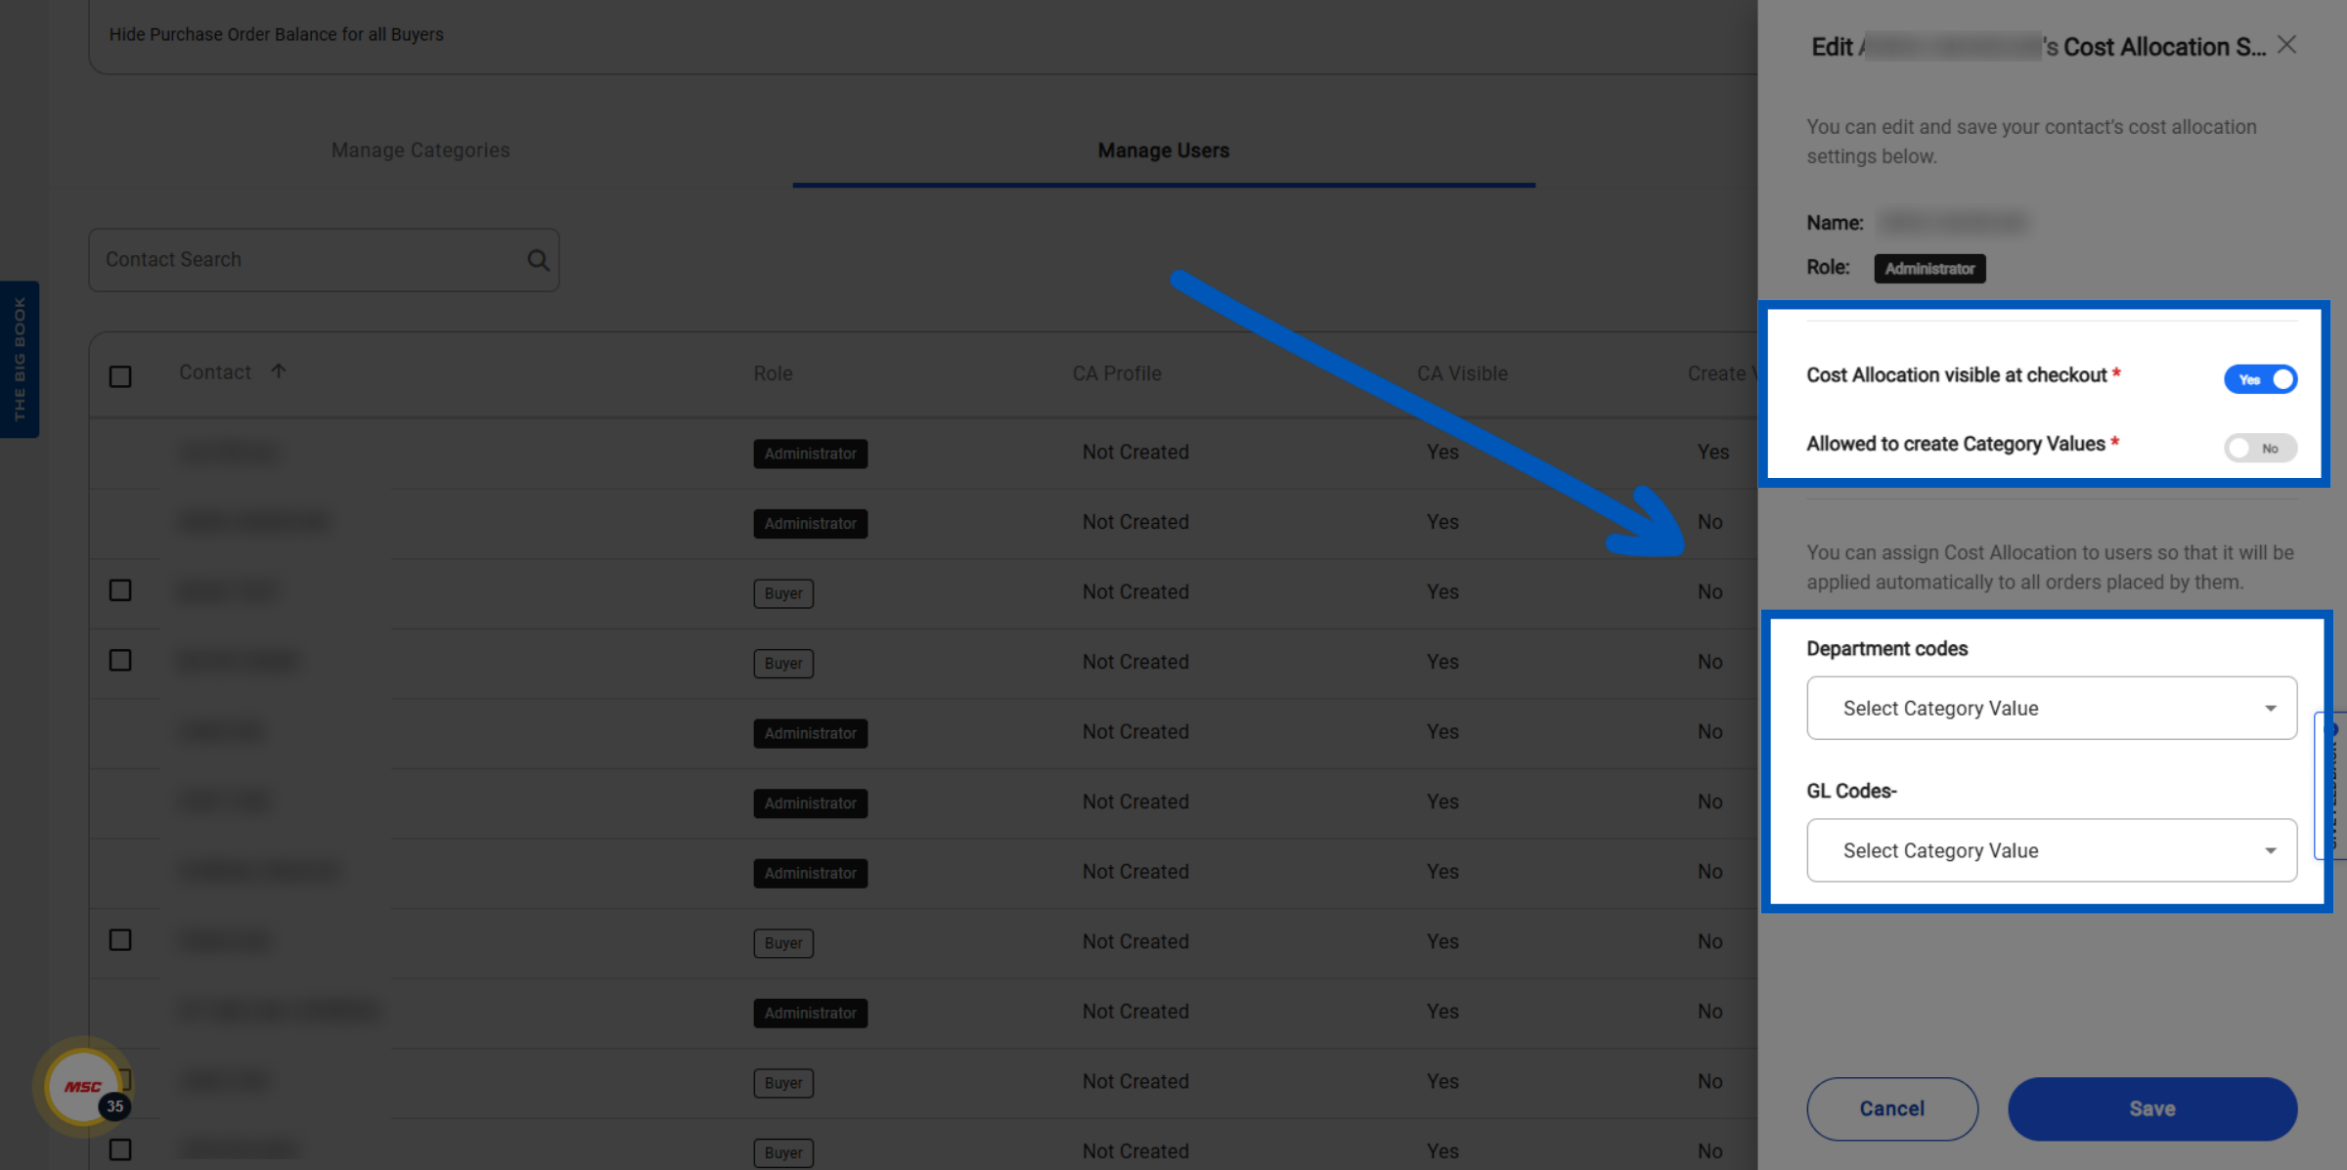
Click the toggle switch to enable or disable the cost allocation visibility and category creation permissions Also, Assign default values to a user for automatic application to their orders.
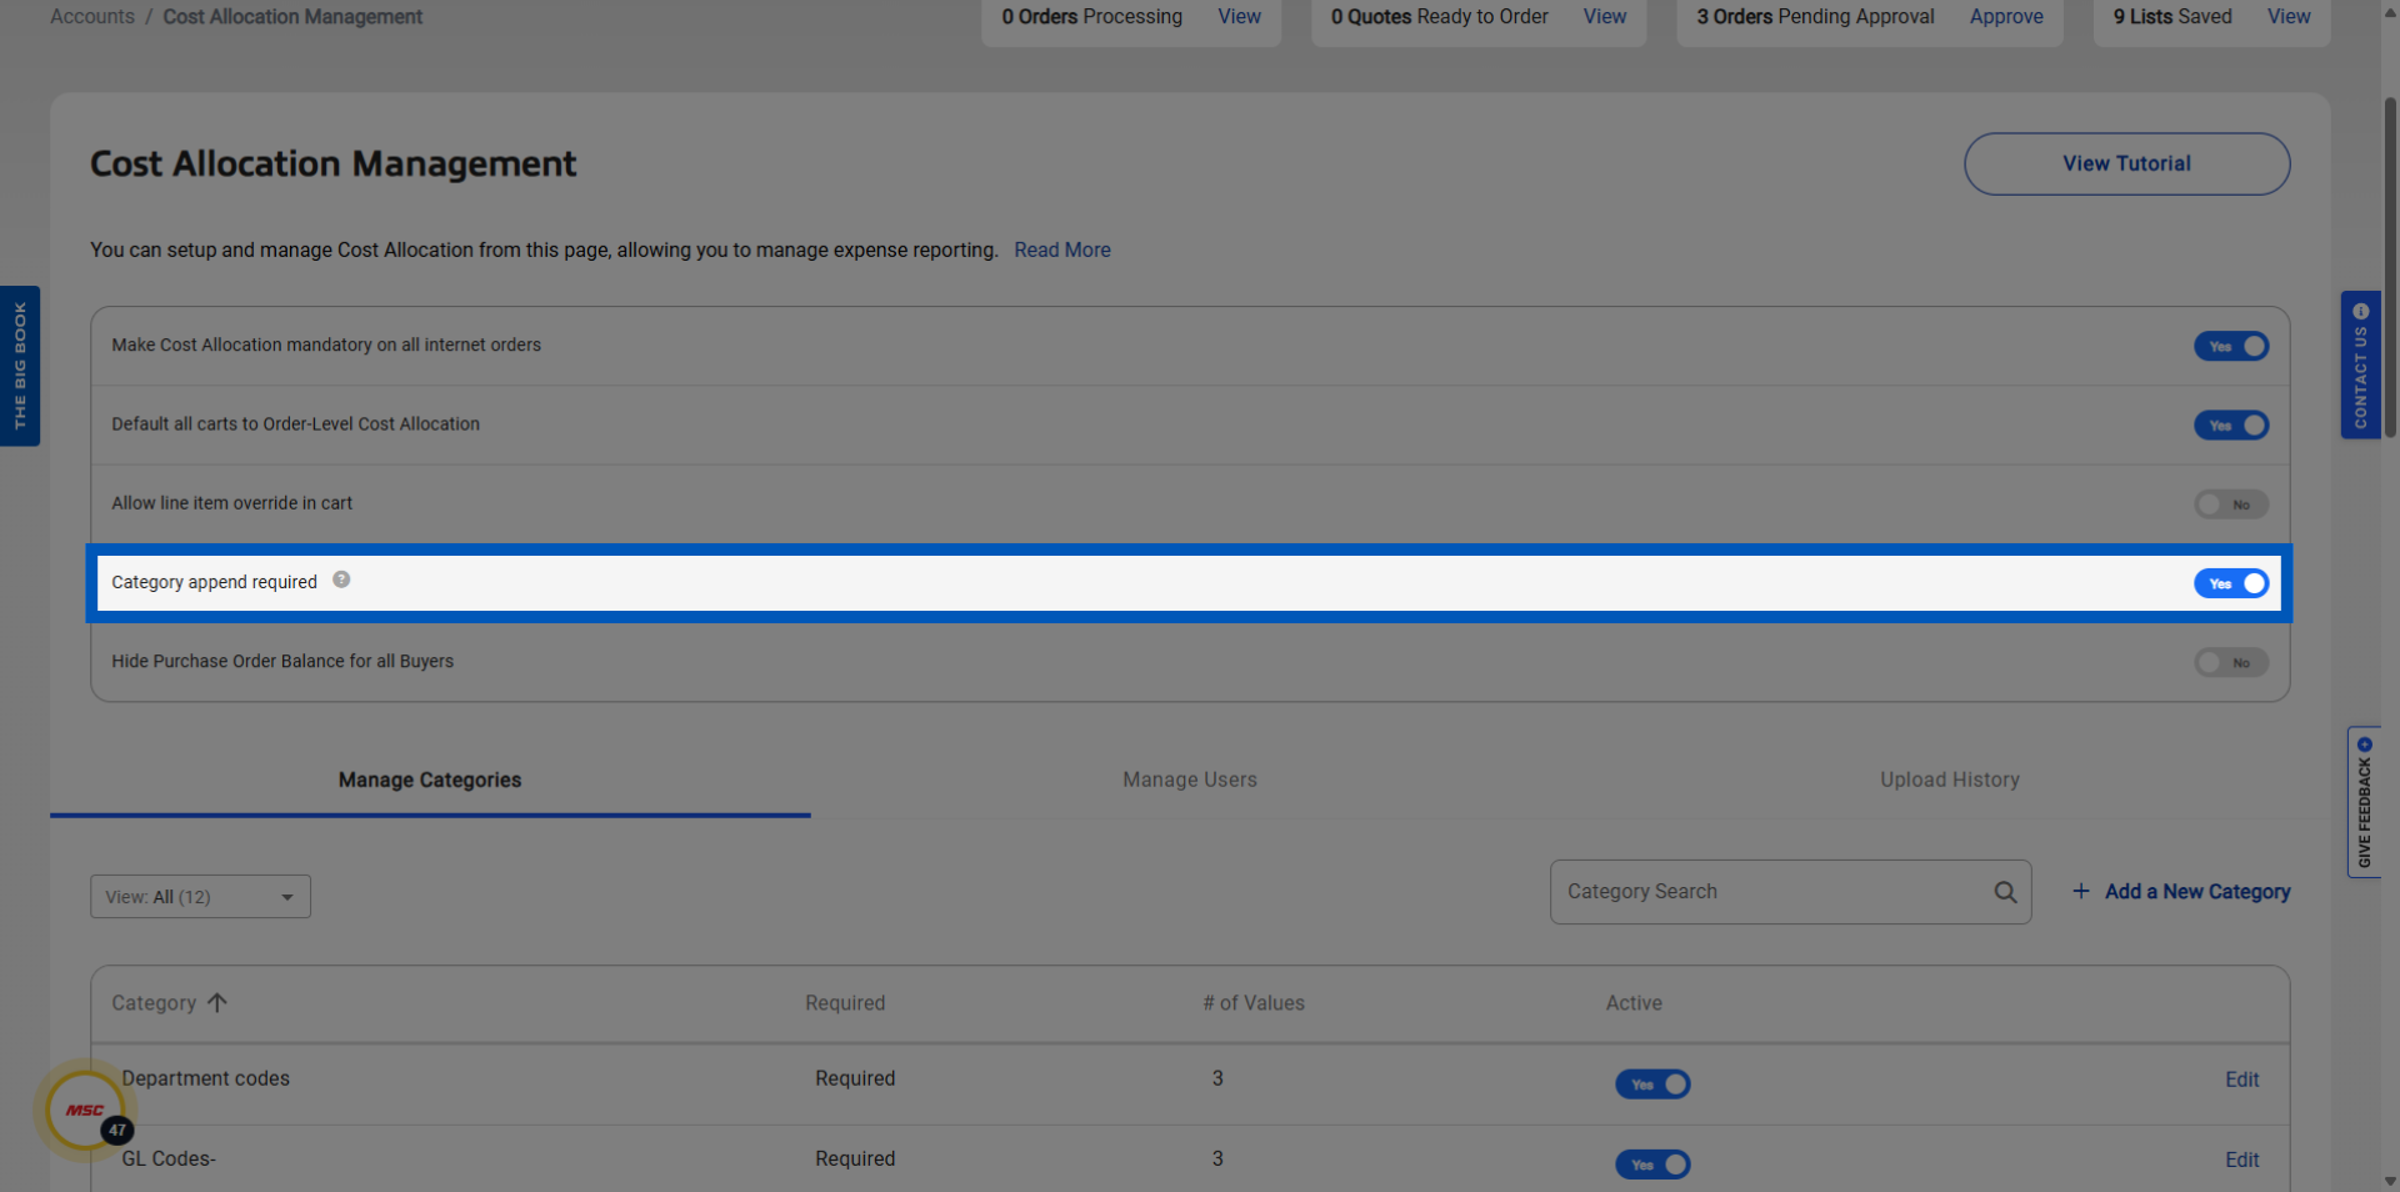
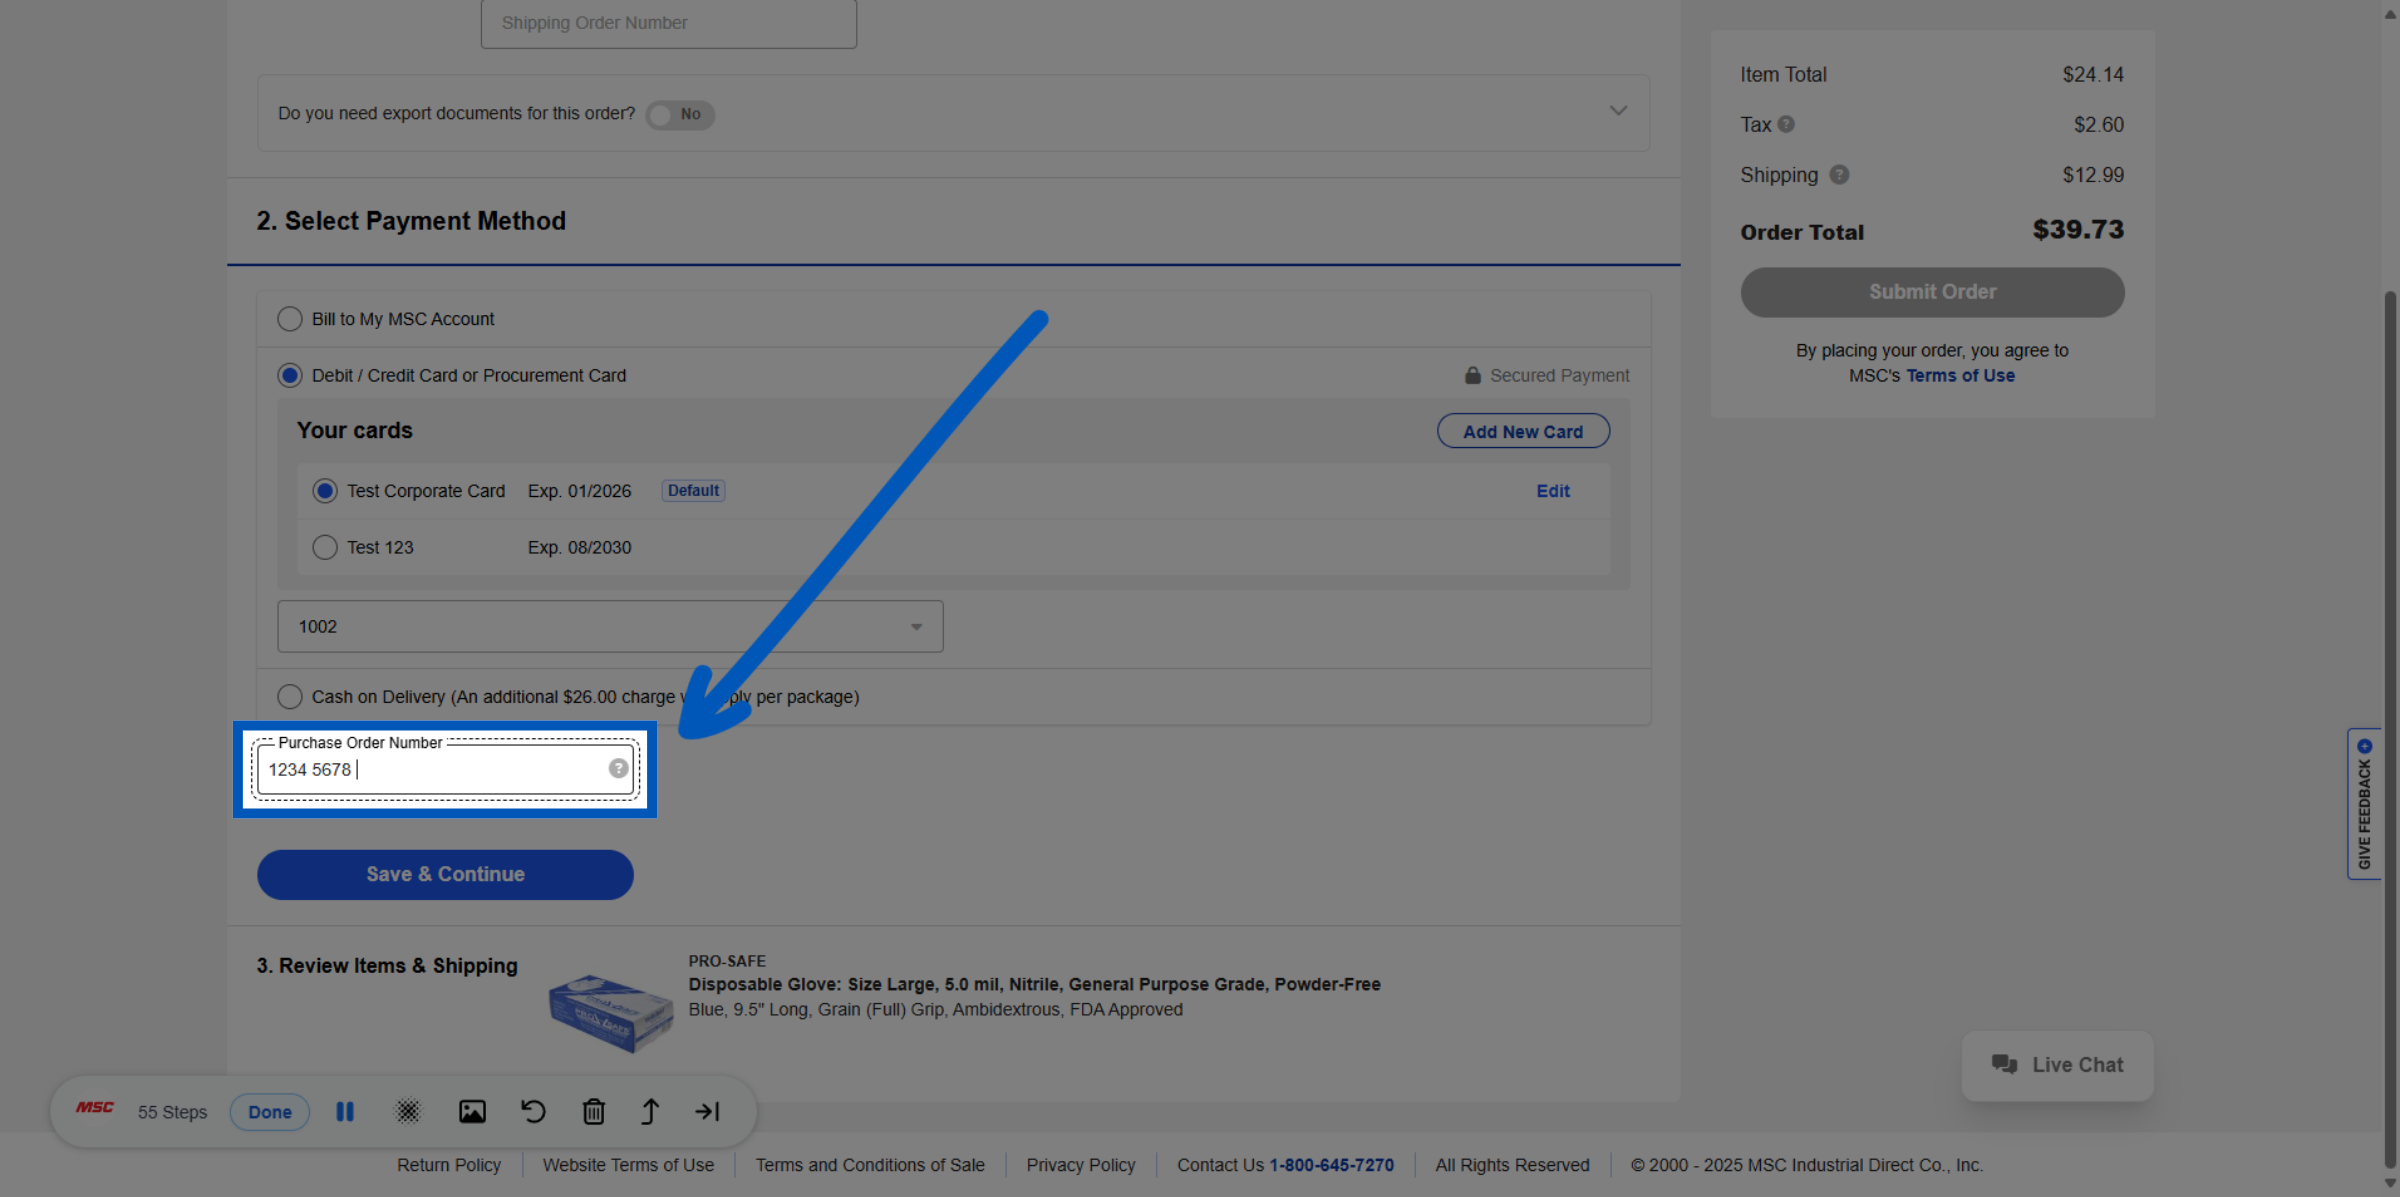
The final feature is merging two distinct categories, such as department codes and geocodes, during checkout. When enabled, this functionality generates a purchase order number that integrates both cost allocation values for the entire account. If you require this feature it will override the default values. Once you click "Yes, Continue" this feature will be enabled.
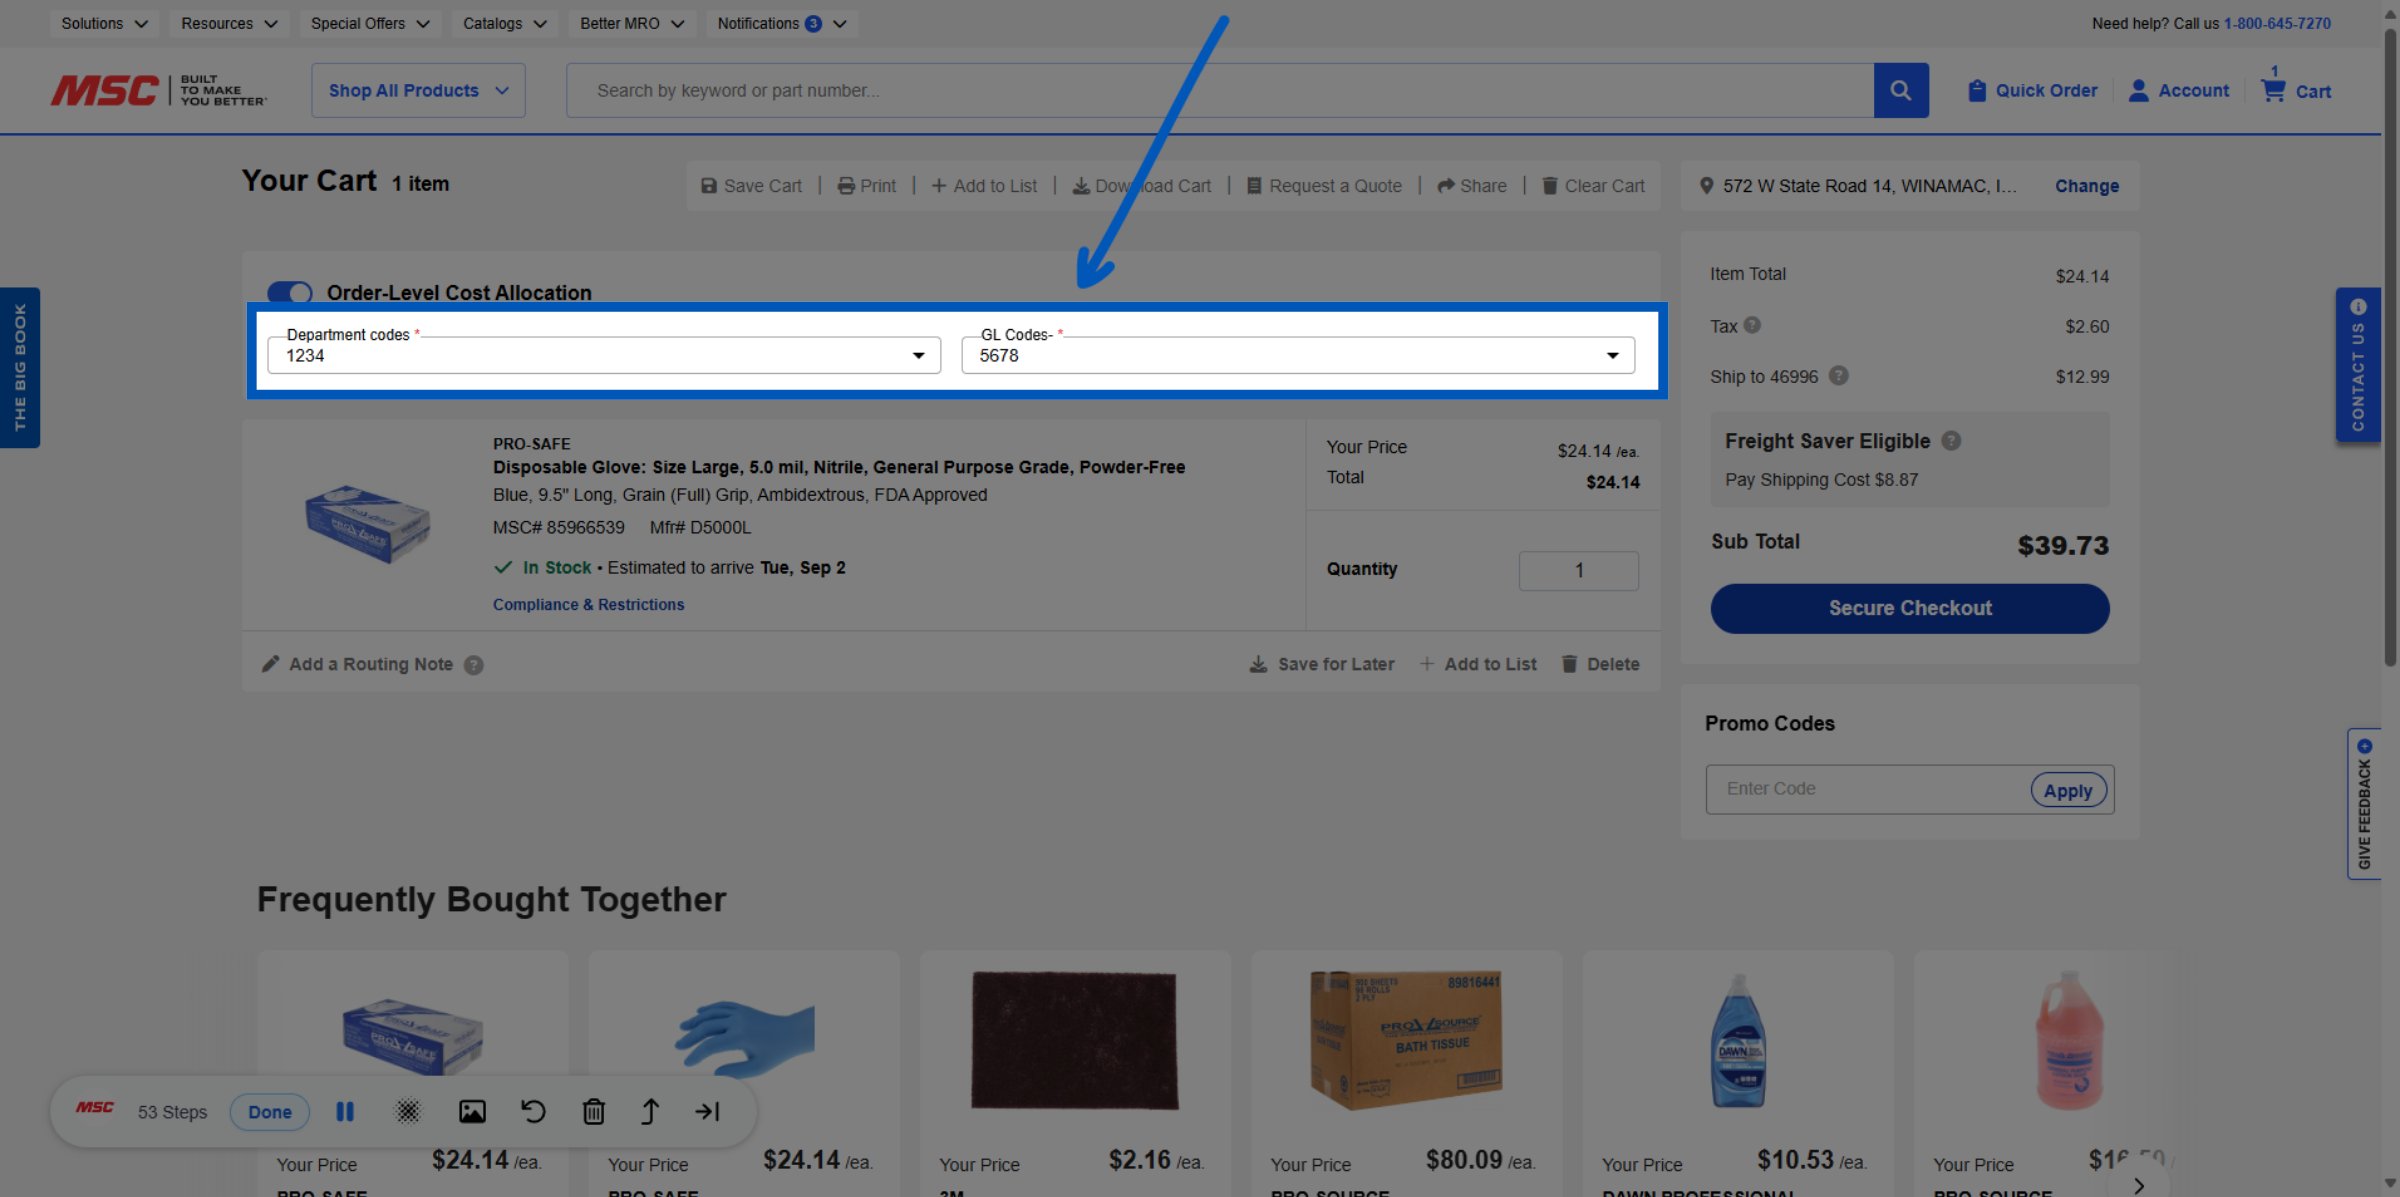
Once you have selected your values in cart....
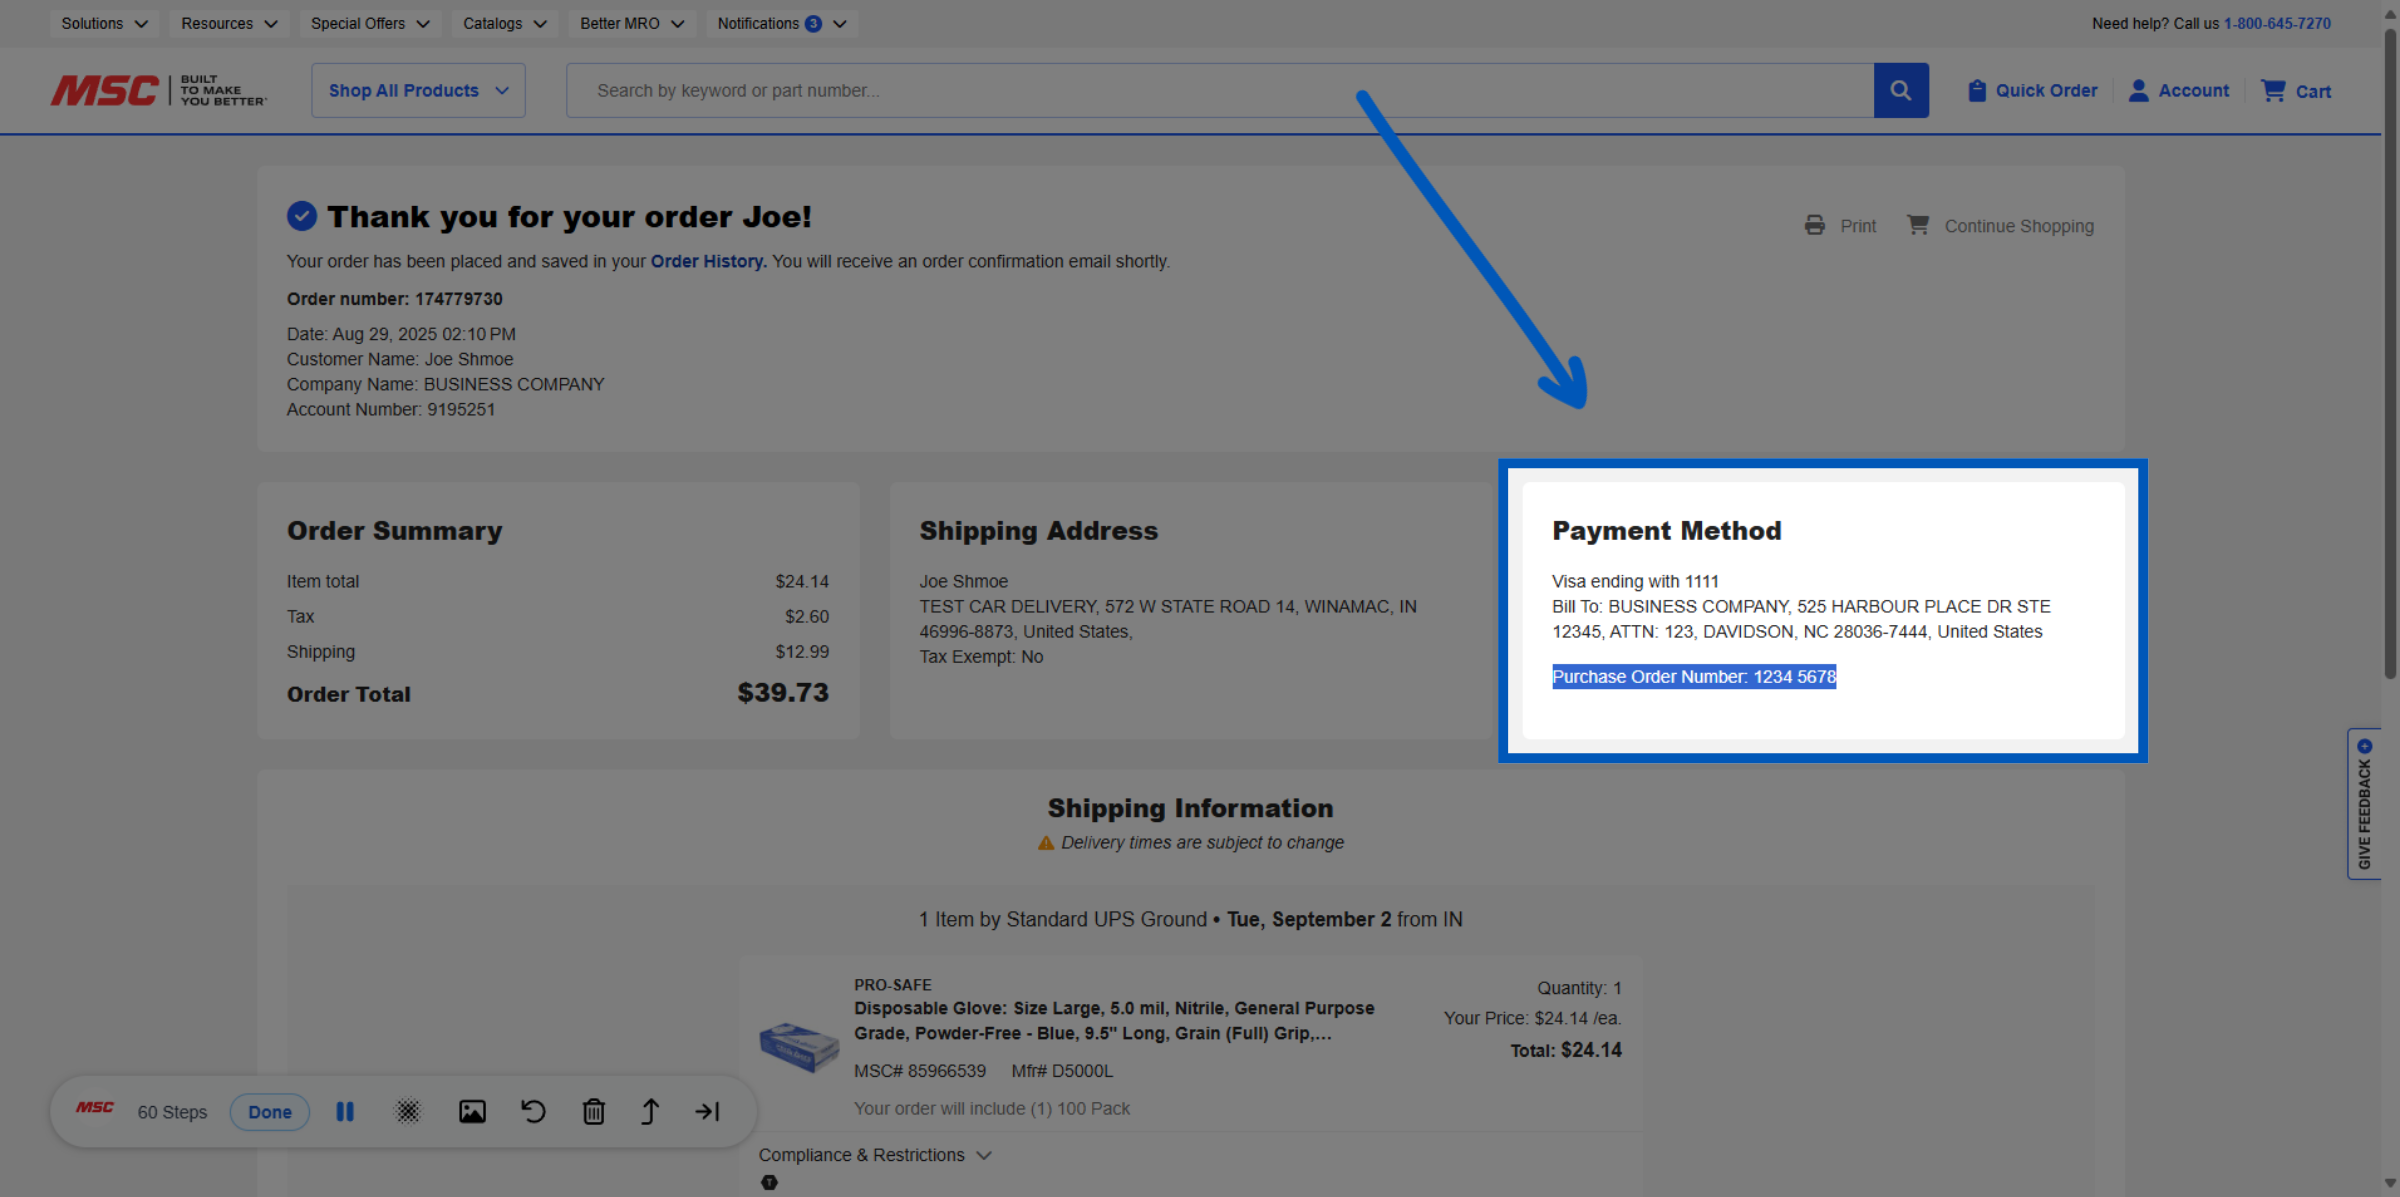
The purchase order number will show both category values combined
The order summary will also display the combined cost allocations.
Section 3: Applying Cost Allocation in Checkout
The training explains how to set and manage cost allocation categories and values for orders, with details shown in order documentation.
Detailed Step by Step Guide:
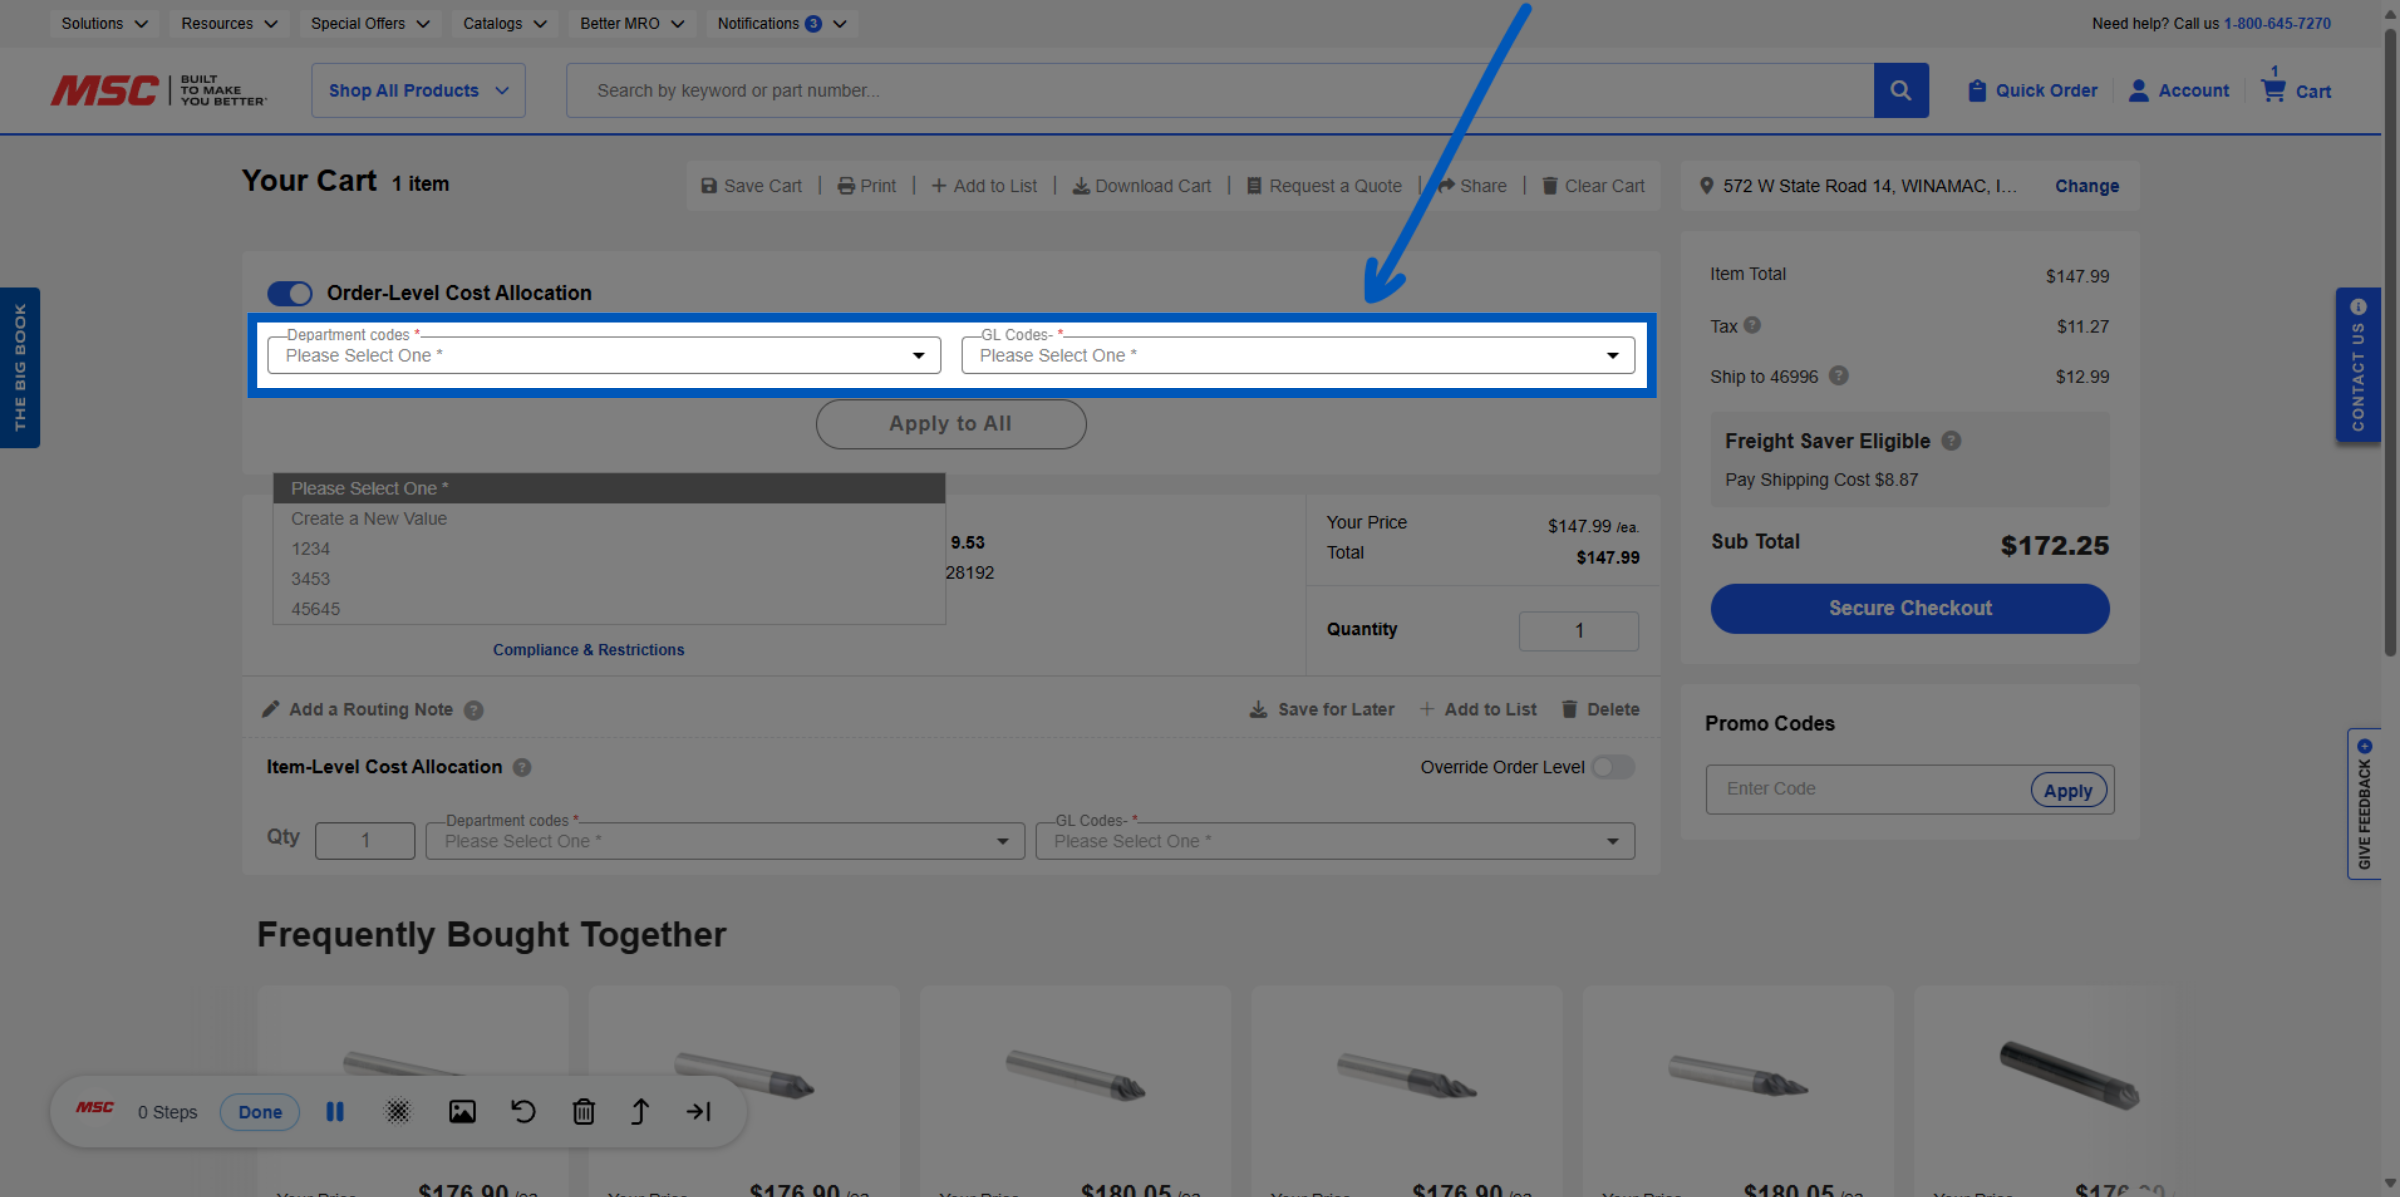
Cart Integration: - After creating cost allocation values, users can view categories—such as department codes and geocodes—along with their corresponding values at the top of the cart screen. Selecting them here will apply the values to the whole order
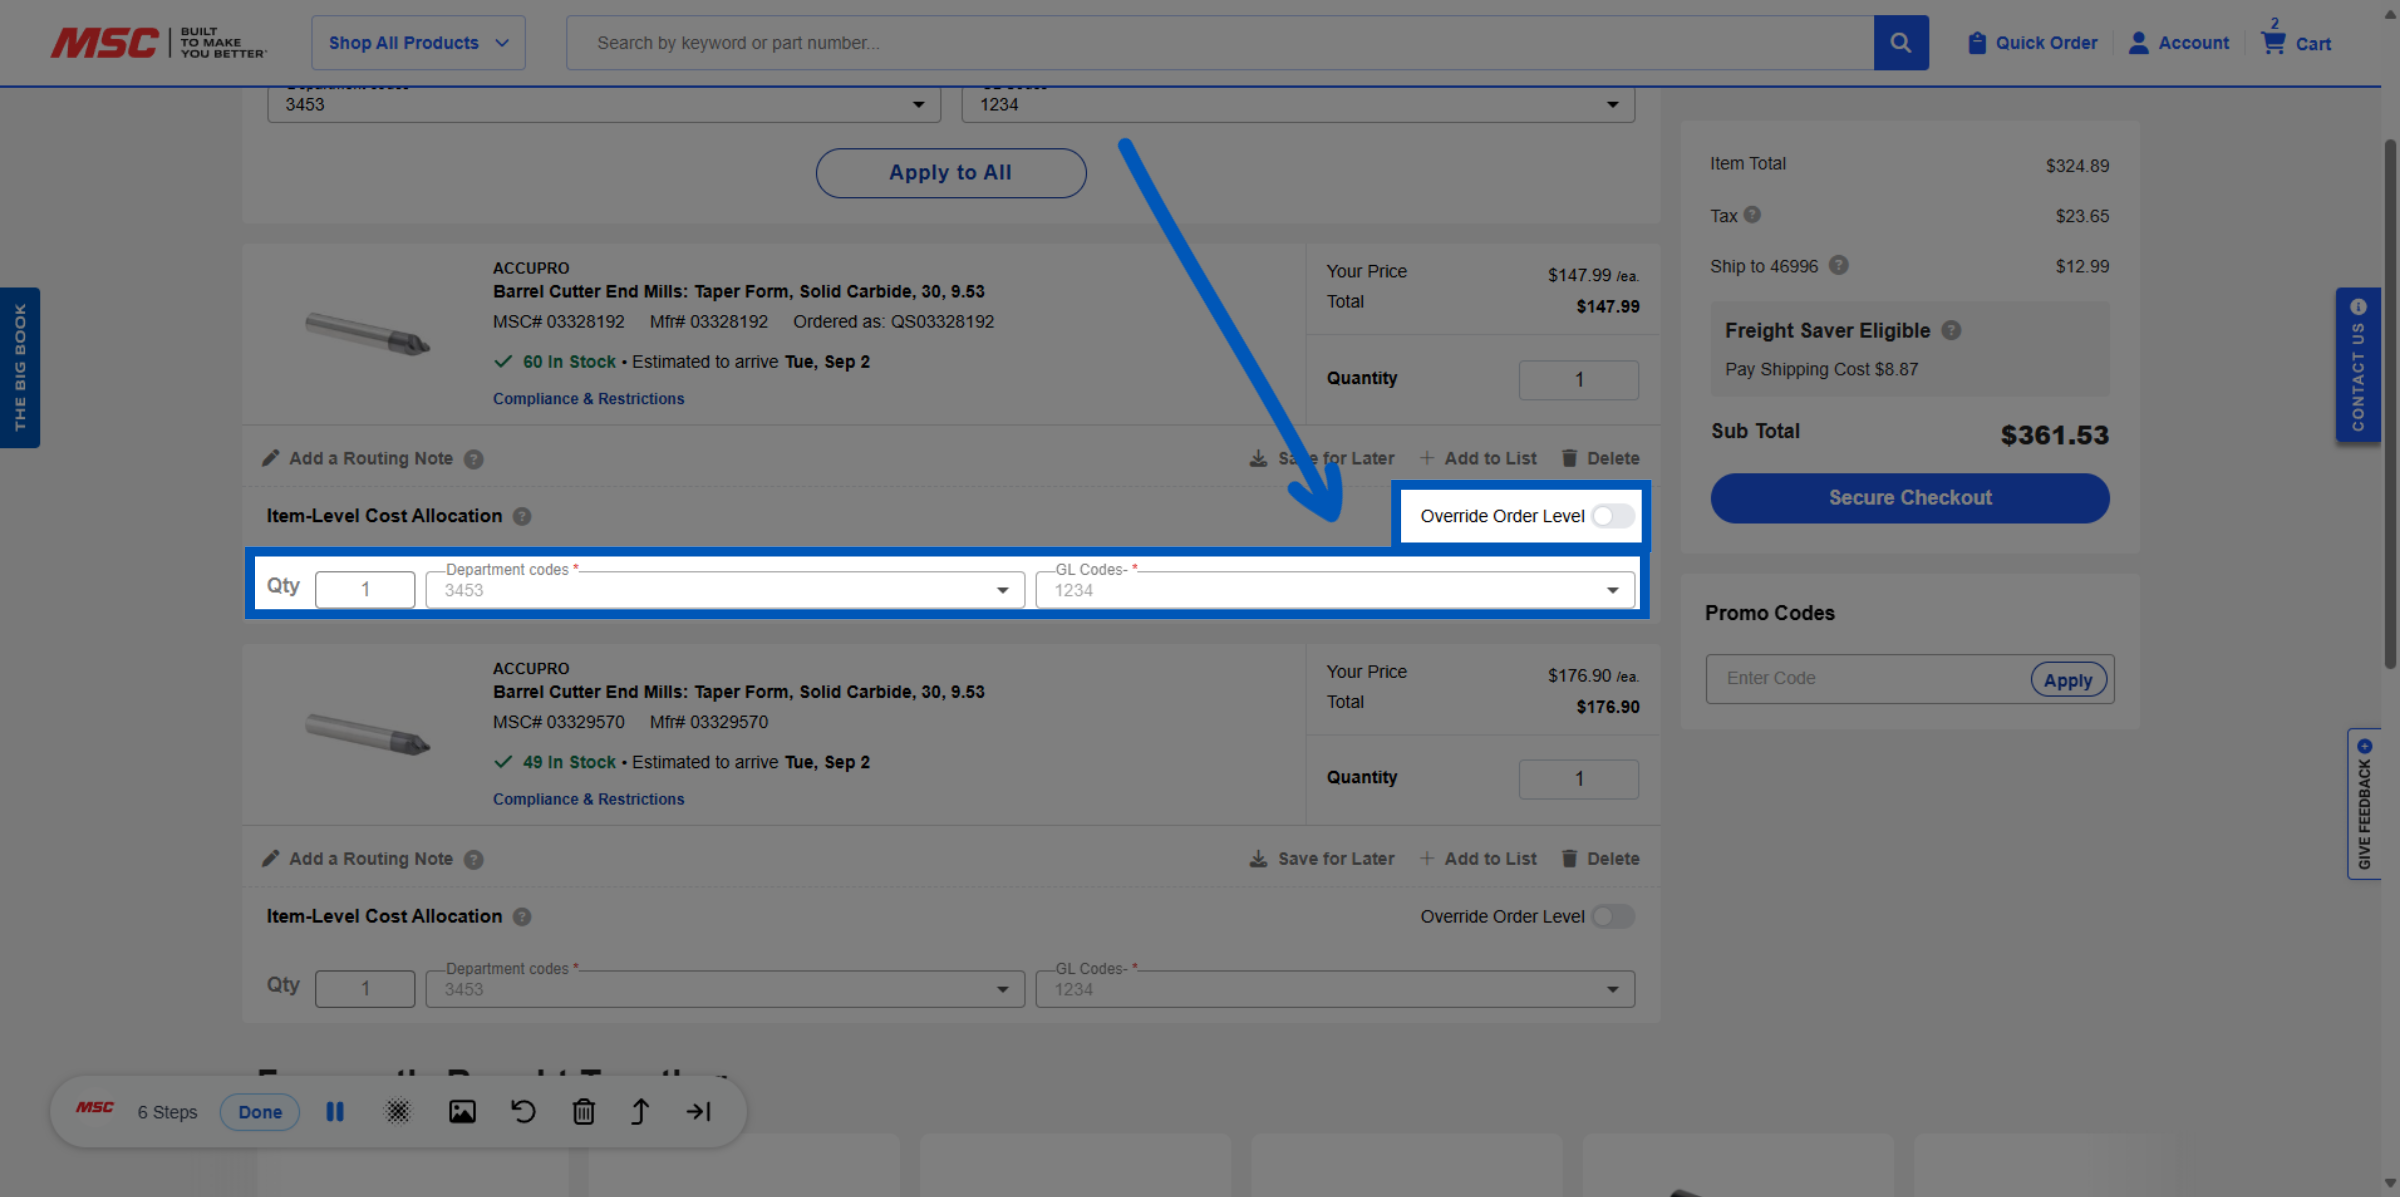
Item Level Cost Allocation - Users can assign a different cost allocation to specific items by selecting 'Override Order Level' and choosing an alternative code or category for those items.
Your cost allocation values will appear on your order acknowledgment, packing slip, shipping acknowledgment, and invoice.
More Account Management Resources
Back to Account ManagementTo request a quote, please login to your existing account or register a new one. This helps us provide you with a personalized experience and keep track of your requests.